

Post by jrod on Mar 6, 2014 18:32:41 GMT -5
I keep on asking questions but have never started a build thread so here it is. This a compilation of my build threads on a different forum over the last 2 years so it might not make much sense reading it! I just thought i should share it with you guys and bring you up to date with where I am at and how I got here.
Work Done in fall 2012 and all of 2013
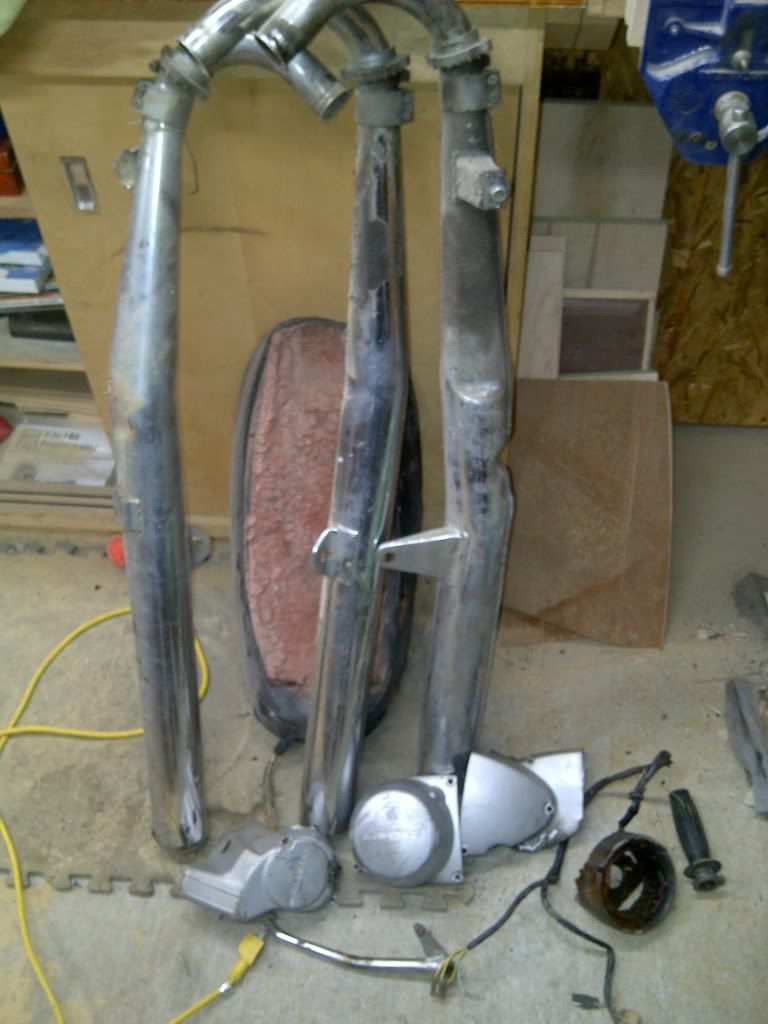
This is how it all started for me. Drug this out of a guys barn for the total price of $0. I was doing him a favor by cleaning up his junk. I had no idea what I had just picked up or the obsession that would start. It was was complete but seized, heads were off and the guy I got it off of used Coke to try and free the rings. Well it didn't work as you can see by the following pictures:

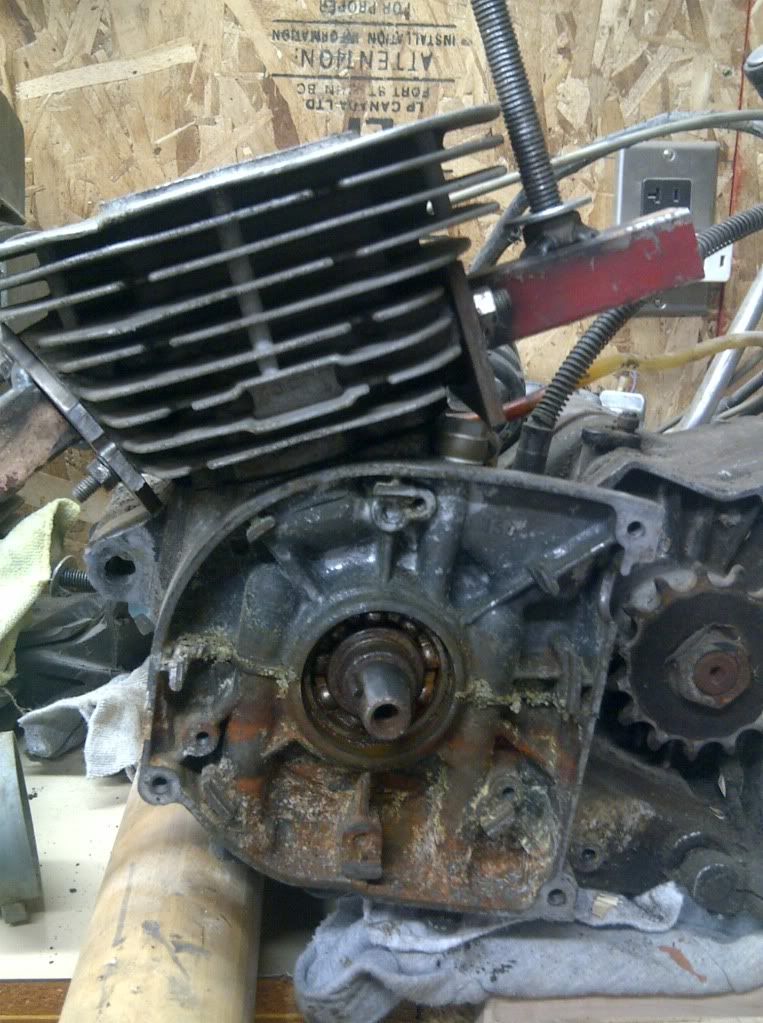
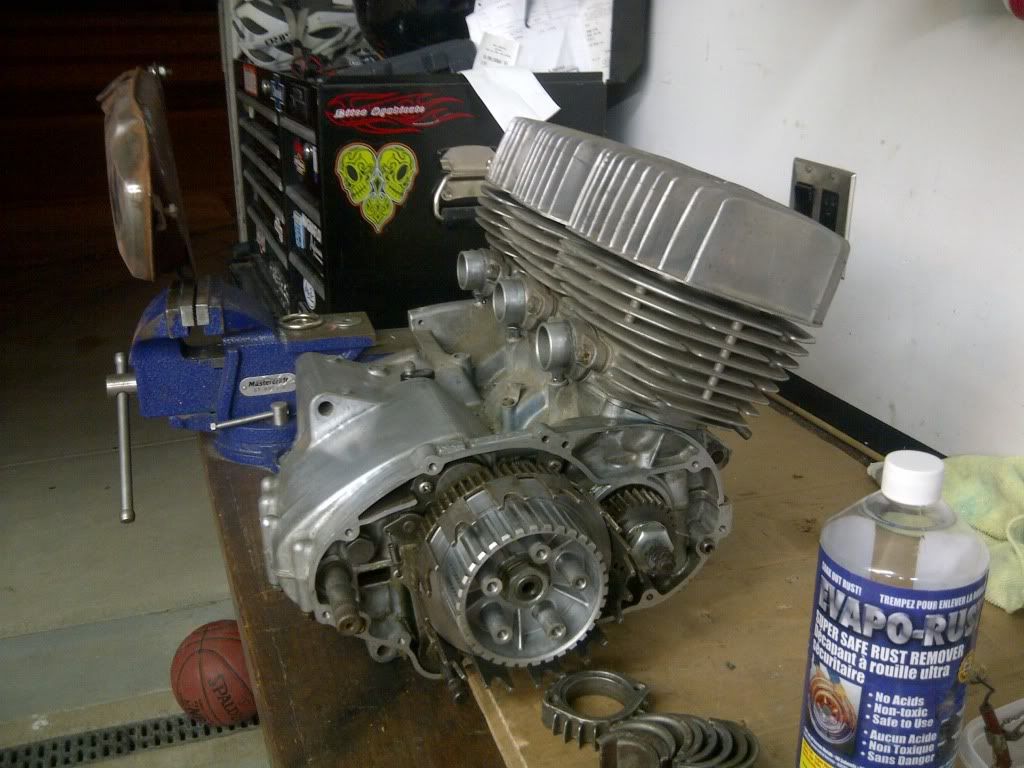
The left cylinder still won't come off and it has been soaking in oil for about 8 months. Found myself a new engine though, a 72 h1 with a little bit of work done to it. Wiseco forged pistons, ported somewhat but it was built about 18 years ago, so I need to pull it down a down and refresh it. Much better shape to start with.

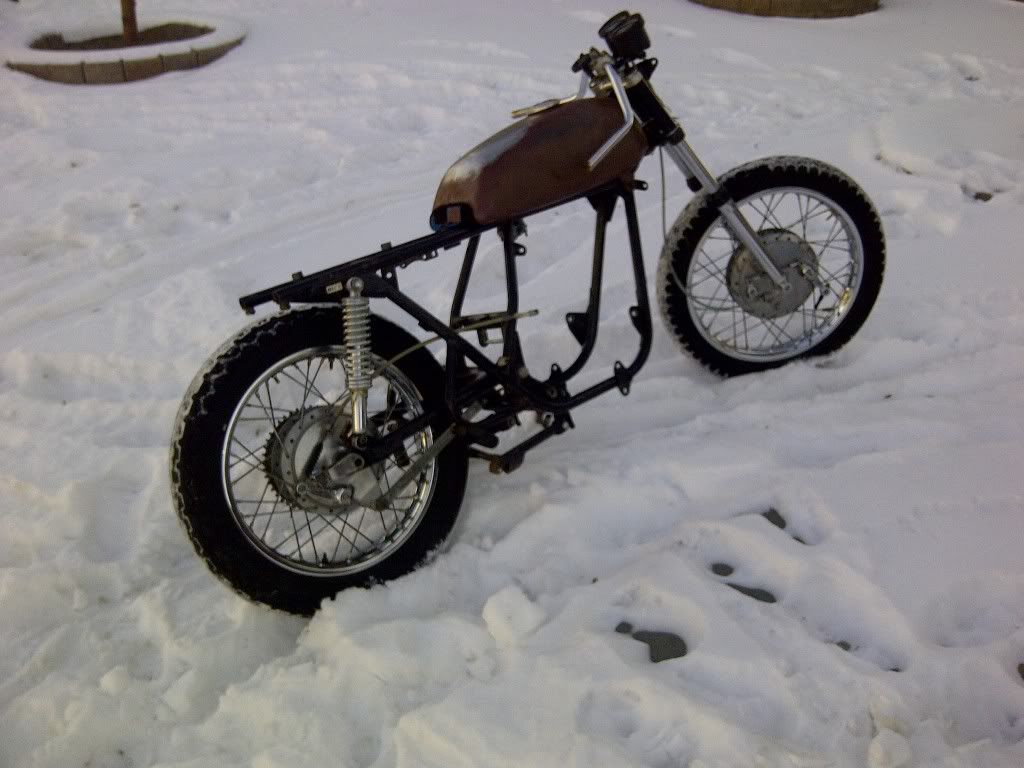
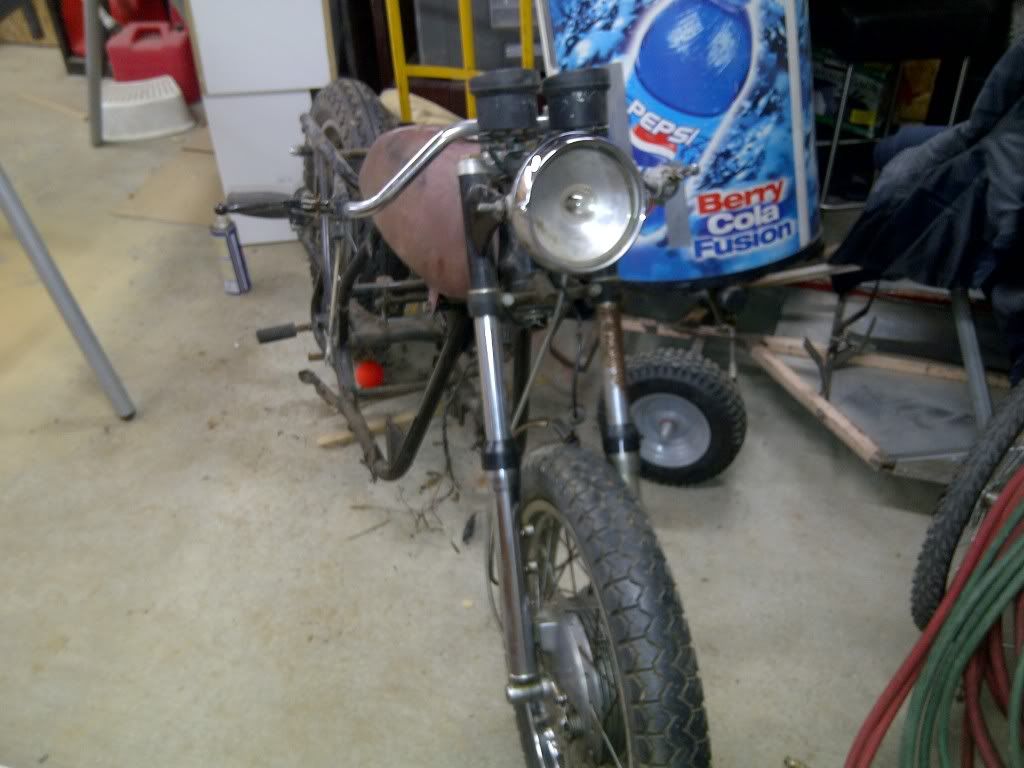
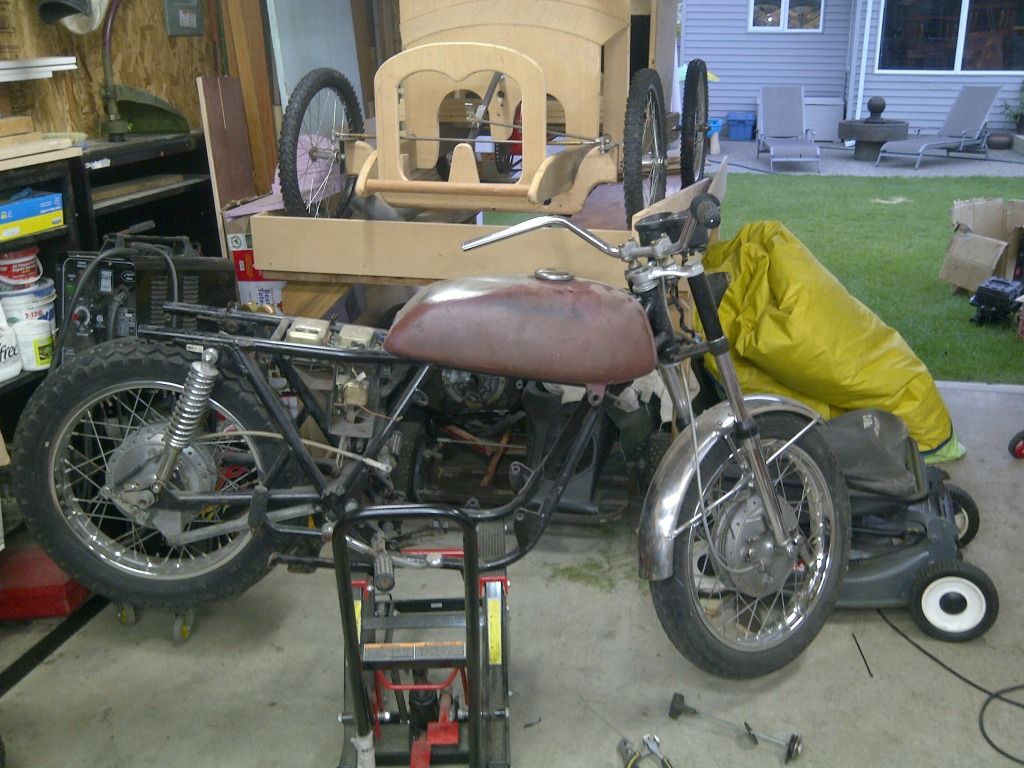
The rest of the bike looks like this
Got the ol girl up on the jack and swapped the front end. I think the stem will work just need to find a bearing that will work with it. Could be a challenge.
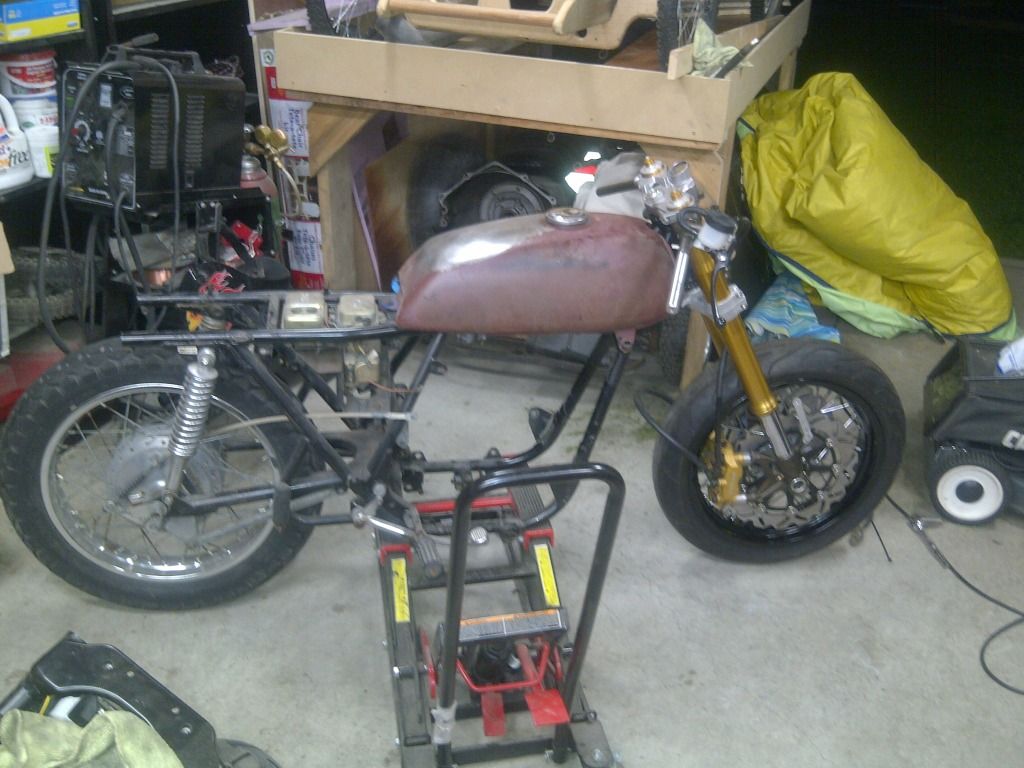
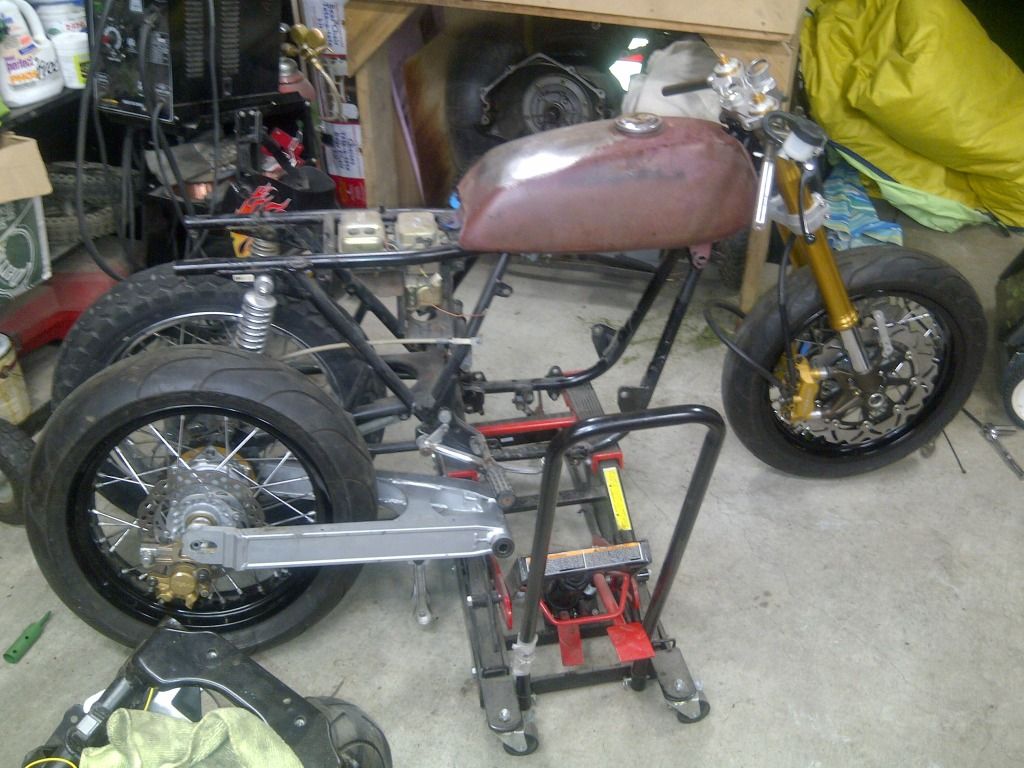
I mocked up the 88 ninja swinger I just bought and think it might work well. Dam the wheels are nice!
I ended up pushing the stem out of the triple for a little machining to get the new All Balls bearing kit to fit.
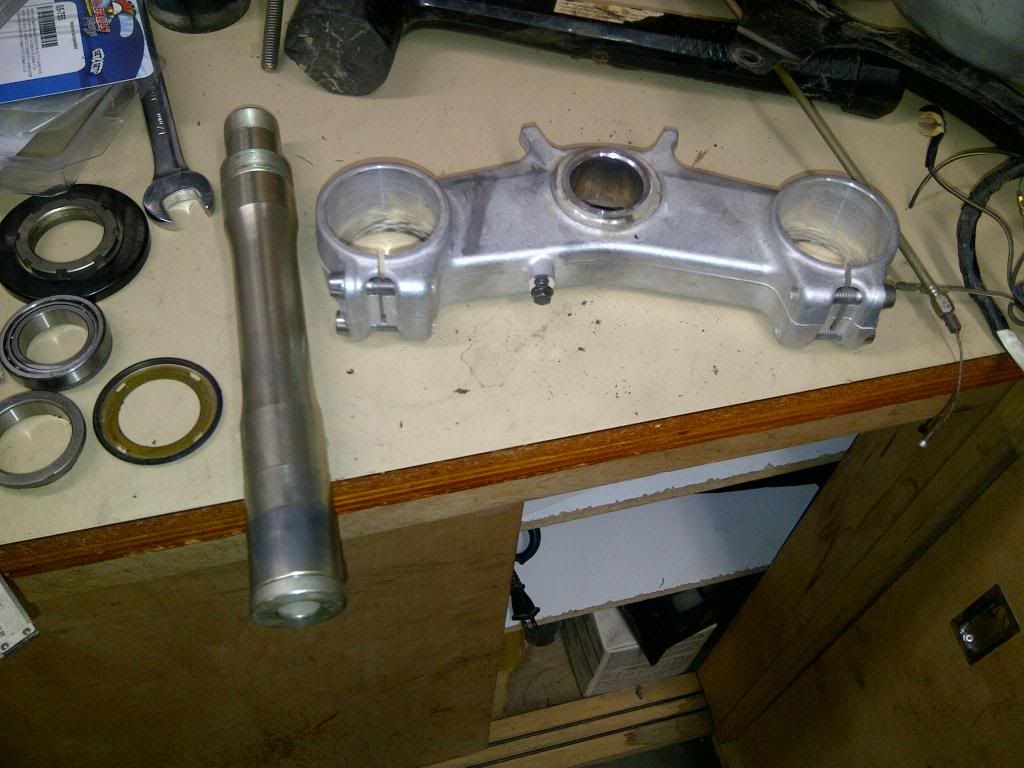

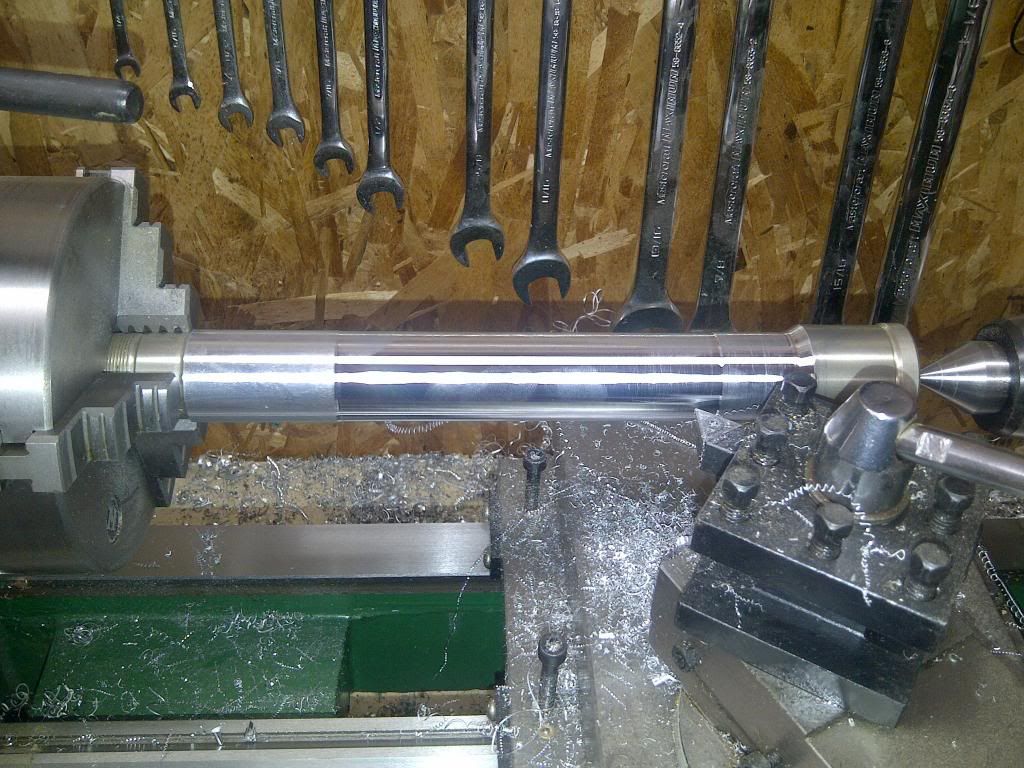
And here it is, ready for install
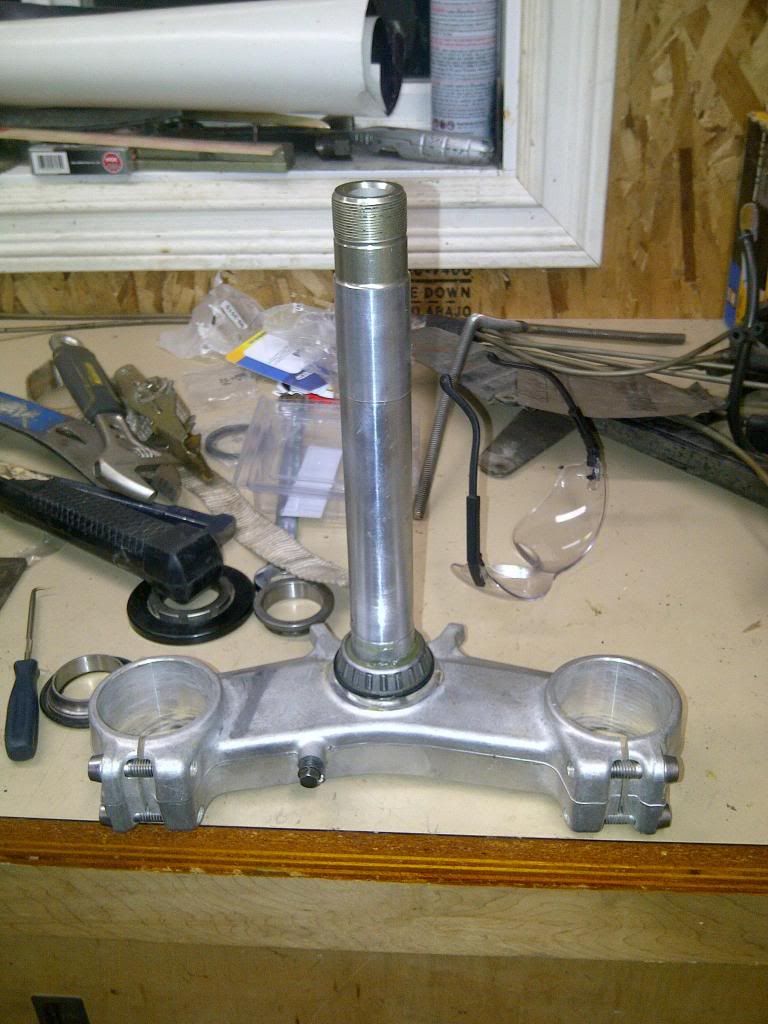
It is about .8" too long so I started machining a spacer for the top below the triple clamp. I'll post a pic once I have the front back on the frame. This spacer will give me some flexability to make a gauge mount under the triple clamp. More on that later.
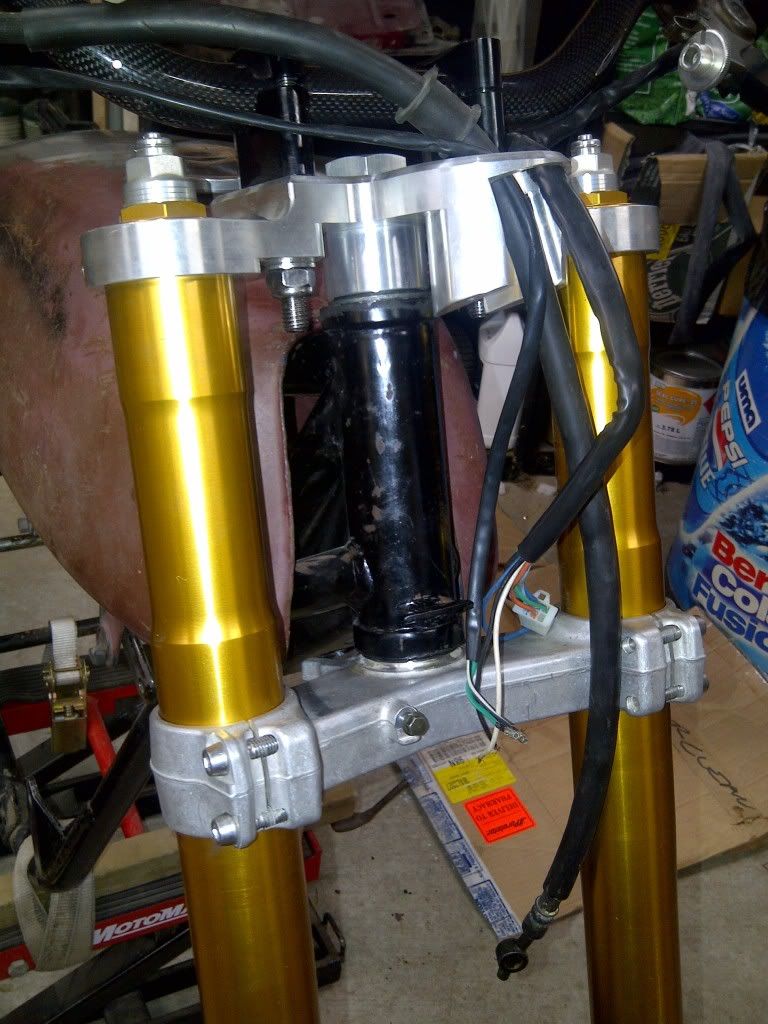
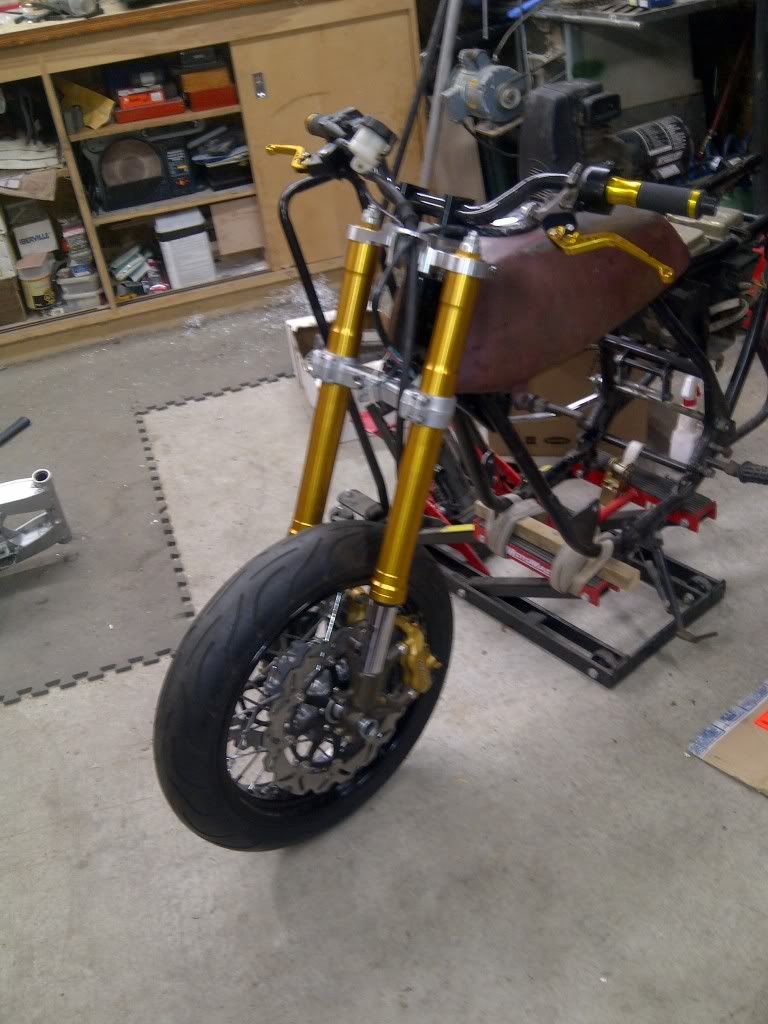
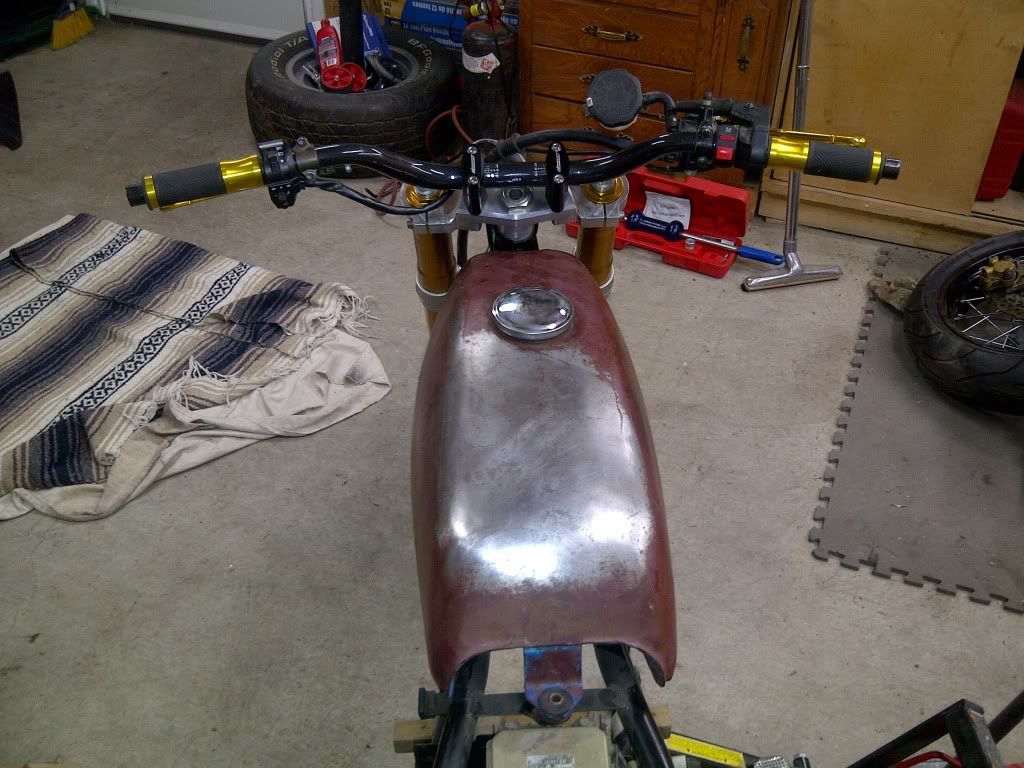
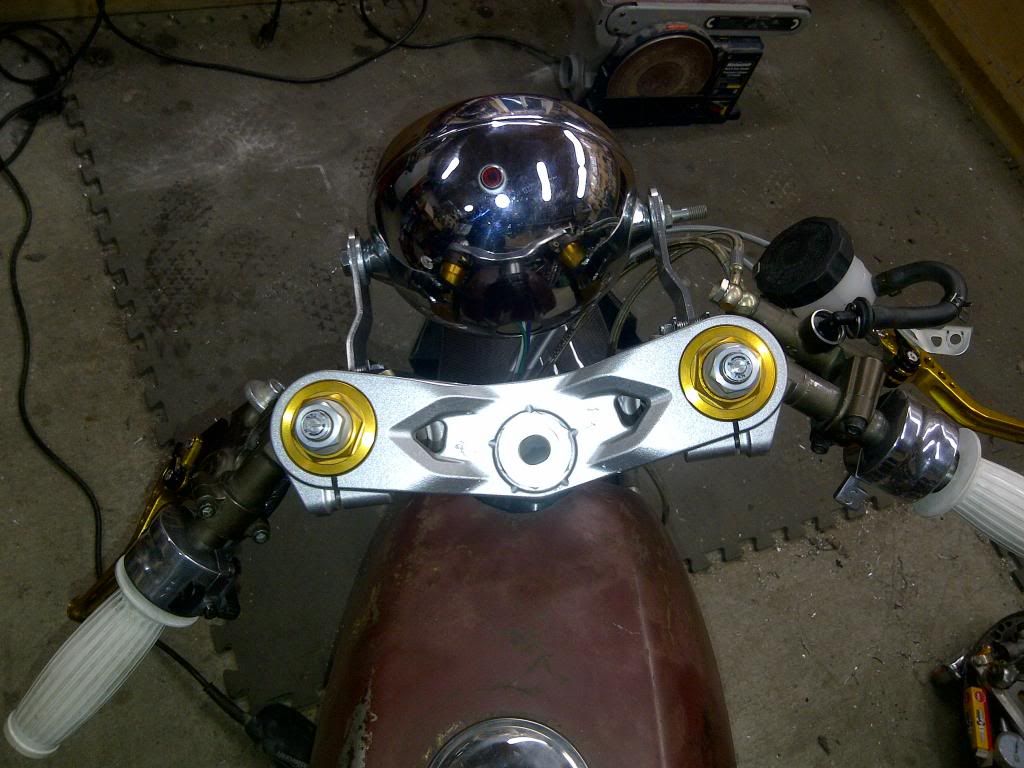
Finished the spacer for the triples and put the front end back on the bike. The factory turn stop thingy actually worked with these triples, just needed a little massaging. I figured I would put the HoHey Top clamp and dirty bars on to see what they looked like. Not sure which i like better. Thoughts?
Started to work on the swinger. I pulled the cross shaft out and thought I would find bushings. Not so, these pesky little bearings need to be pressed out but the swinger is tapered and I can't get at them. I will try something else tonight, but am open to any suggestions. I am pretty sure once I grind the swinger down they will be too long anyway, I'll probably build some bushings out of brass. Have to pick some up on the way home.
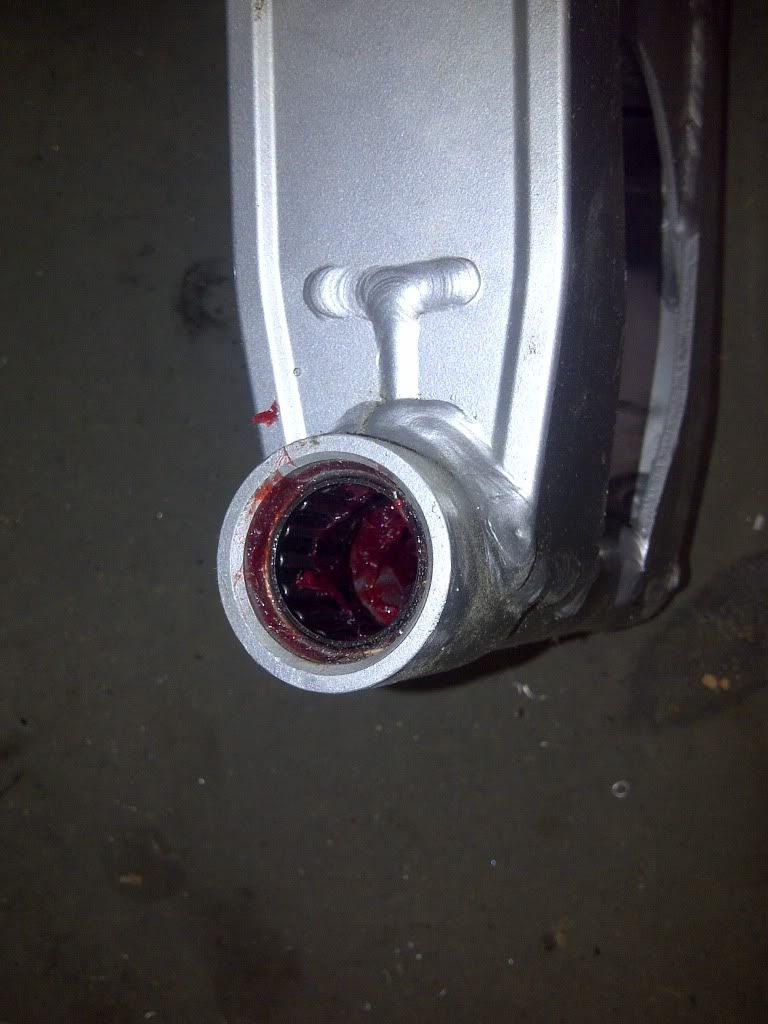
I overlooked a crucial component of the swingarm, I had no side thrust once I mounted it in the H1 frame so I had to build these. Tightened it up nicely.
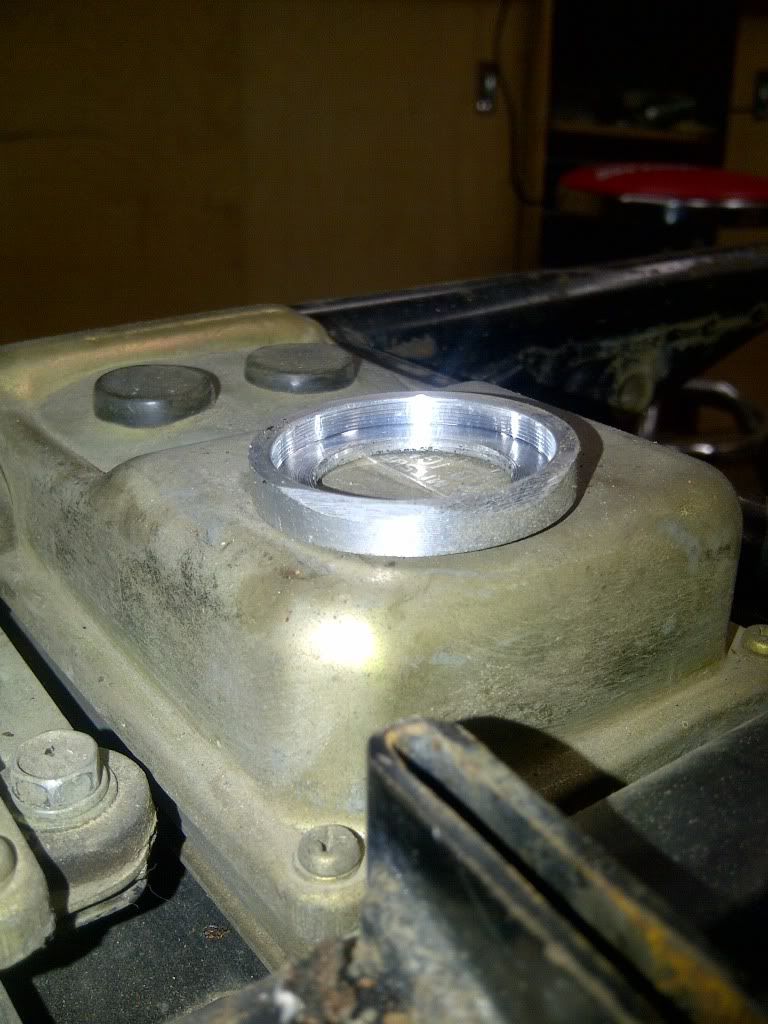
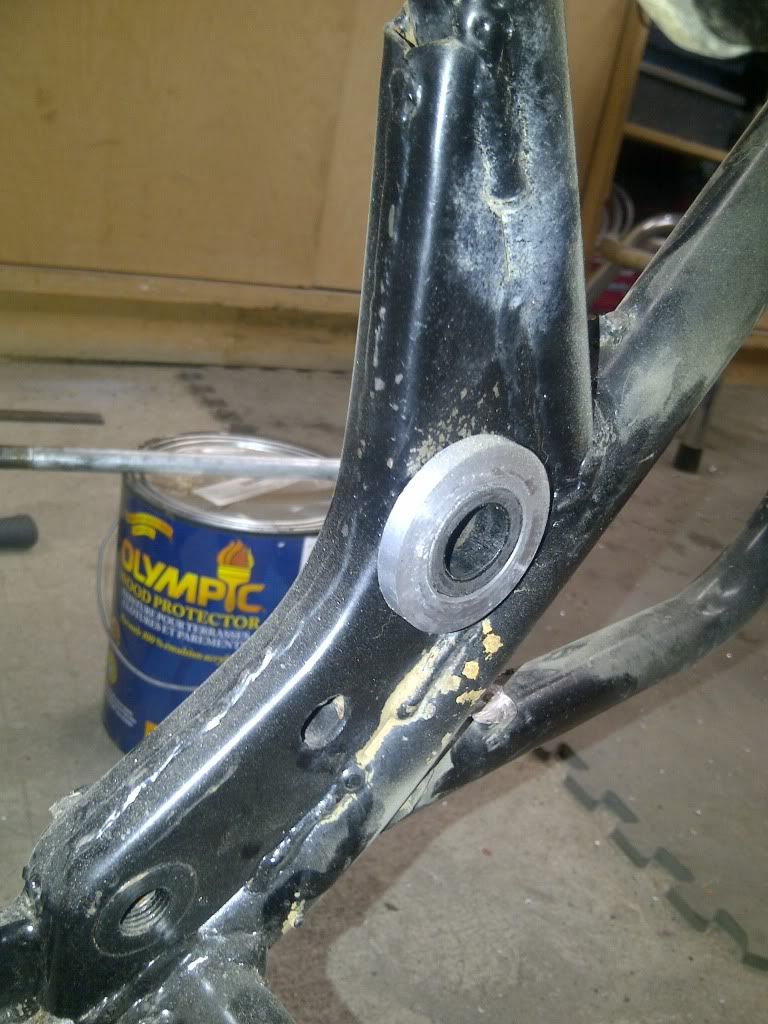
Next the swingarm bolt, the Ninja bolt was a c-hair too big for the H1 frame(black one, not blonde:D) Instead of drilling the the frame, I made some bushings for the pivot and pressed them in to use the H1 swinger bolt. Nice and Tight now, just how I like'm
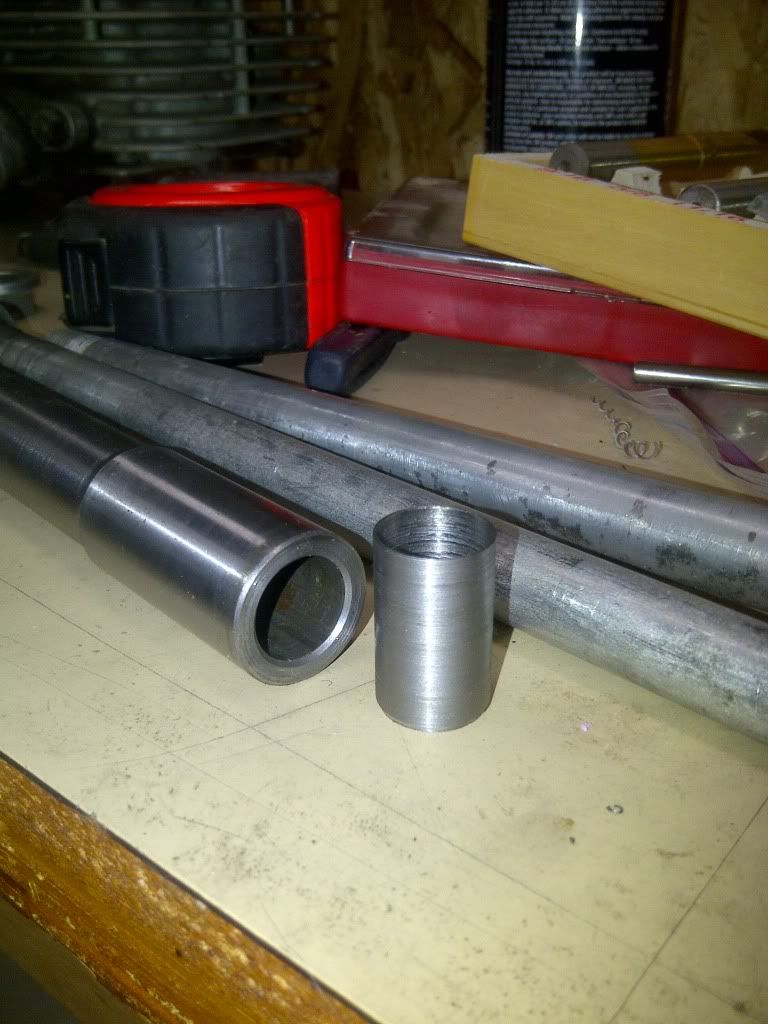
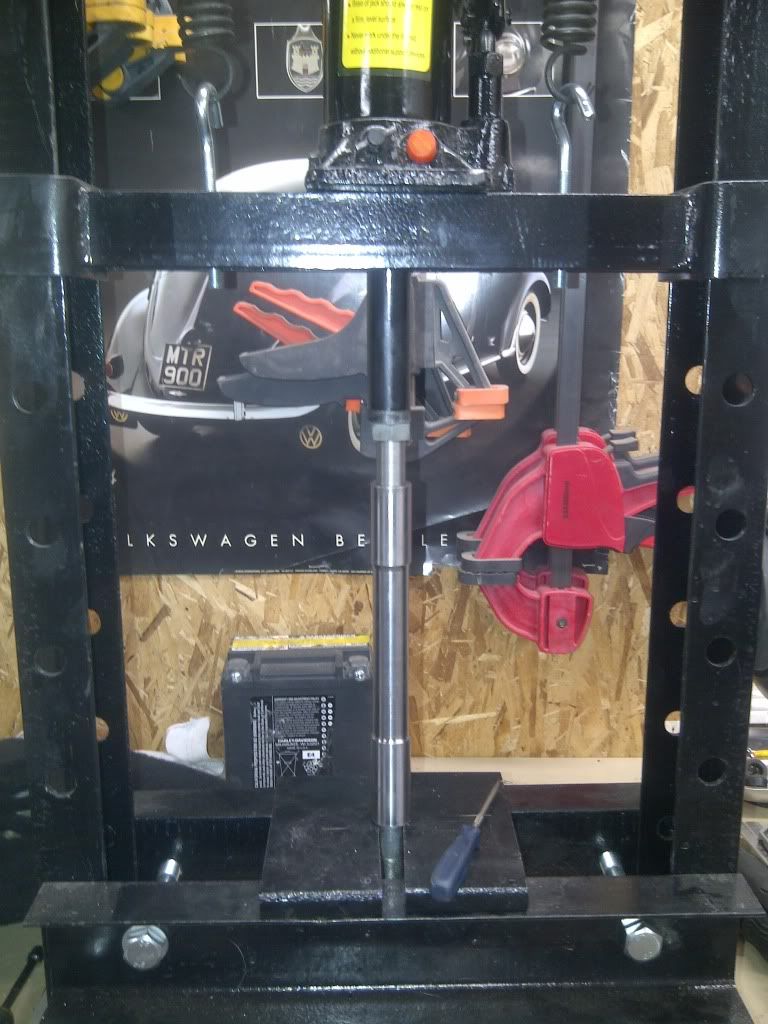
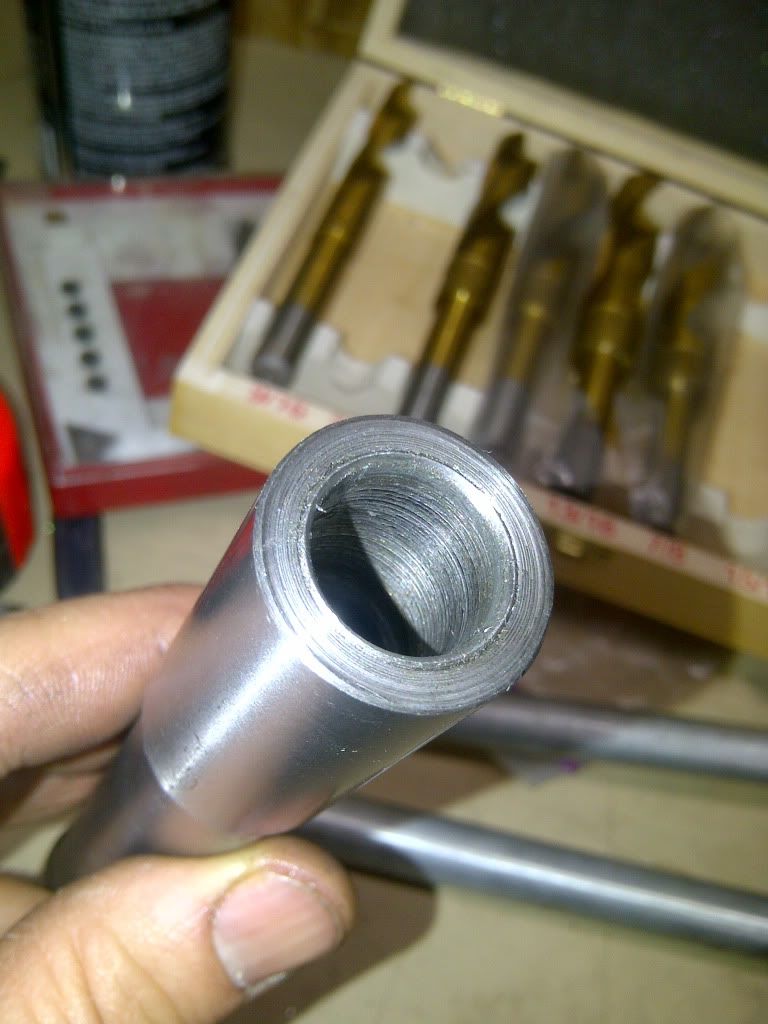

Had to build a boring bit to hog the holes deeper in the swinger to be able accept the stock bearings since I cut about a 1/2" off of each side. Here is the Bit

Before
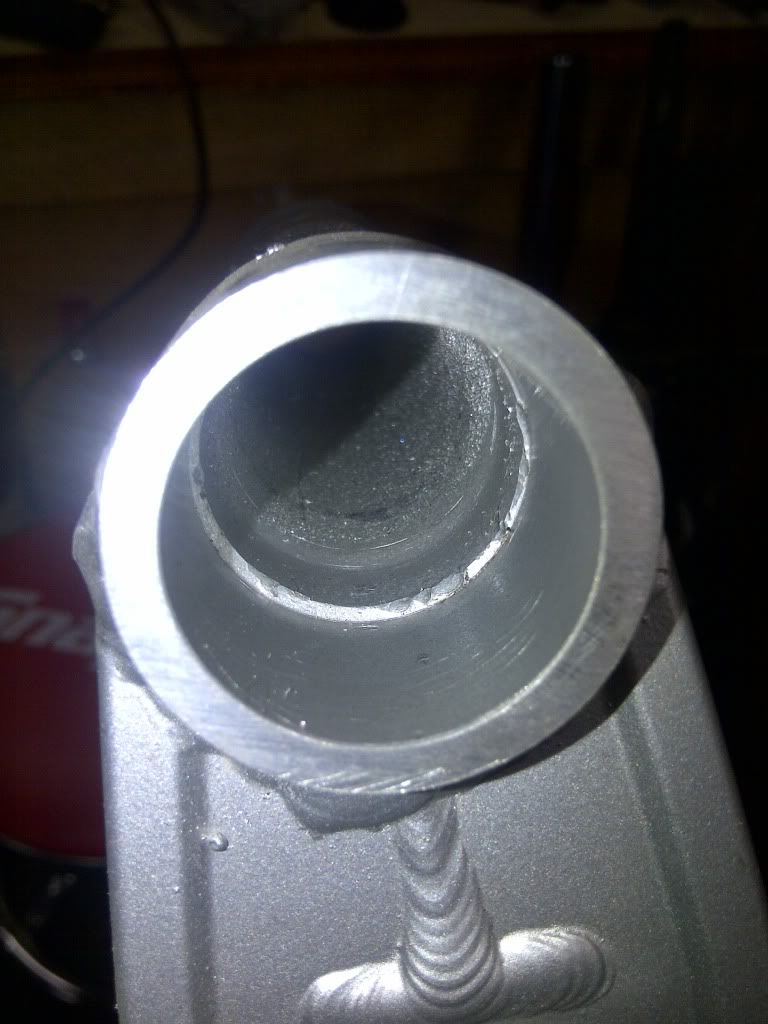
After

Pressed the new bearings in and she is complete!
Now do I go mono shock or duals?
I tackled the carbs while I figure out what I want to do for shocks. These bad boys is dirty, rusty and full of shite!
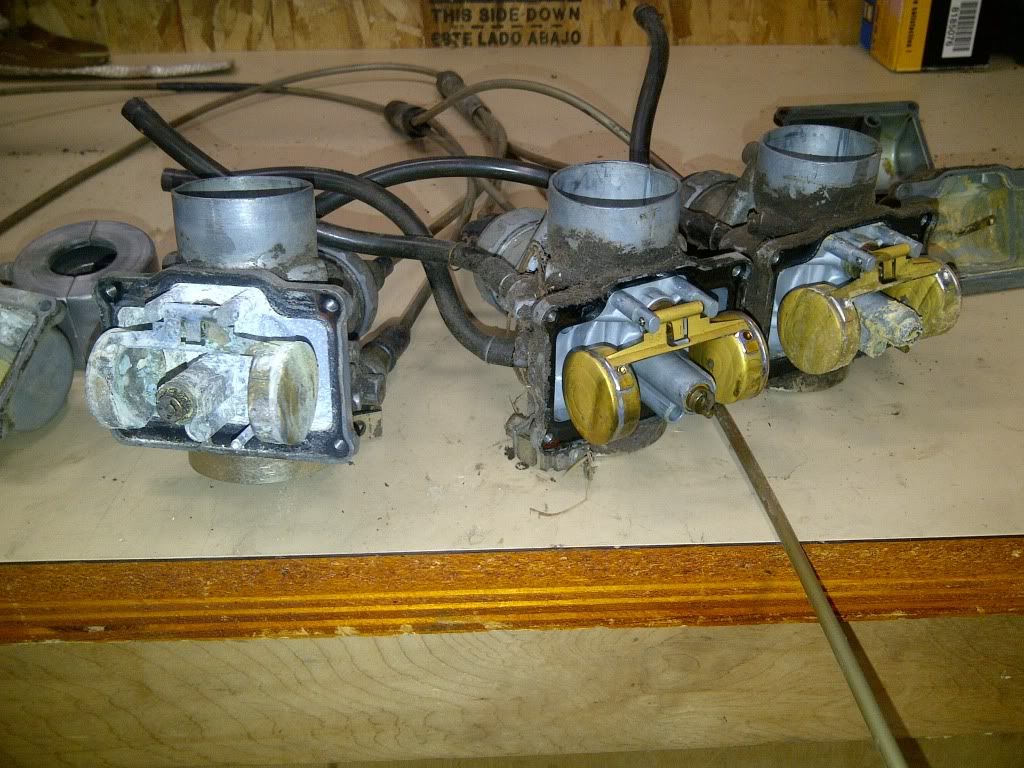
But I gottem all apart and separated into their respective trays for cleaning. I think I am going to have to order a few carb kits
One set of floats has been crushed, I am assuming from water being in the bowl and freezing. Maybe I should just buy some Mikuni flatslides? Time for a dunk in the Gunk or Pinesol (I have heard it works prett y good too)
Carb's all cleaned up. I used Pine-Sol cause I didn't get to the parts supply to get some proper carb dip. Worked well though, the only downside was it smelled like someone shit a christmas tree in my garage for 3 days after!
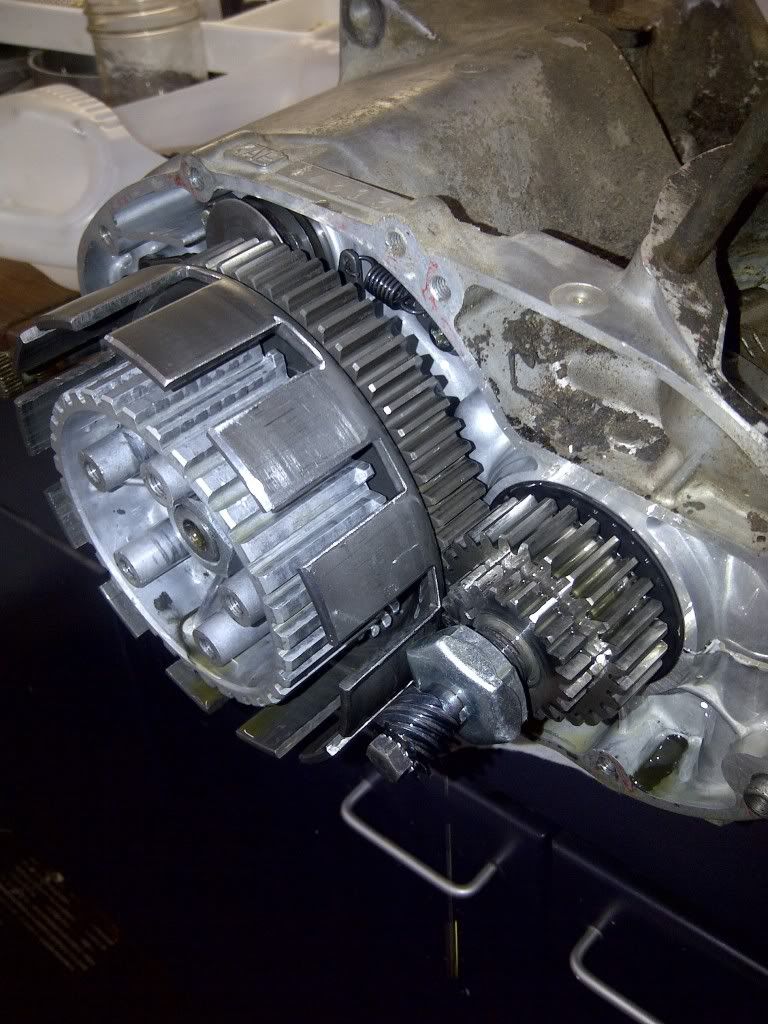
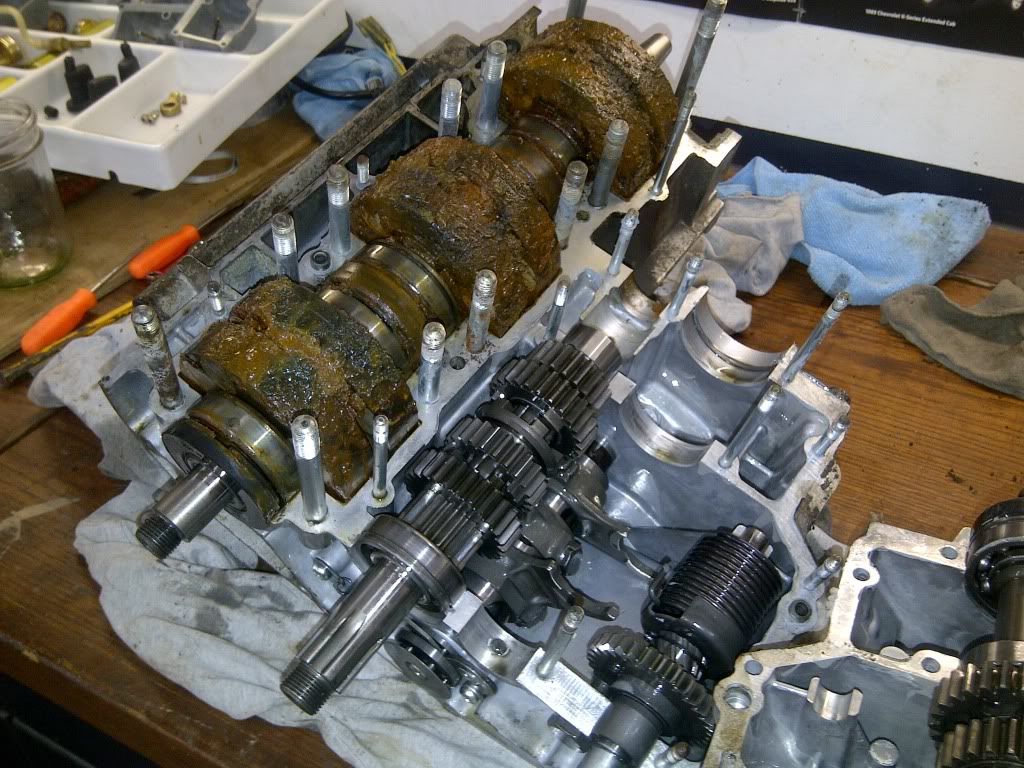
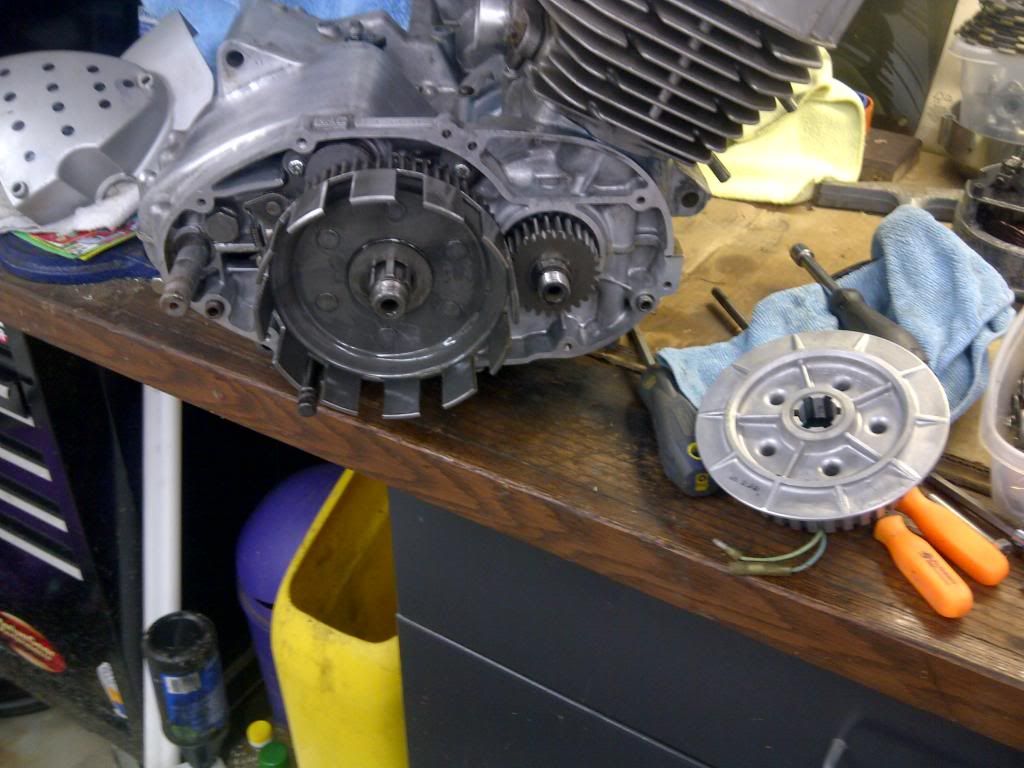
Waiting on carb kits now. So I took the old lump apart to scavenge the clutch and drive gears out of it. The basket and gears are mint, I think I am the first one to split this thing open. Now the crank is another story. nothing a miracle can't fix. See for yourself.
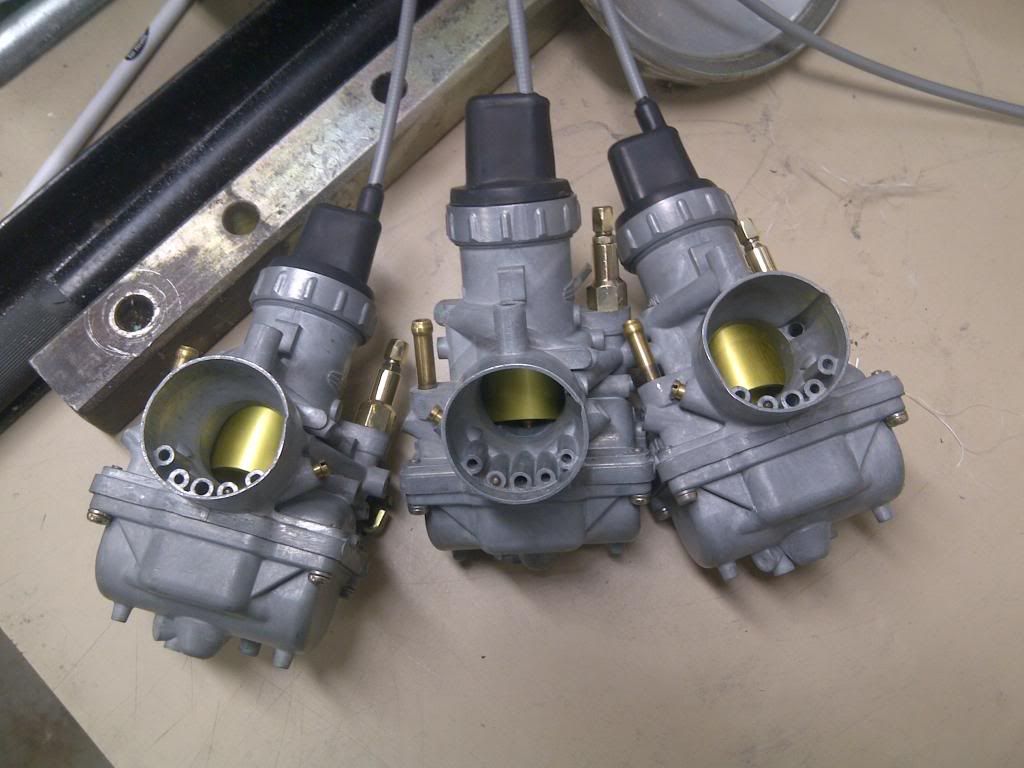
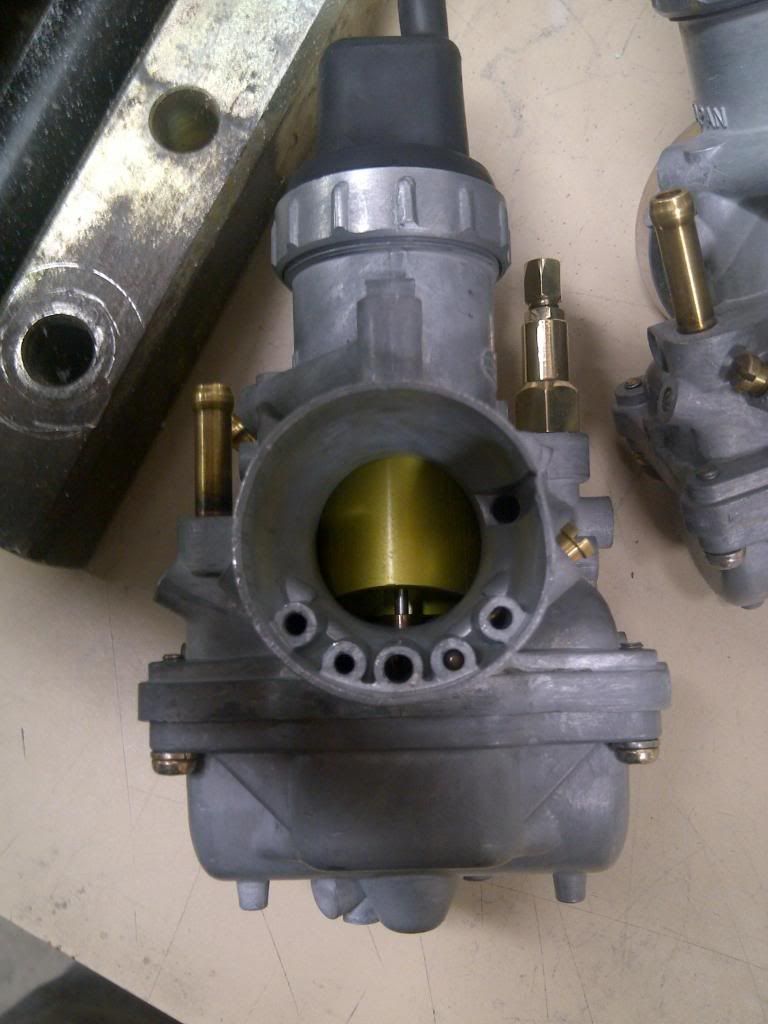
Carbs are rebuilt and look great, added a new cable, Nice and smoooooth
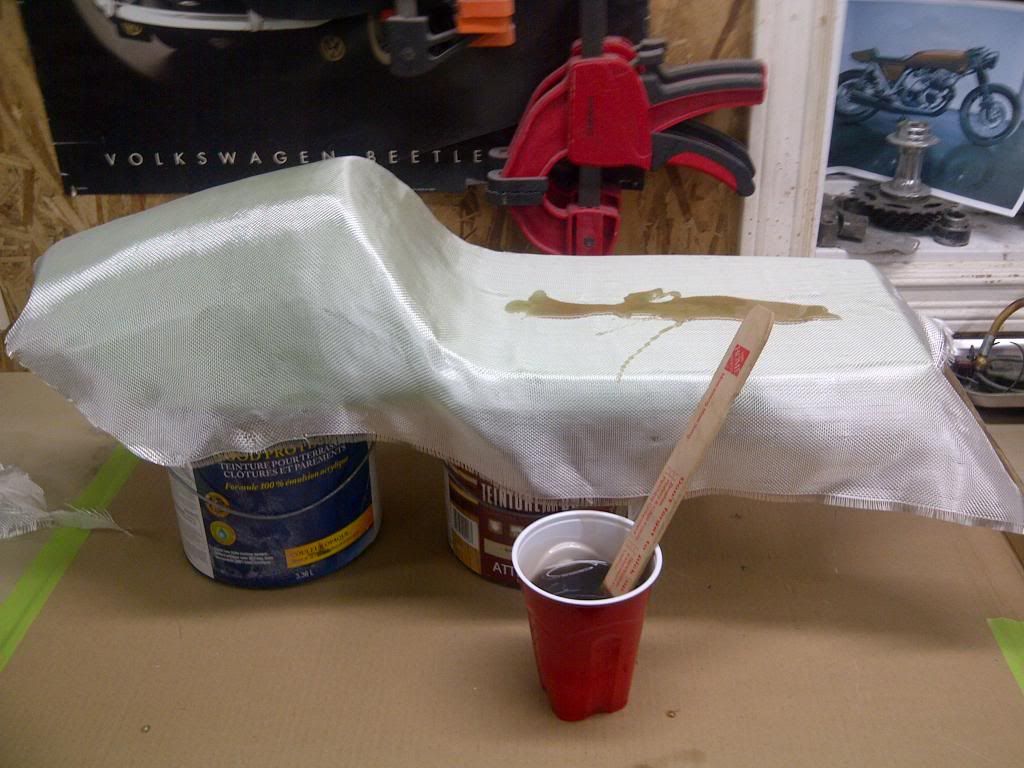
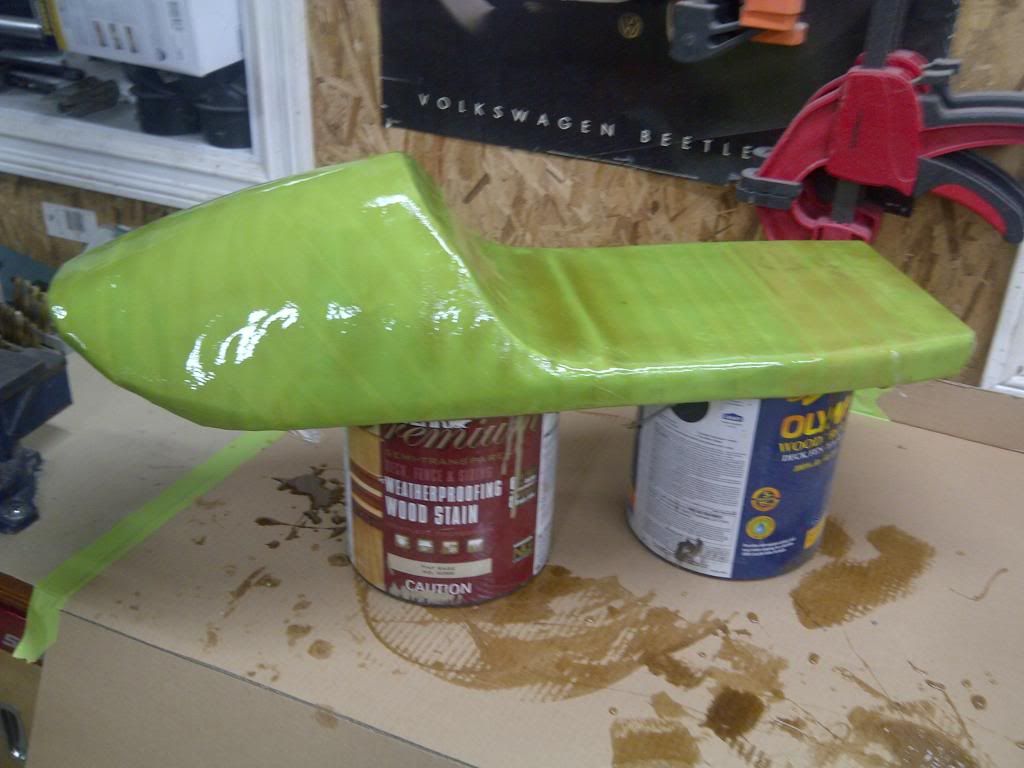
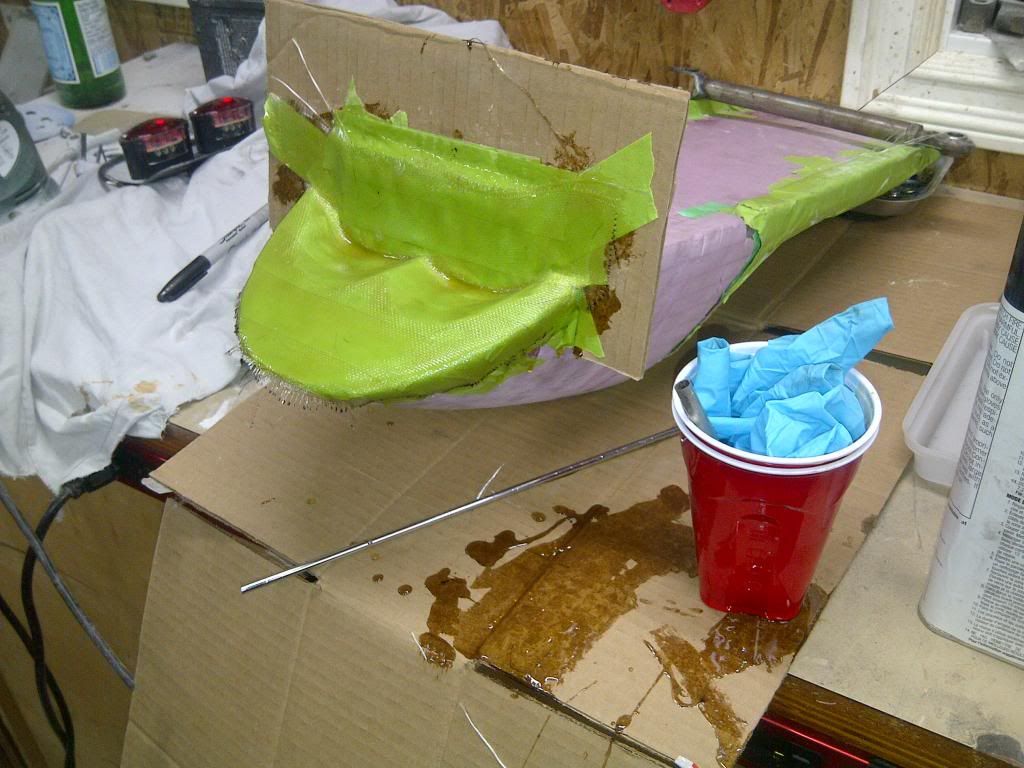
Started glassing the Tail, I have i coat of woven and a heavy layer under this of the fiber
With this smelly crap drying in the shop I moved to the garage to rebuild the Stator. this thing was rusted solid. I should have taken a before picture but I was to excited to get scrubbin
After a long soak in Evap-O-Rust
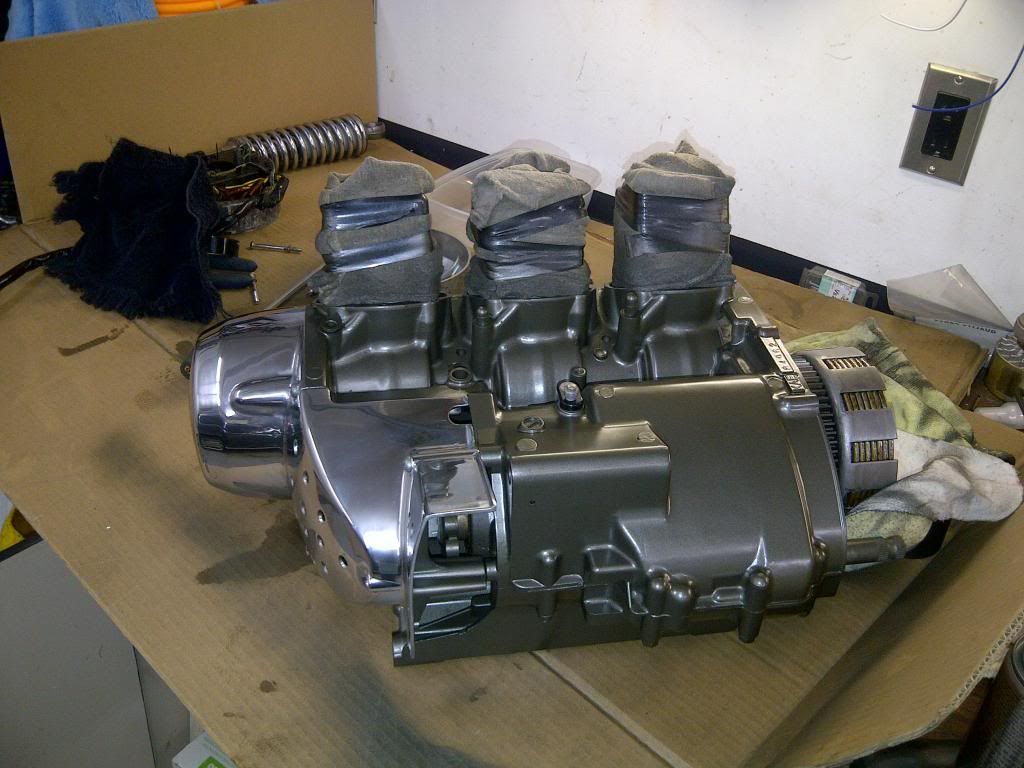
Started cleaning up the Engine, managed to get the engine cleaned up and the clutch basket and hub mounted. Put the drive gears on the crank, pulled the new style stator off to install the one off of the old engine. Had to build a puller first of course! Need to go to the cycle shop today to get some oil to soak the clutch fibers in before the install.
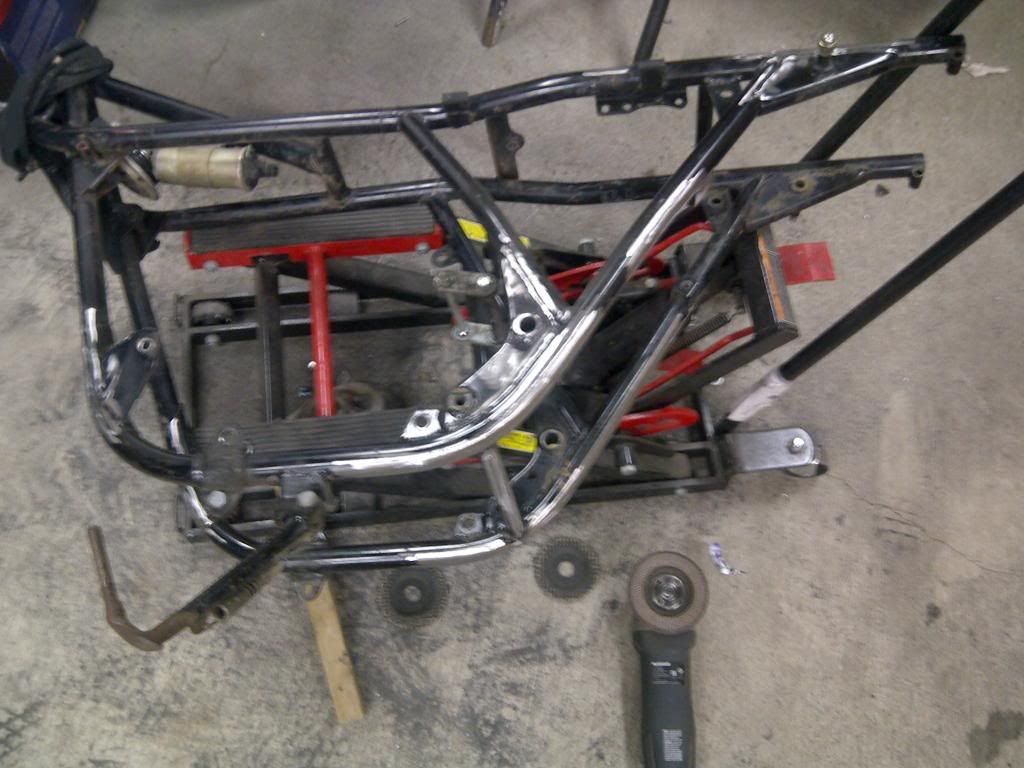
I pulled the bike back down to the frame to do some surgery. There was a lot of tabs that weren't needed!
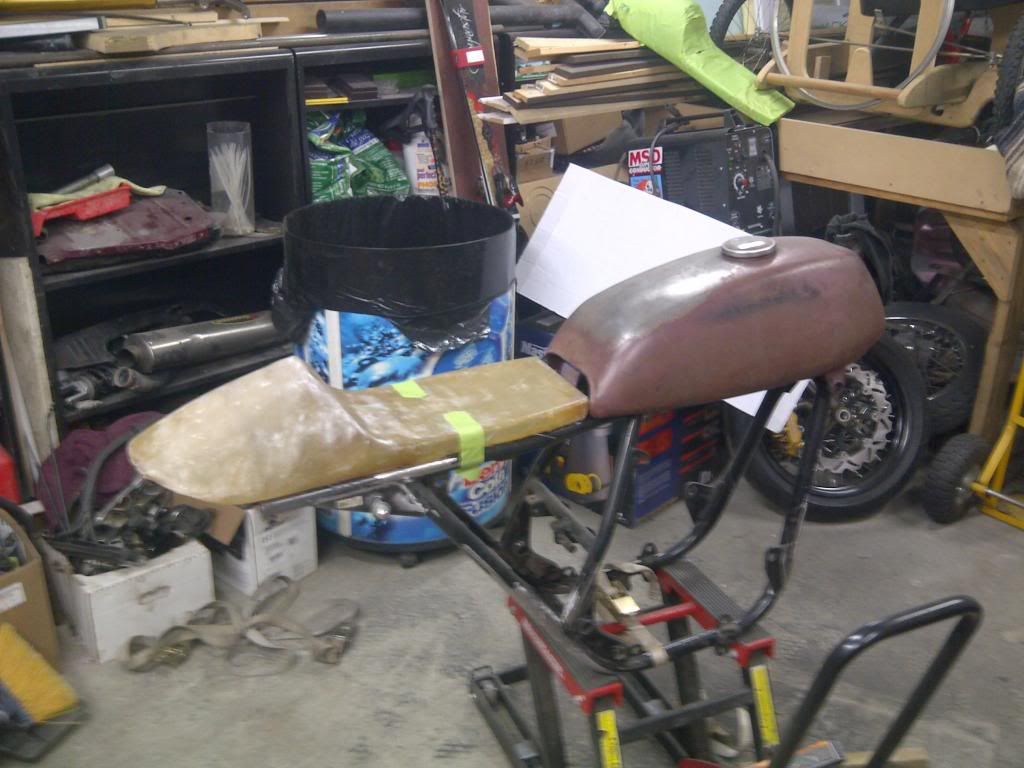
Started mocking up the seat. I am undecided if is should install a hoop on the end of the frame or build a cross bar and and have the tail hang past.
Had a little time last night to DW. Took this
and turned it into this
Now only 3 more covers to go, and this was the easy one
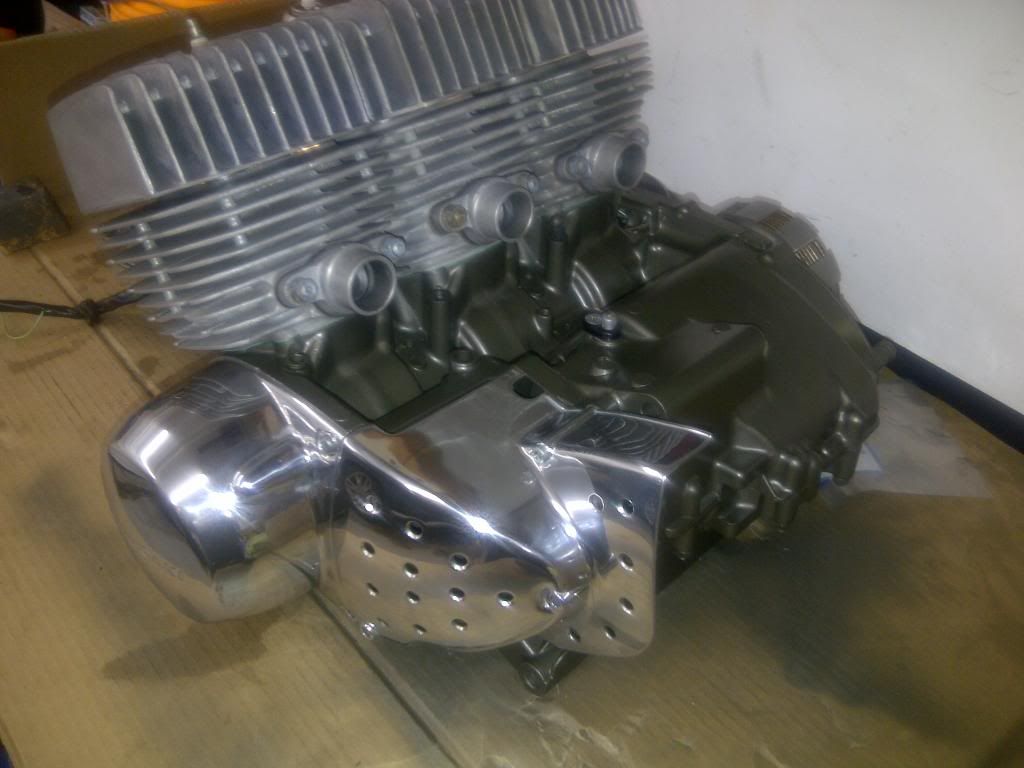
Managed to get the clutch back in and then I pulled the jugs off to paint the cases.
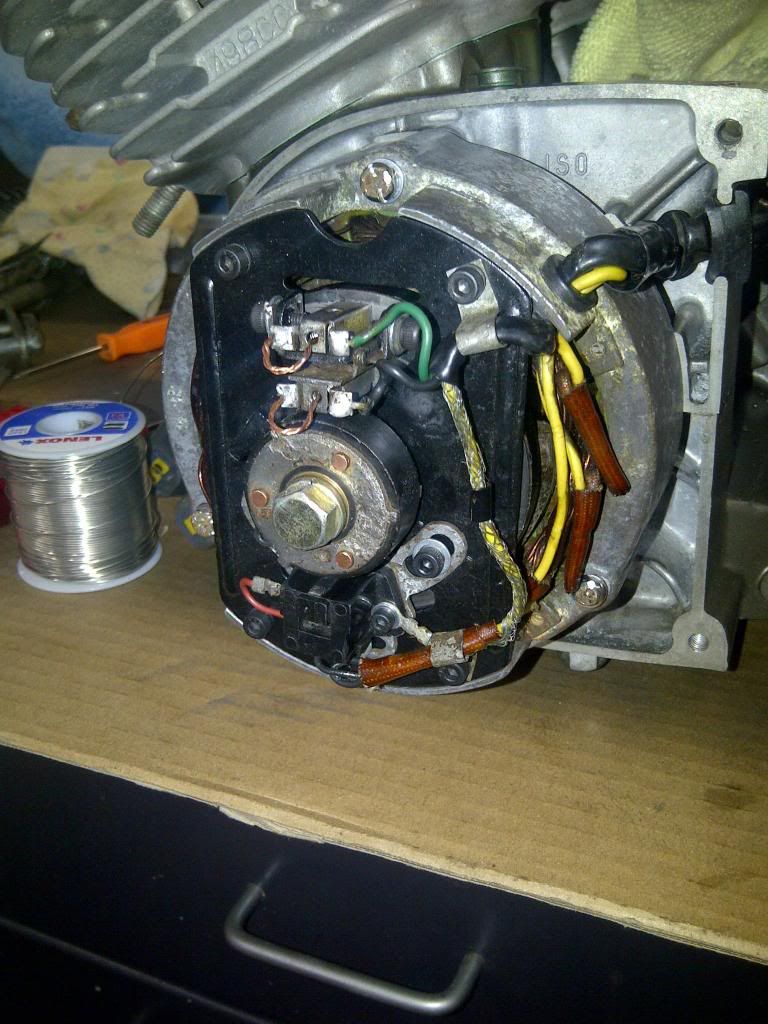
Got the stator hole figured out. I built an aluminum spool to get the hole perpendicular to the case. Worked really well.

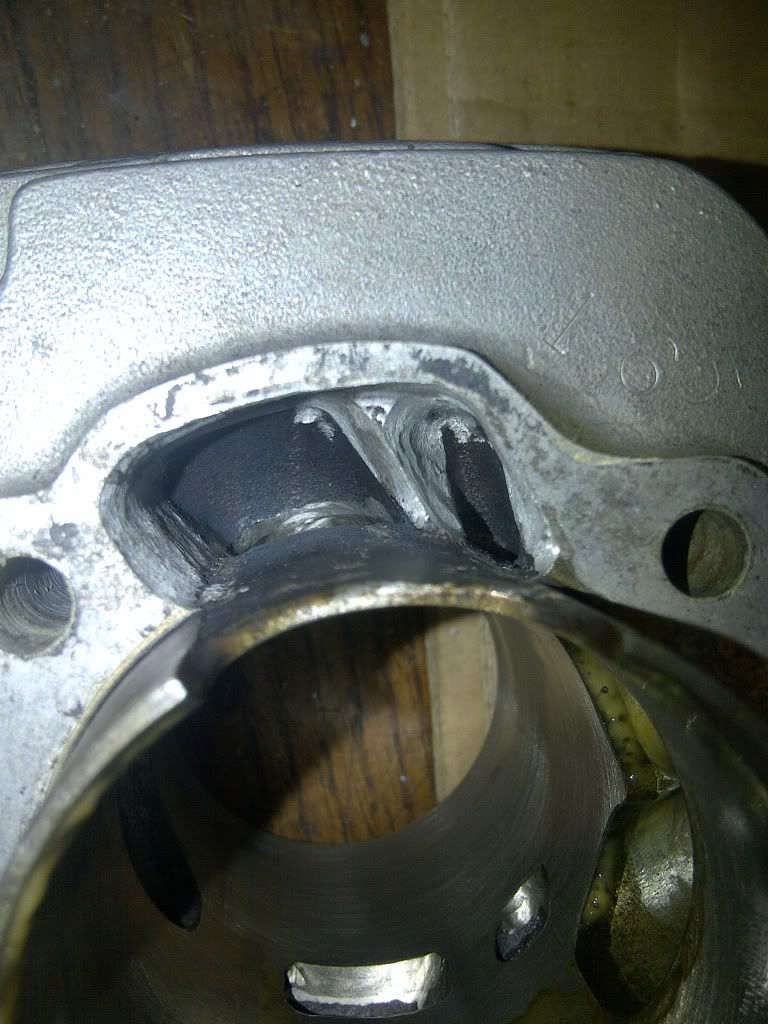
I started drilling and everything was going smooth until i drilled into a cavity. At first I thought I was into the combustion chamber, but it was just the hole for one of the jug studs! Whew, that was close almost had a heart attack , thought I fooked the case. I checked the other set of cases I have and it was the same so all is well. I drilled the hole in the spool to match the size of hole needed for the tap, once the hole was drilled in the case I hogged the hole in the spool large enough for the shank of the tap to fit through. This way the threads were sure to be square. Pretty small update but it was time consuming and a PITA. Stator is fully mounted and back together, wiring and all!
1 step forward. 2 steps back. Looks pretty good, polished up another cover.
Put some new base gaskets
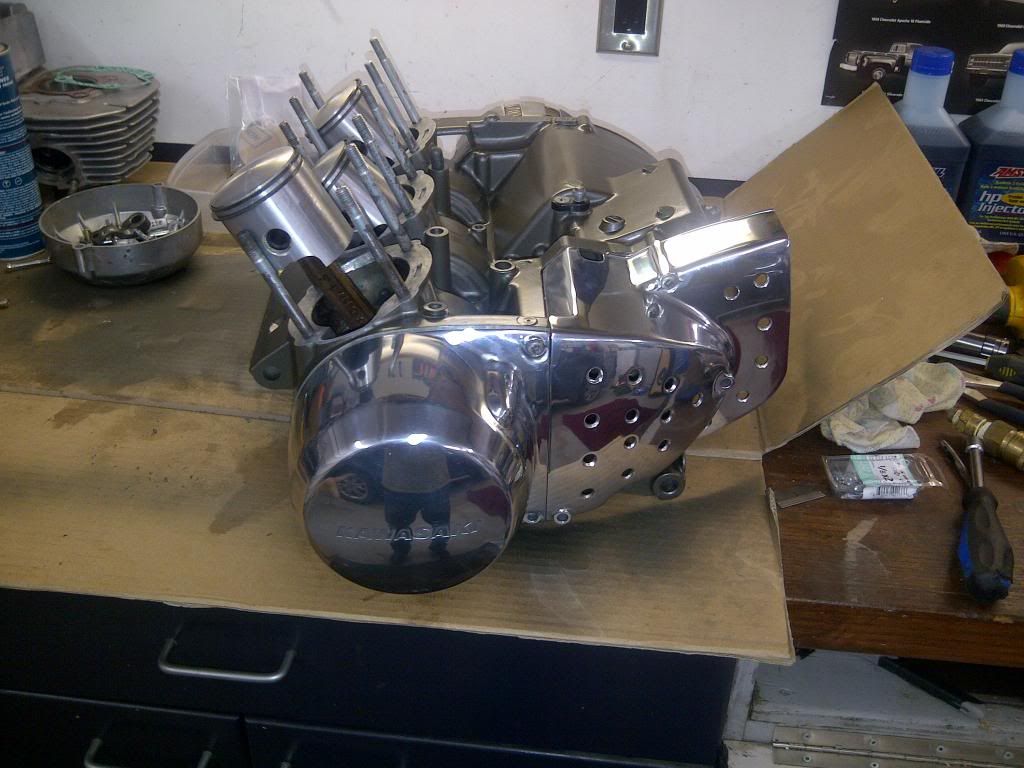
And bolted the heads back up.
I ran into a slight problem with the stator, the engine cases are missing one threaded hole for the old style stator. So I have to drill and tap it I guess. I think I figured out a way to get the hole straight and in the right spot, but I won't post any pics until I get it right
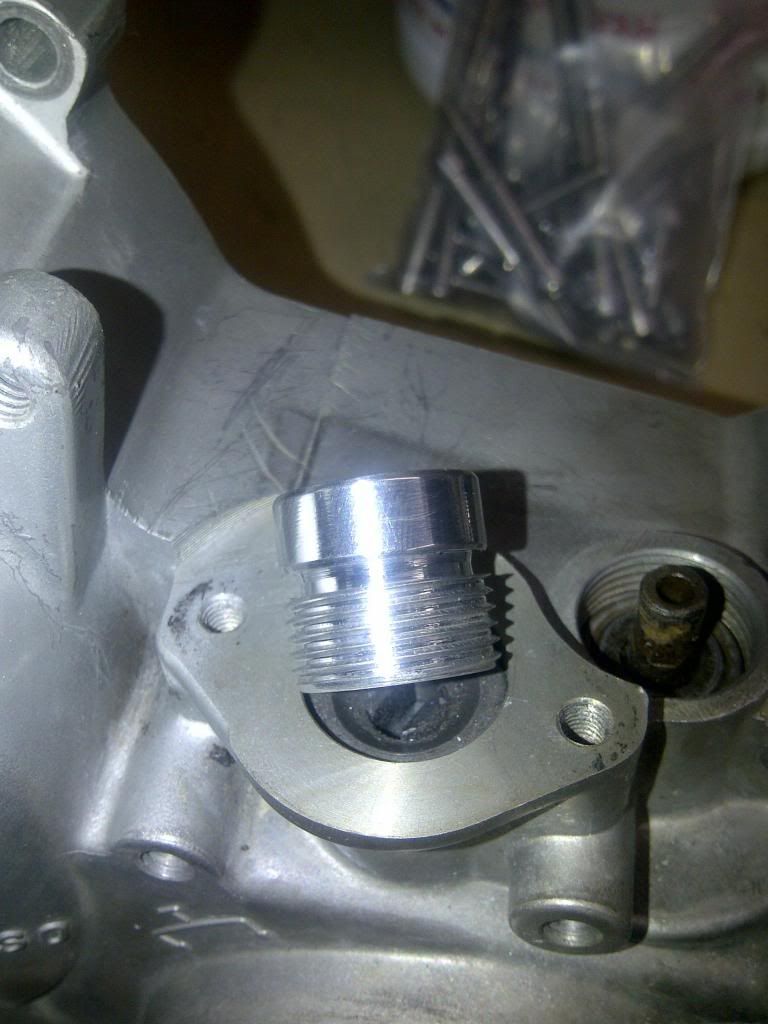
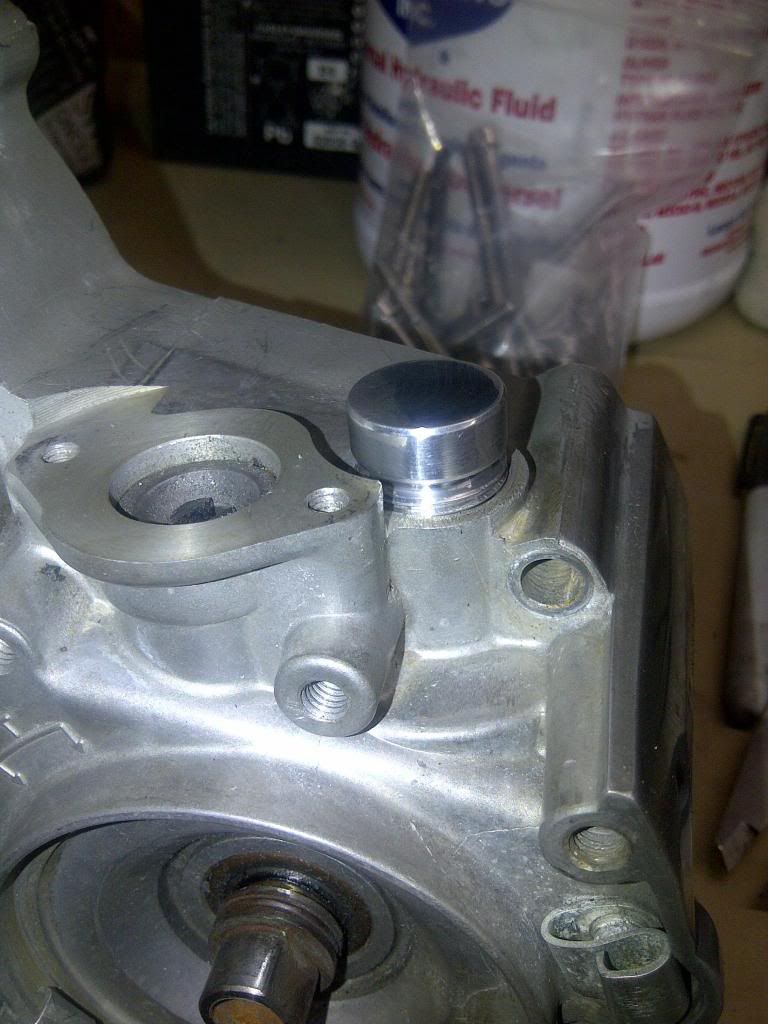
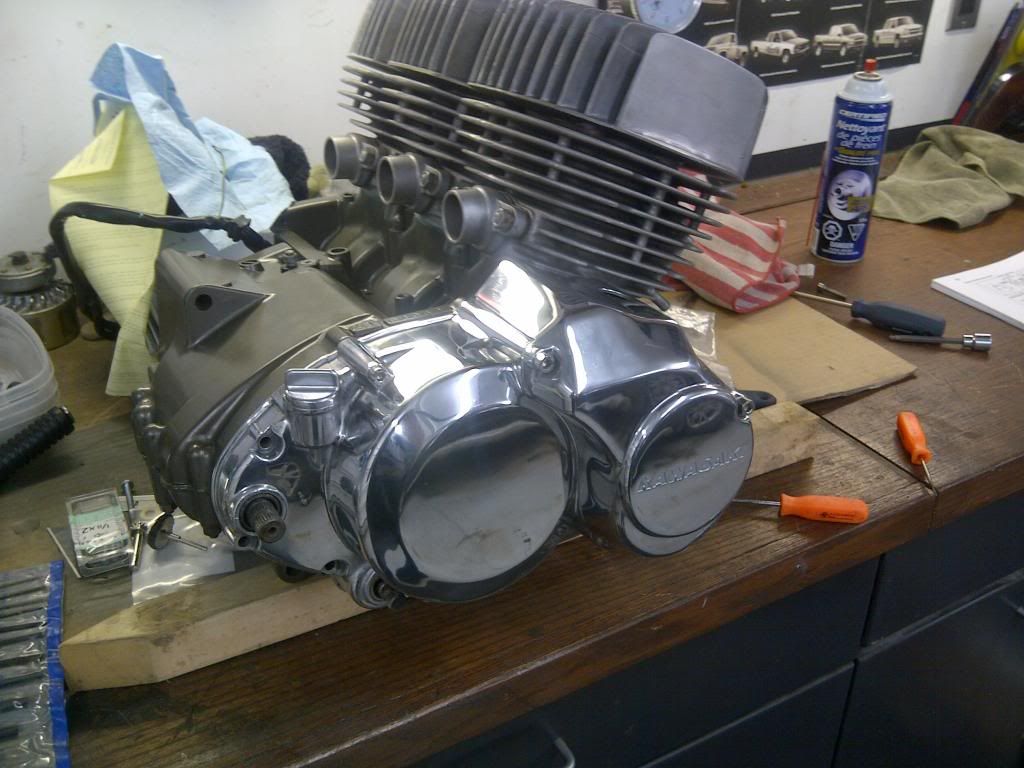
Small update literally, Made a tach cable block off for the side cover since I will be running an electronic pick up tach. The speedo and tach should be here this week. Little bugger still took a couple of hours to machine. The small stuff is what kills you. I was tired of sanding and polishing.
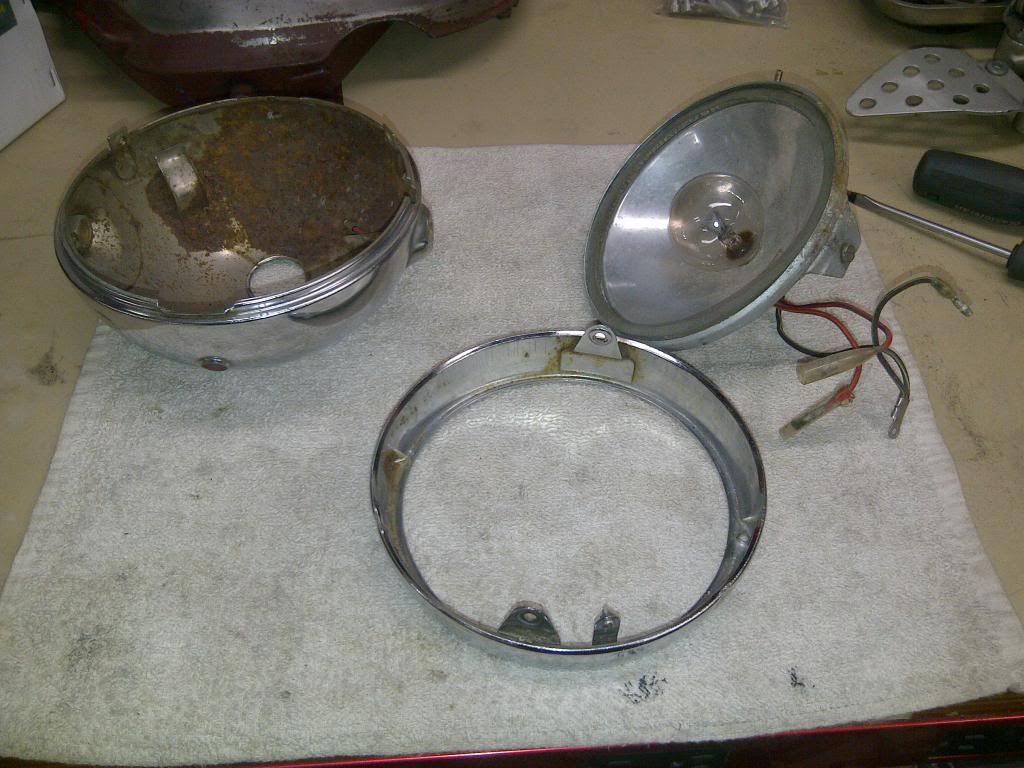
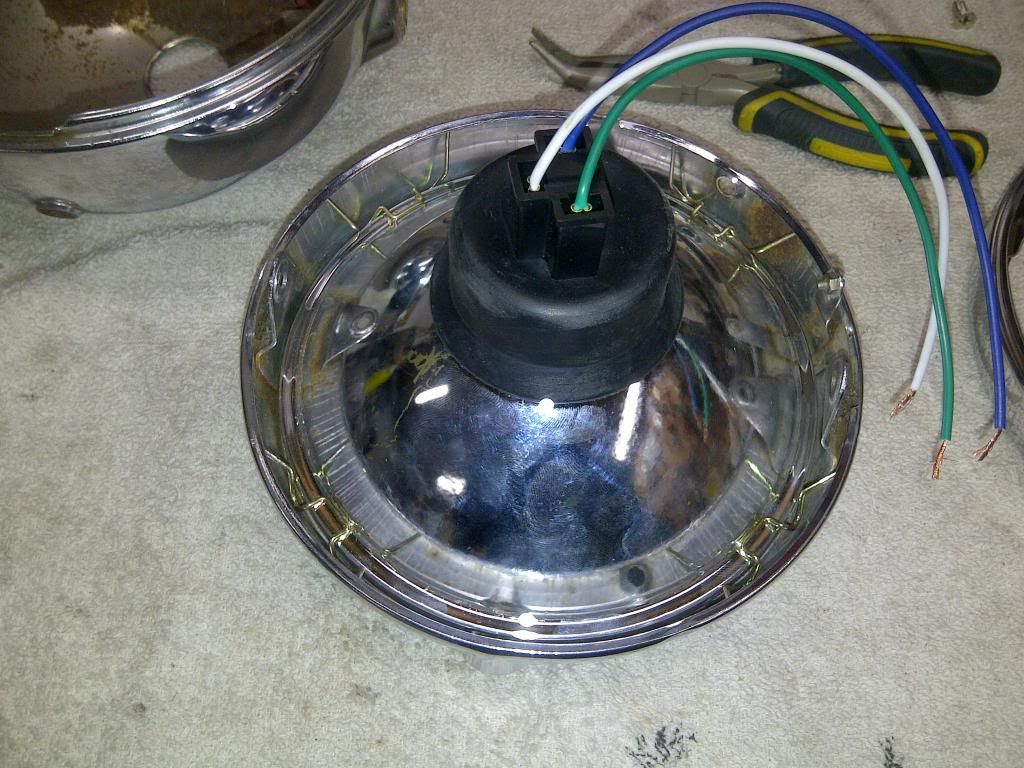
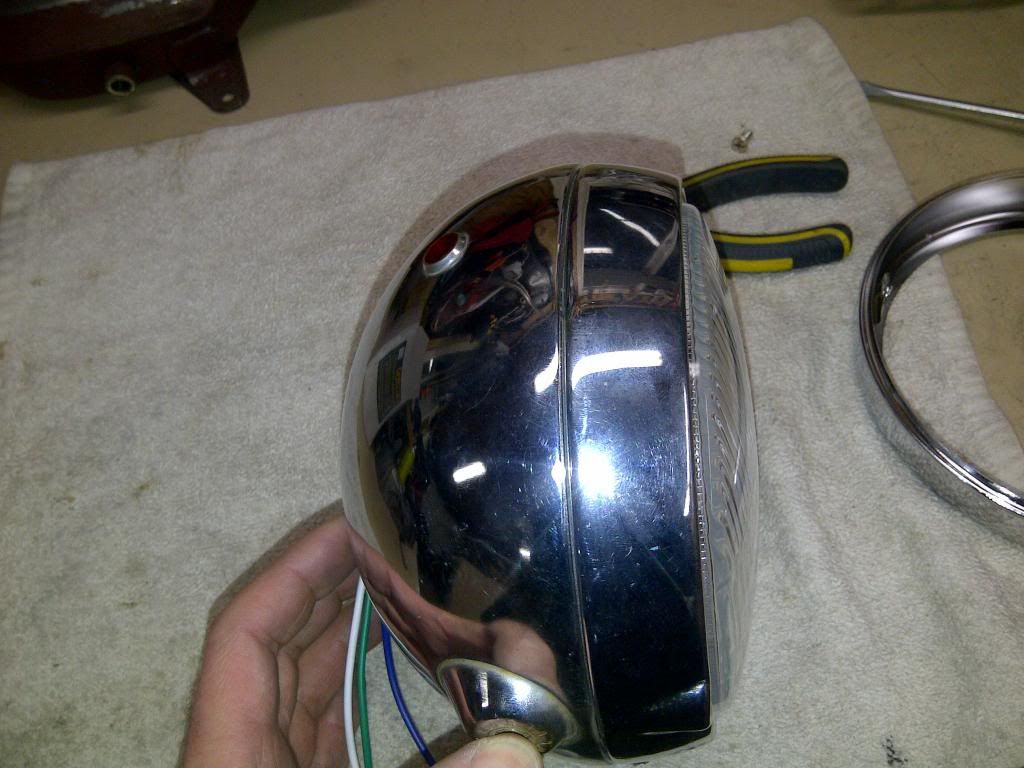
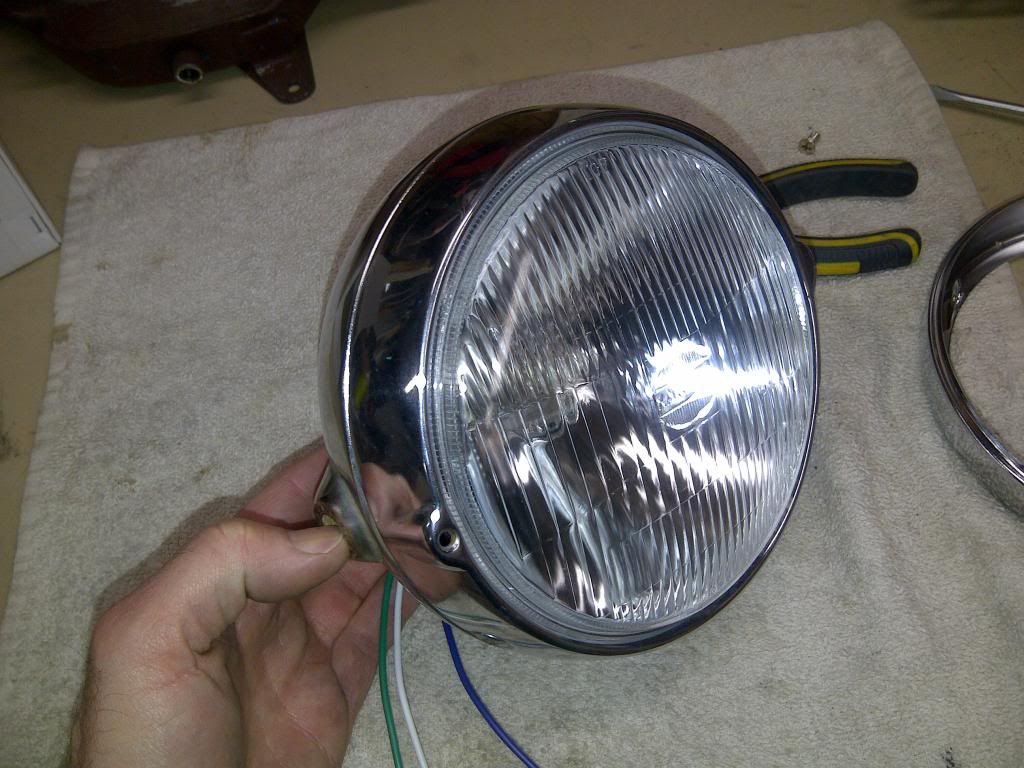
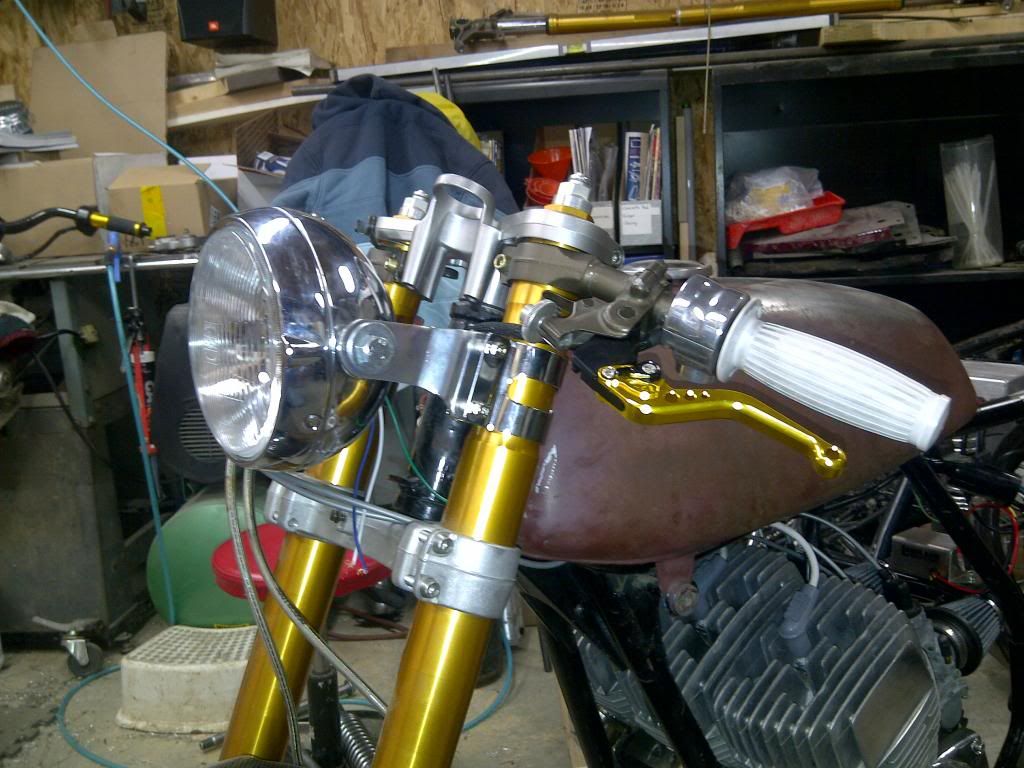
Also finally found a headlight lens to fit into the stock H1 light bucket. Easy straight forward swap.
started cleaning up the controls, polished of course and added some black braid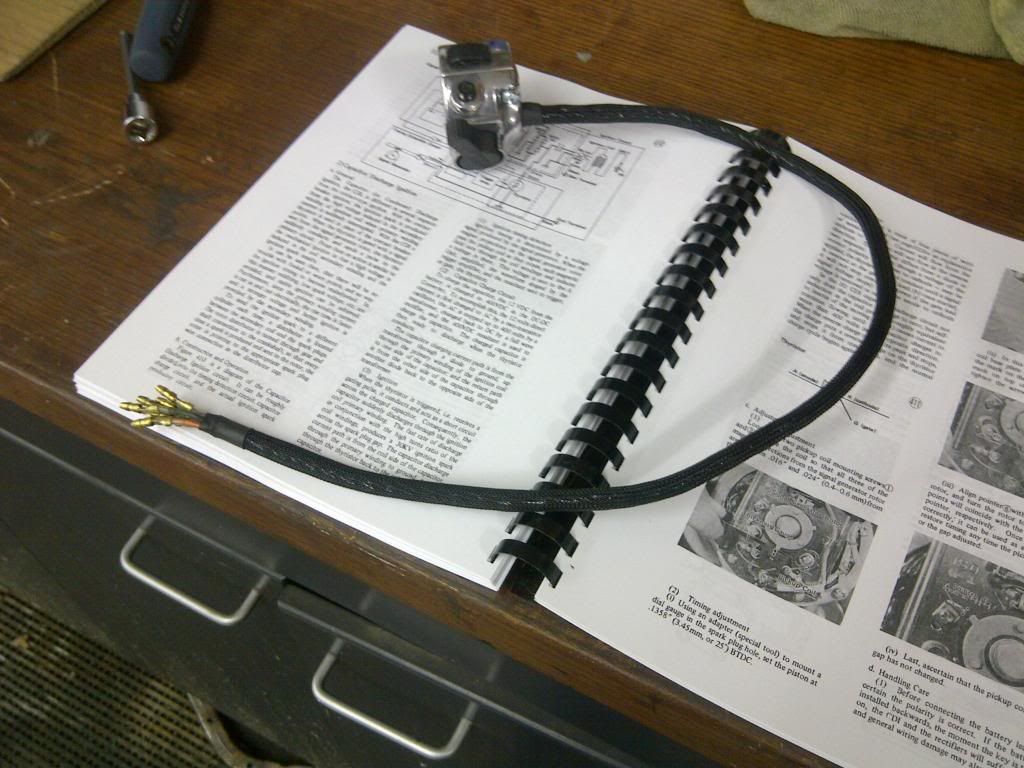
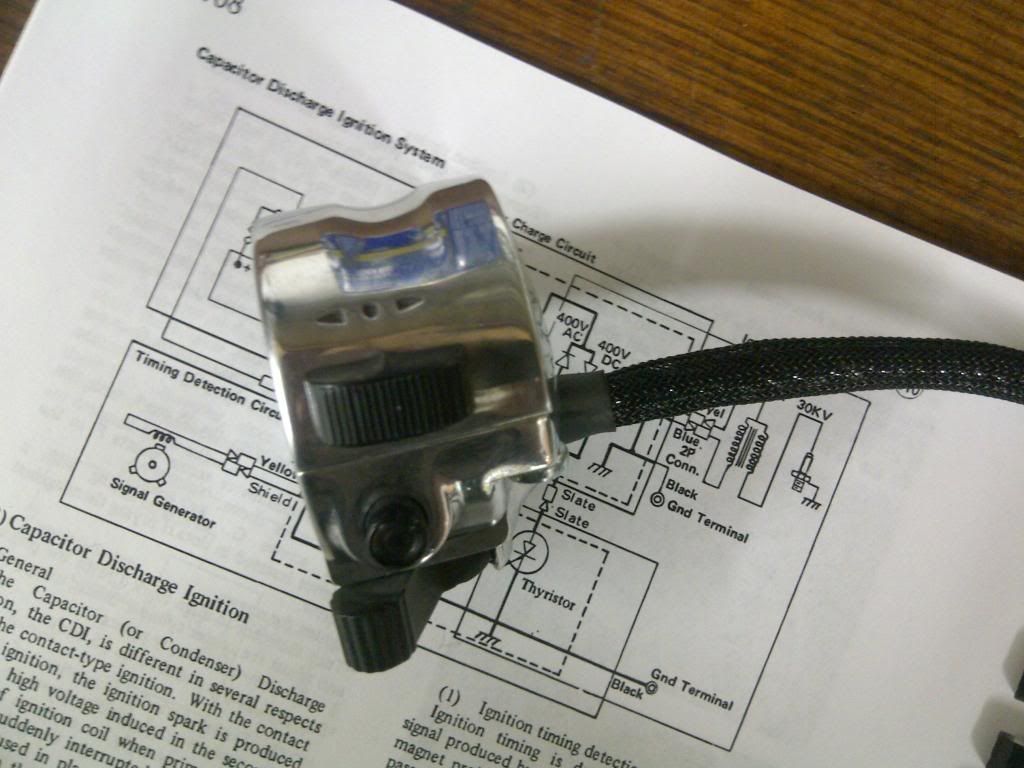
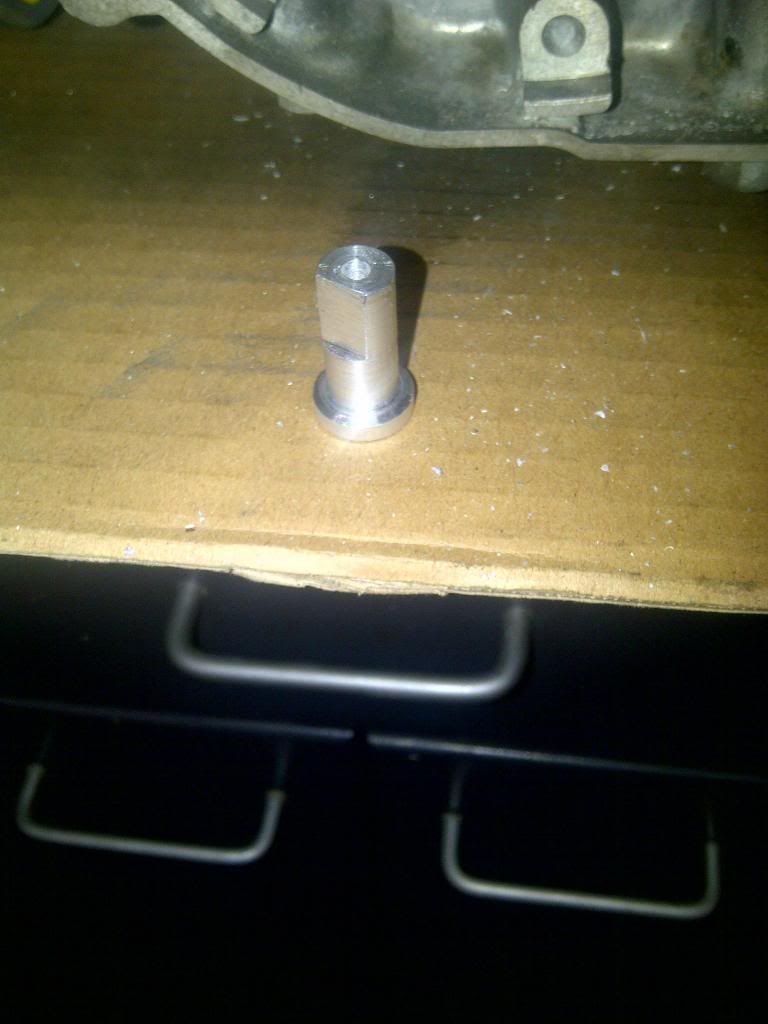
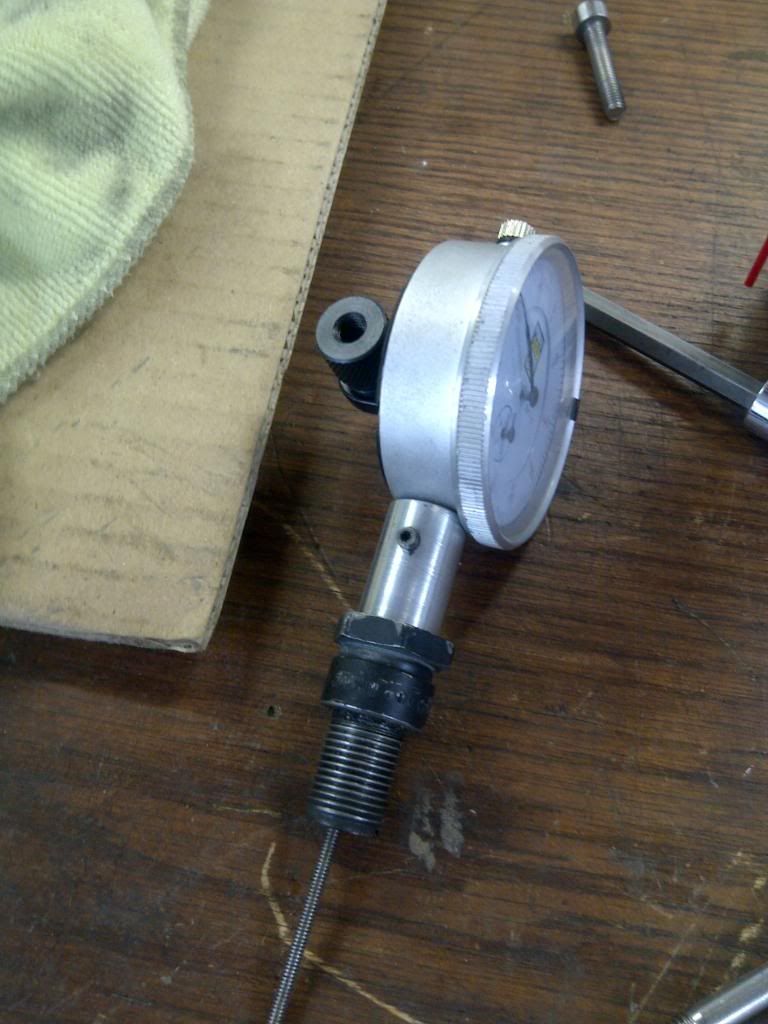
Had to build an adapter for my dial indicator to measure TDC for iggy timing. Manual says 25 deg BTDC or .1356" So this rig worked perfect. Built it out of an old plug and a chunk of alluminum
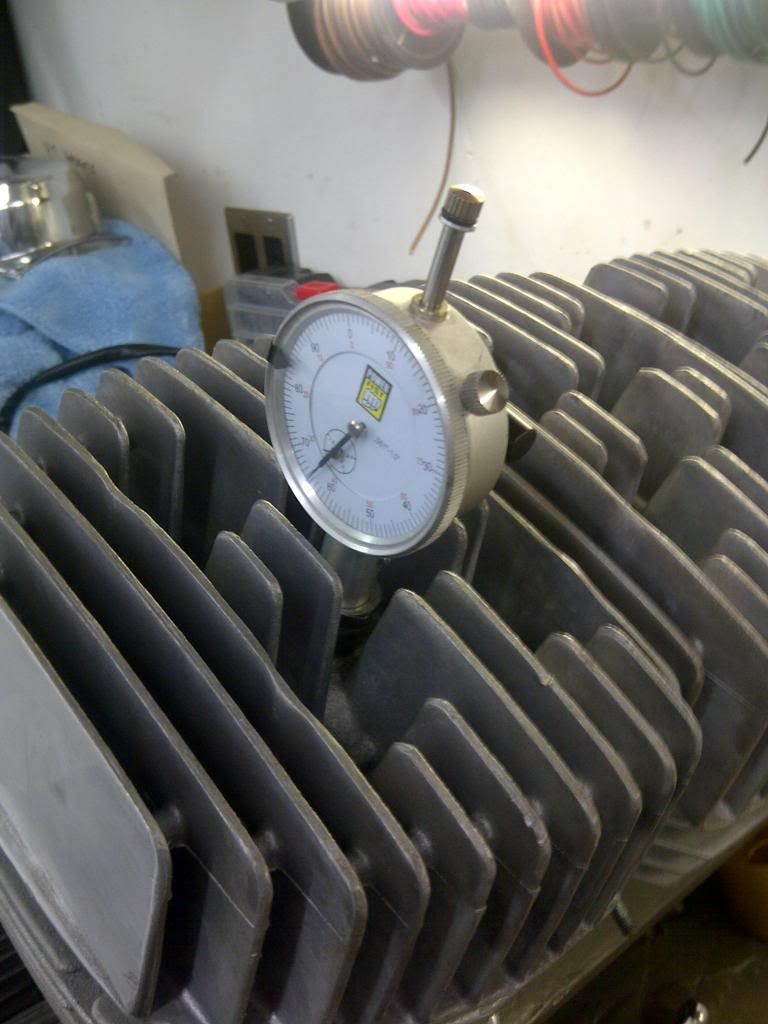
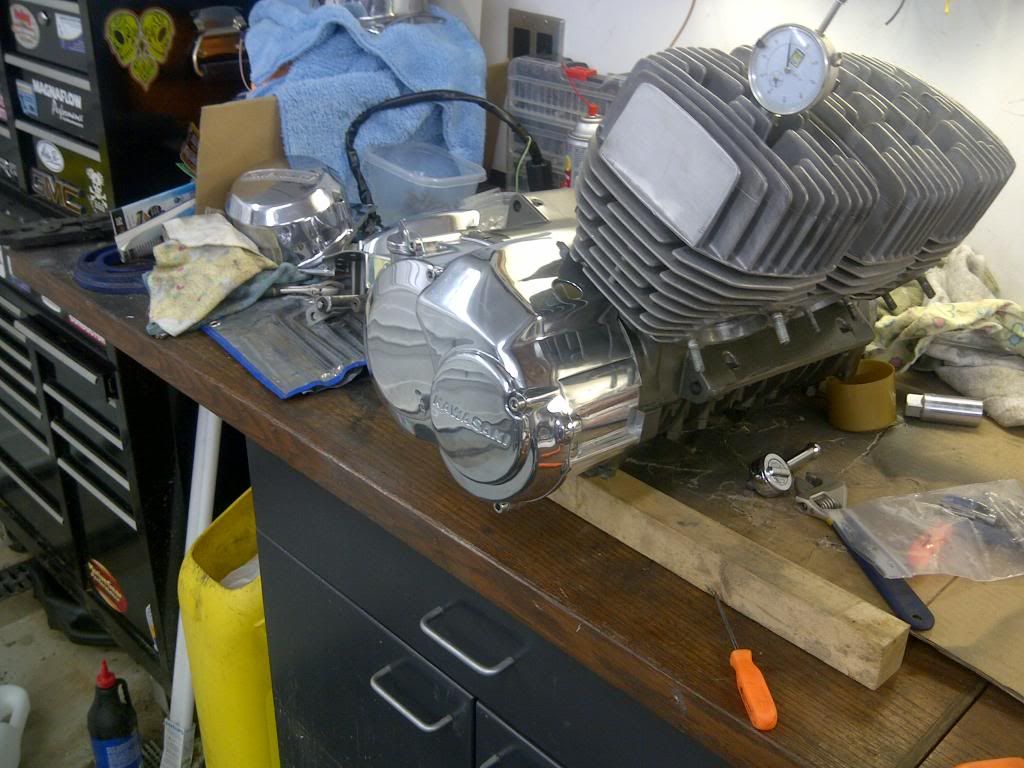
So timing is set, now time to bolt up the rest of the shiny shit.
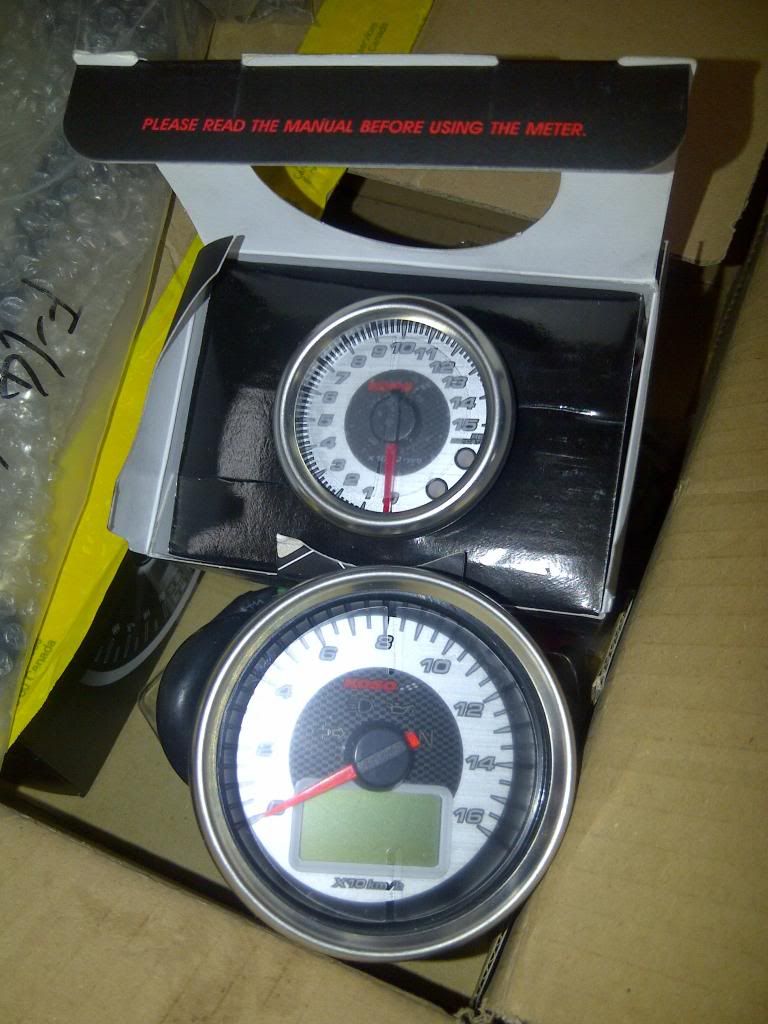
Well its been busy lately, the parts keep showing up and I have no time to put them on. Koso gauges from Germany, for some reason you can't buy these in North America, European Market only Koso said, so I found a dude in Germany on E-Bay, cheaper than Koso List! Beautiful Gauges in my opinion:D
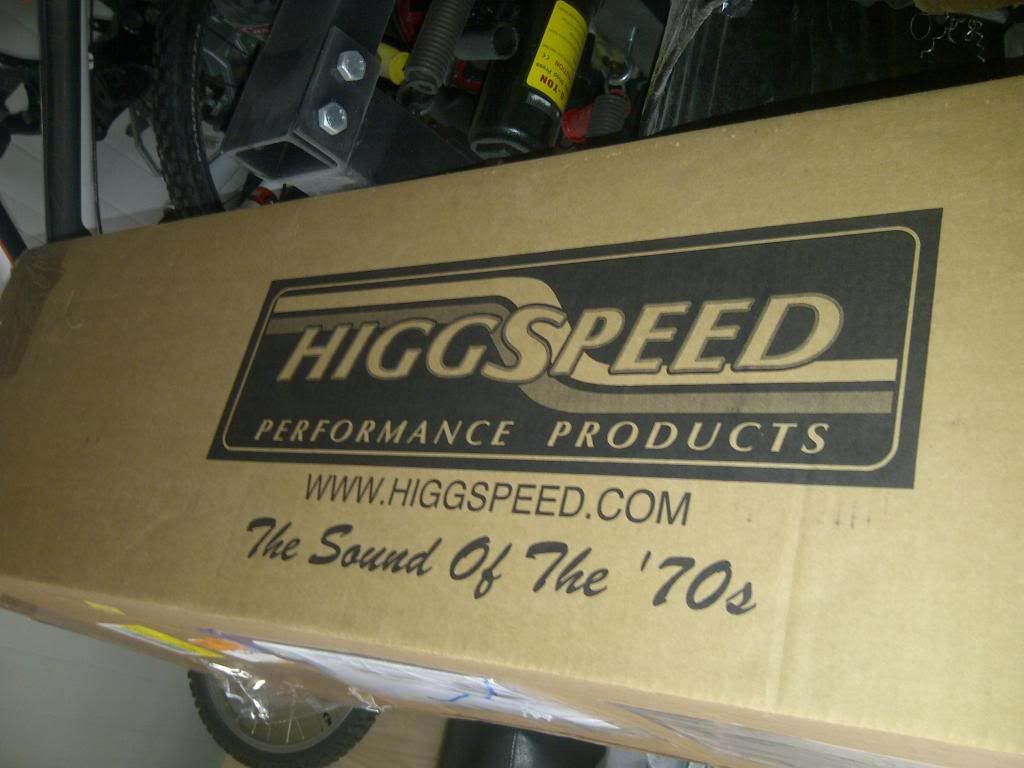
Had a big box waiting for me at home from across the big pond yesterday.
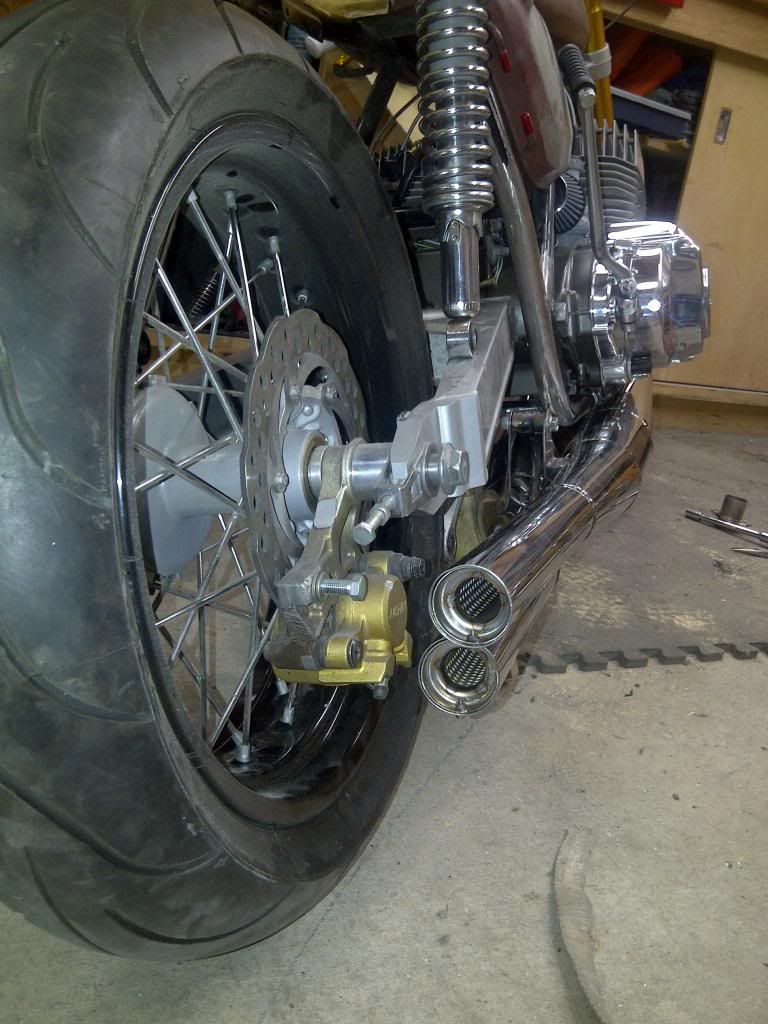
I popped the mill in the frame last week to check the offset I needed for the sprocket. Since the engine was in I figured I had to mock the pipes up! I couldn't wait. These aren't what I thought I ordered but they are pretty nice!

Well its been busy lately, the parts keep showing up and I have no time to put them on. Koso gauges from Germany, for some reason you can't buy these in North America, European Market only Koso said, so I found a dude in Germany on E-Bay, cheaper than Koso List! Beautiful Gauges in my opinion:D
Had a big box waiting for me at home from across the big pond yesterday.
I popped the mill in the frame last week to check the offset I needed for the sprocket. Since the engine was in I figured I had to mock the pipes up! I couldn't wait. These aren't what I thought I ordered but they are pretty nice!
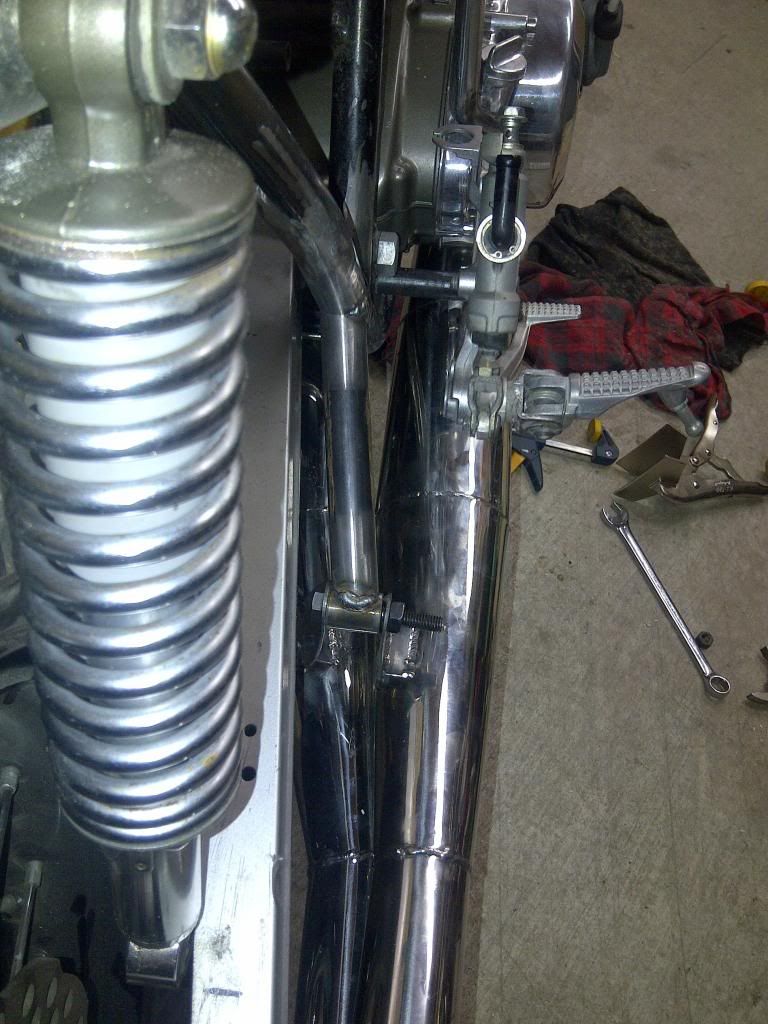
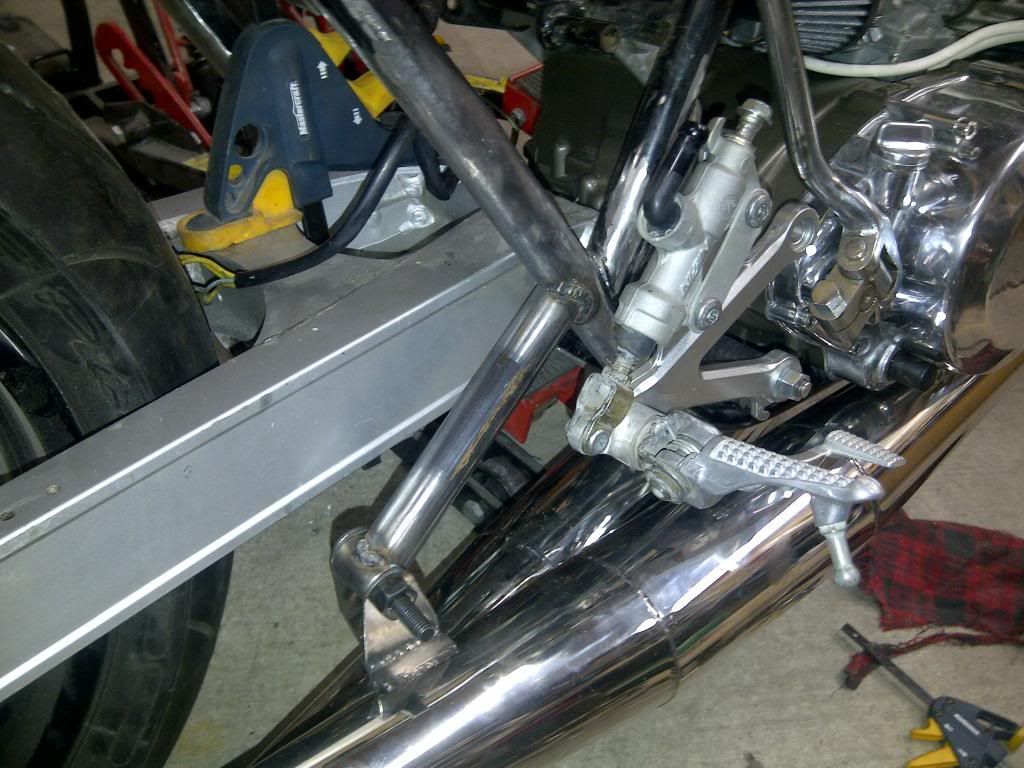
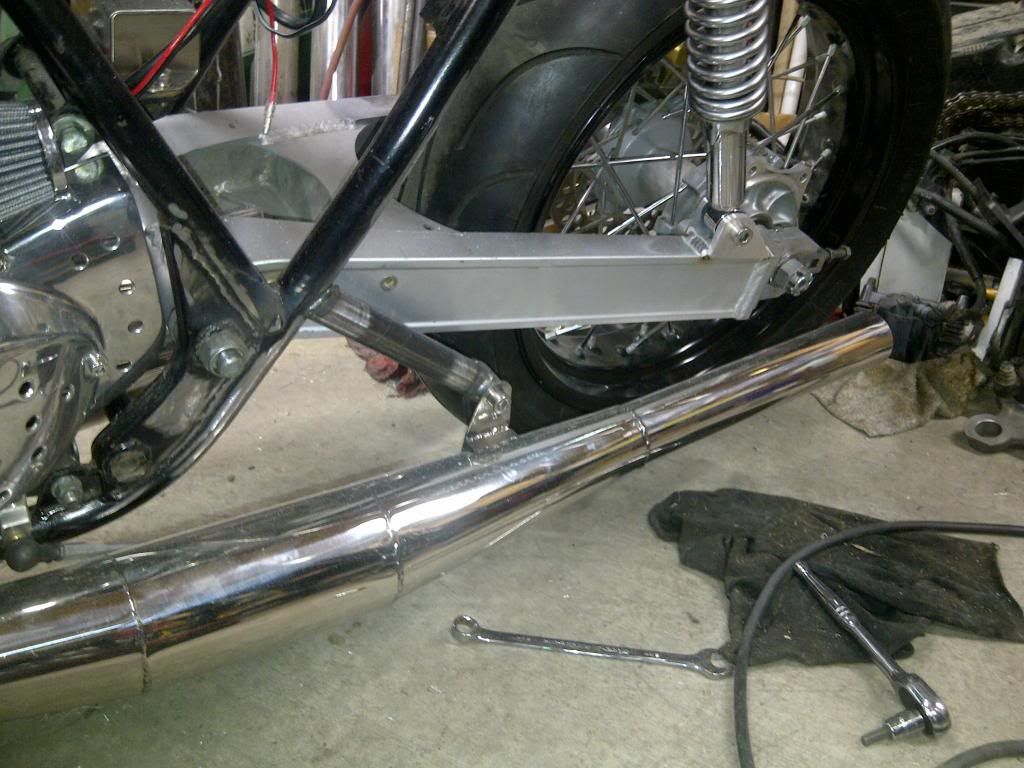
A little progress, Built an exhaust hanger and mocked up the right side rear set.
Plumbed in the oil pump, that took a whole night to bleed the lines, some idiot was turning the pump backwards and put one of the check balls on the wrong side of the spring...:doh: But we got her rigged, some of the swank white plug wires plumbed too. I ordered all the parts for the new iggy system but I figured it's almost together and I have all the parts, I'm gonna try the original system first.
It's been a while but a some good progress. The light is mounted and pretty solid. Bracket will need some speed holes though.
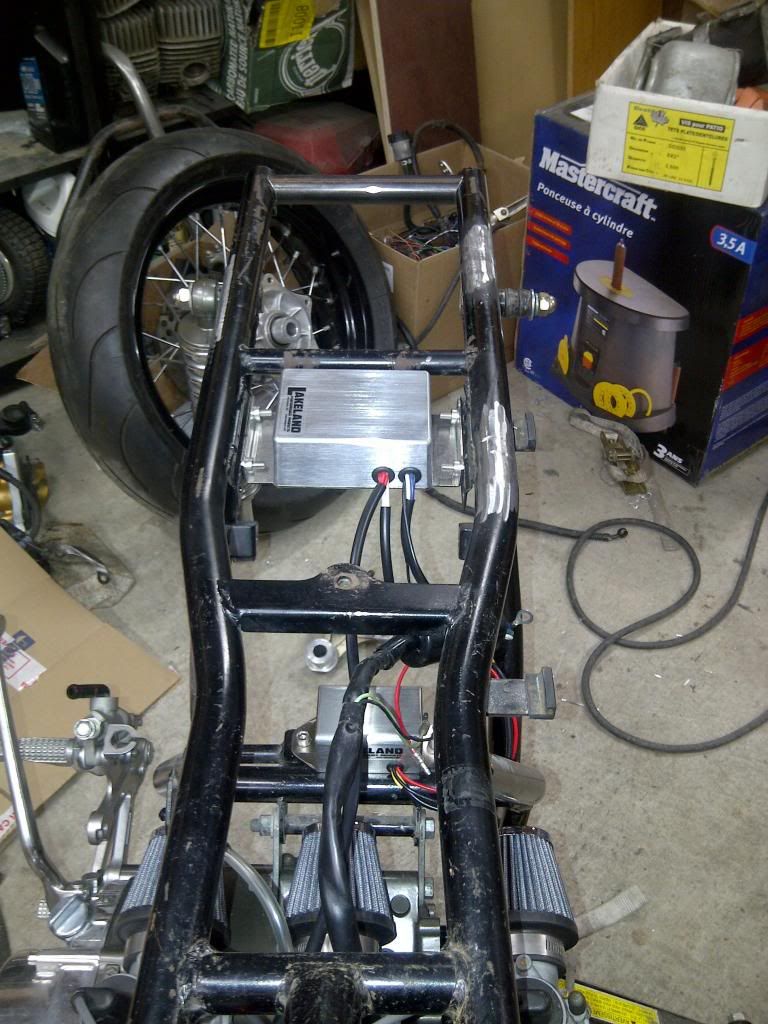
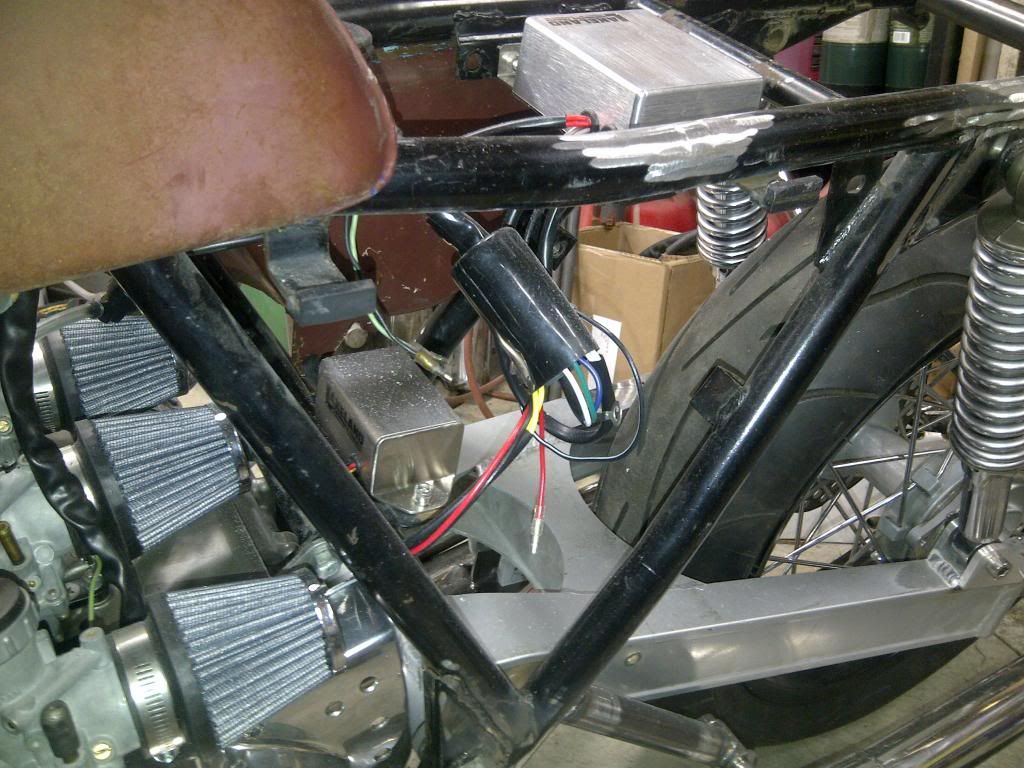
I abandoned the old iggy system as soon as I saw the new boxes. These are things of pure beauty. Boxes are mounted, stator and rotor swapped and ready for ignition.
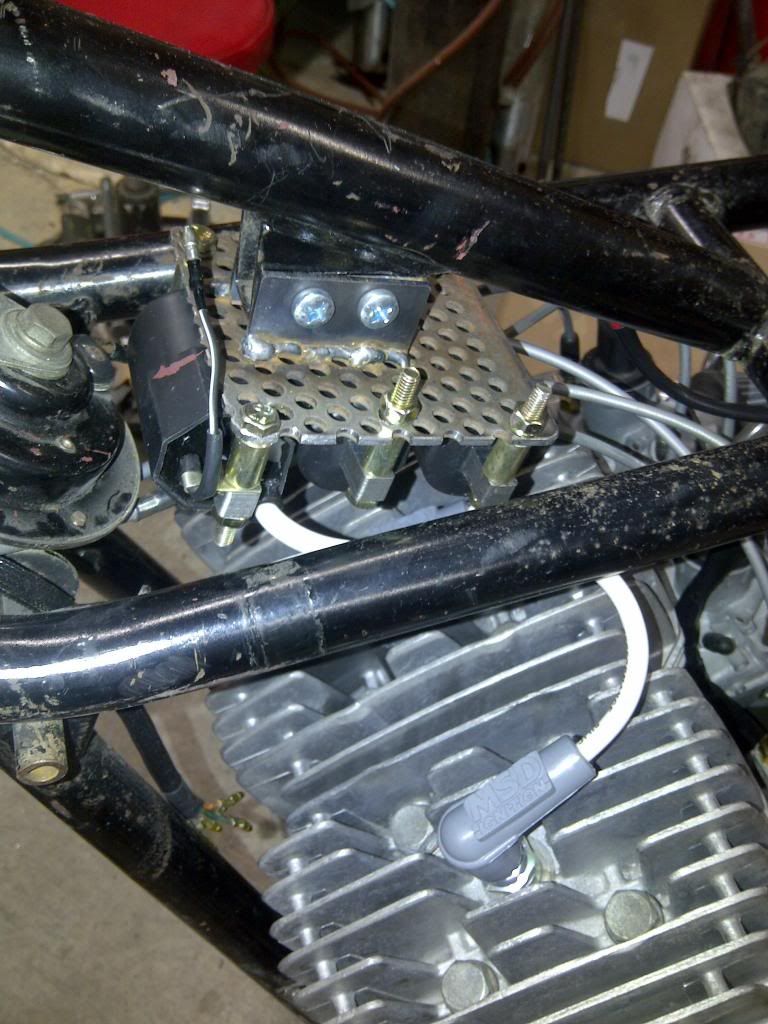
With the new iggy system I needed 3 new coils. had to build a bracket, just happened to have the perfect material. speed hole plate!
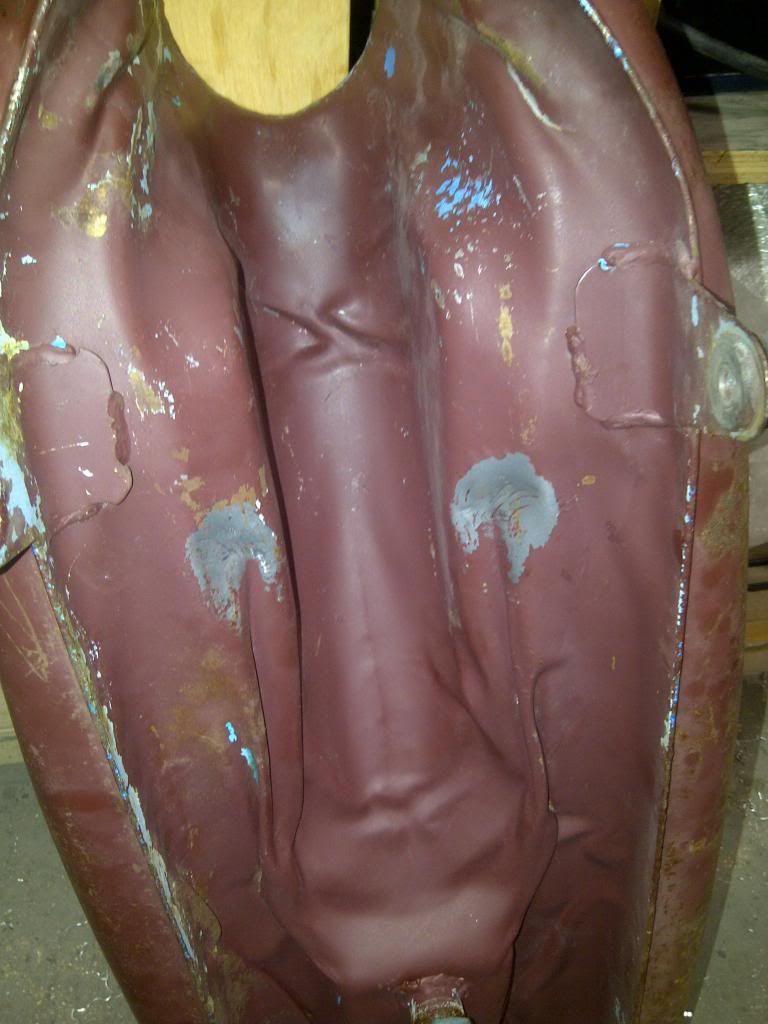
The tank needed a little massage for clearance
Left Exhaust hanger complete
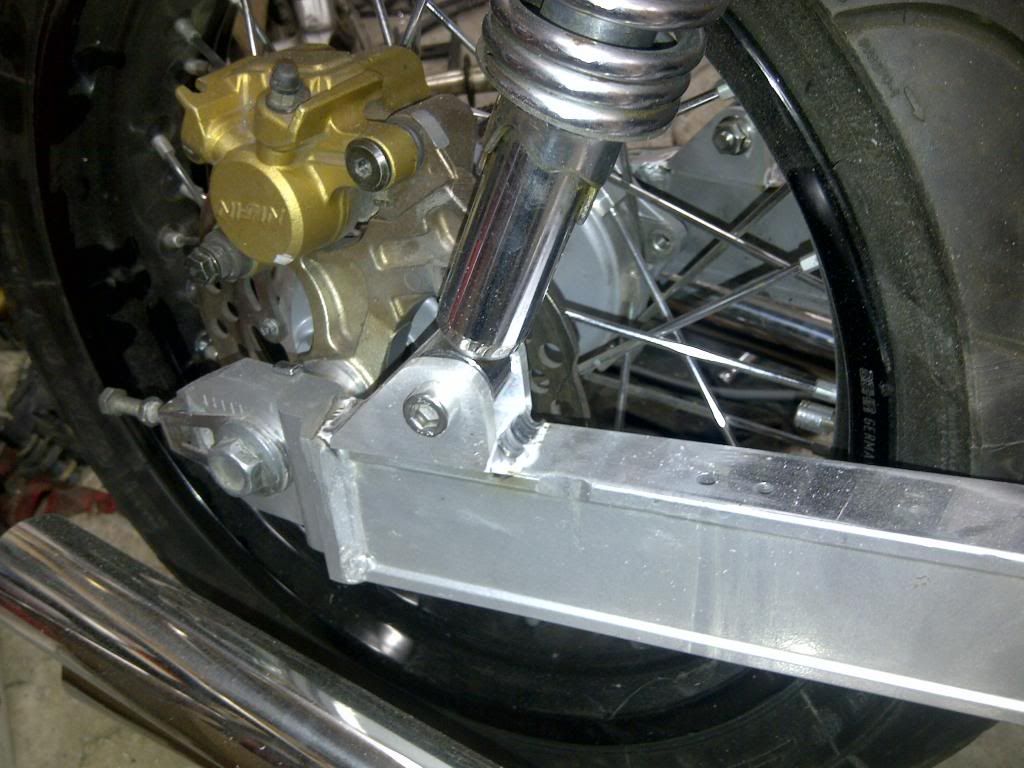
Built some shock mounts for the swinger and had Rodger weld em up for me.
Trimmed the 636 triple clamp of the key mount
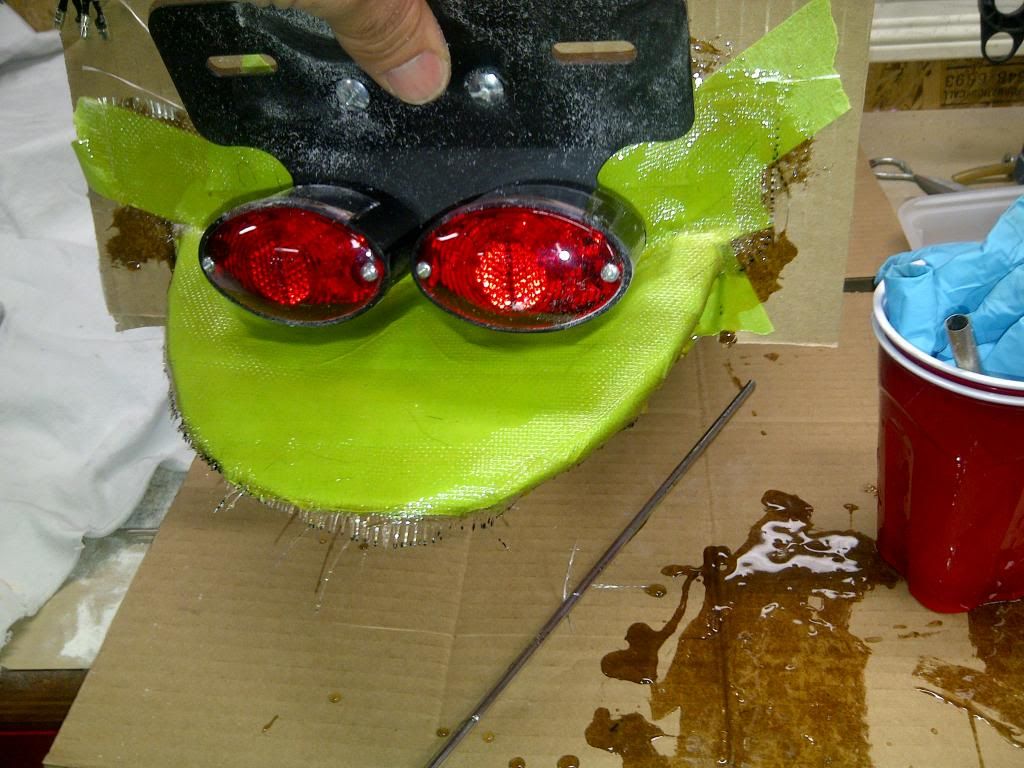
I figured time is running out and I better finish the body work to get it in for paint. Glassed up the bottom of the tail to house the lights.
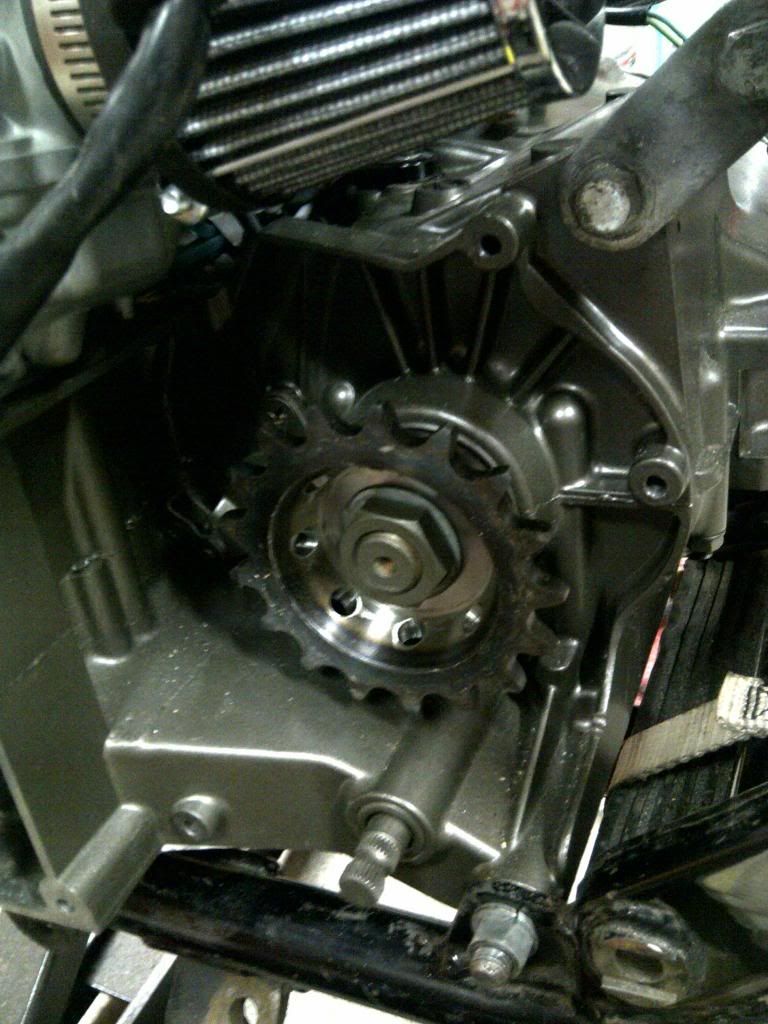
Offset sprocket from Fast from the Past, came with speedholes!
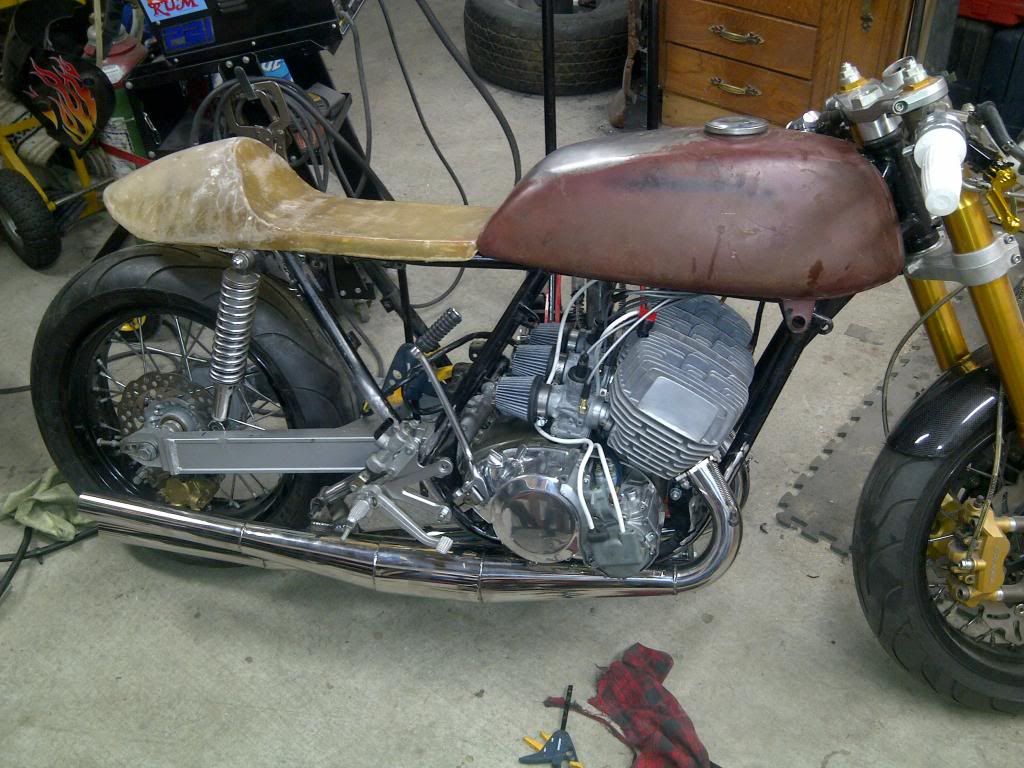
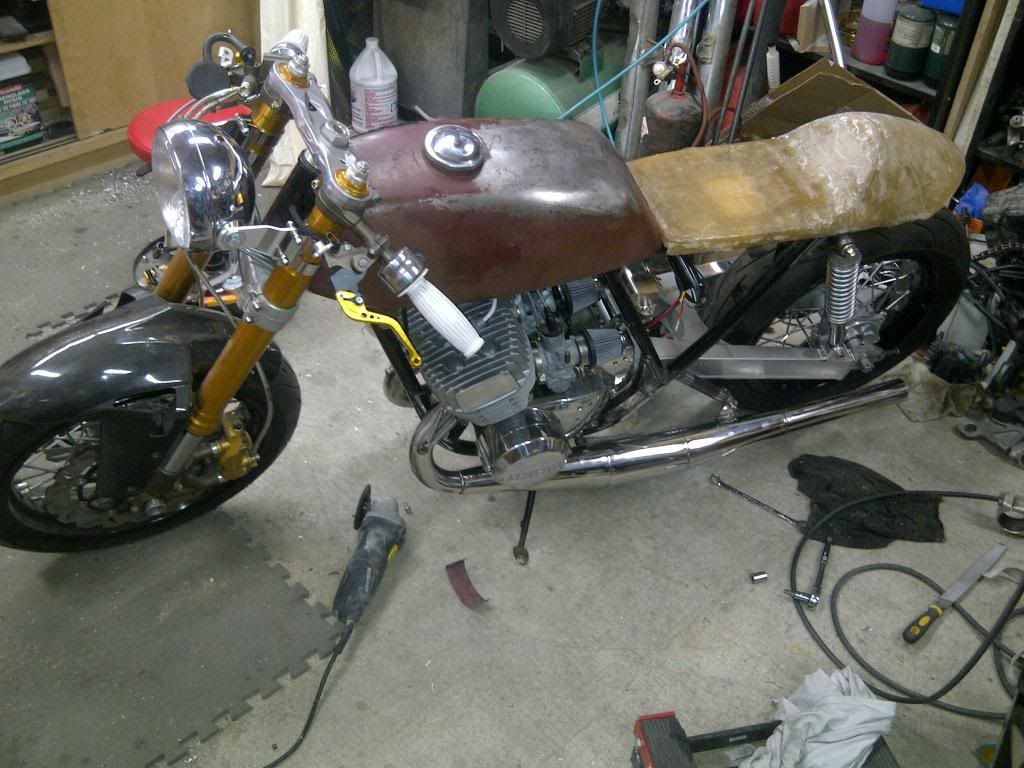
Al in all she is standing on her own and getting closer to the finish line. need to mount the gauges and rear sets next.
Well it looks like I may be out of time. End of the week right? I might be able to piece her together and get her running in a mock up stage. Does that count? Anyways progression is as follows:
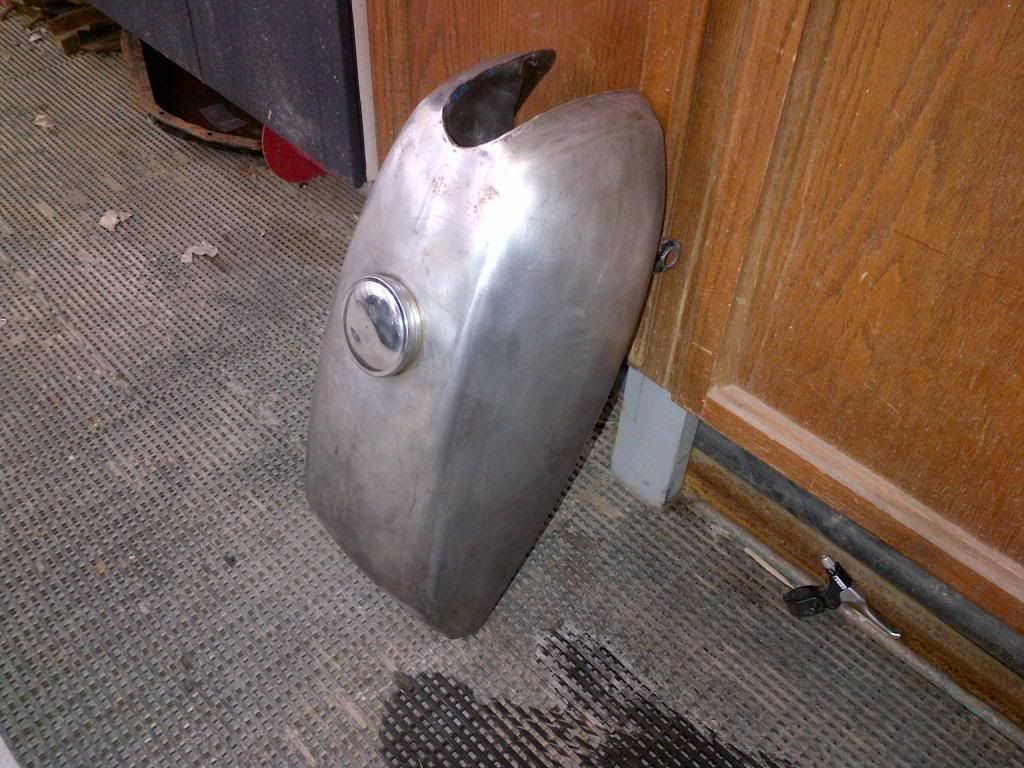
Body is stripped ready for paint:
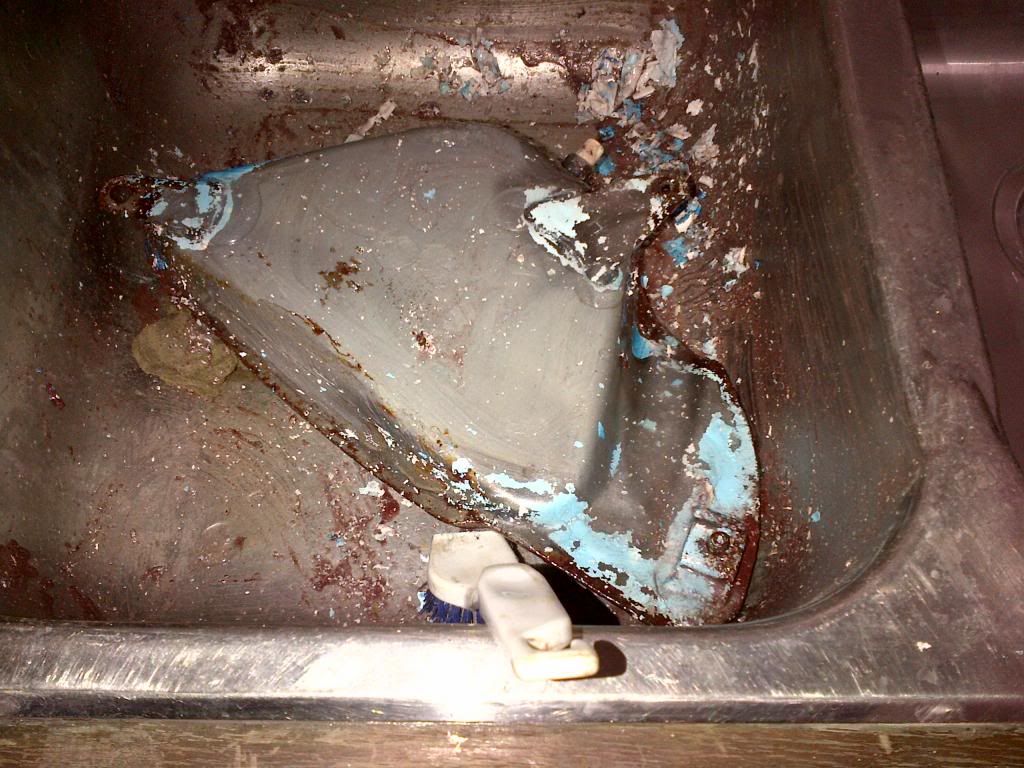
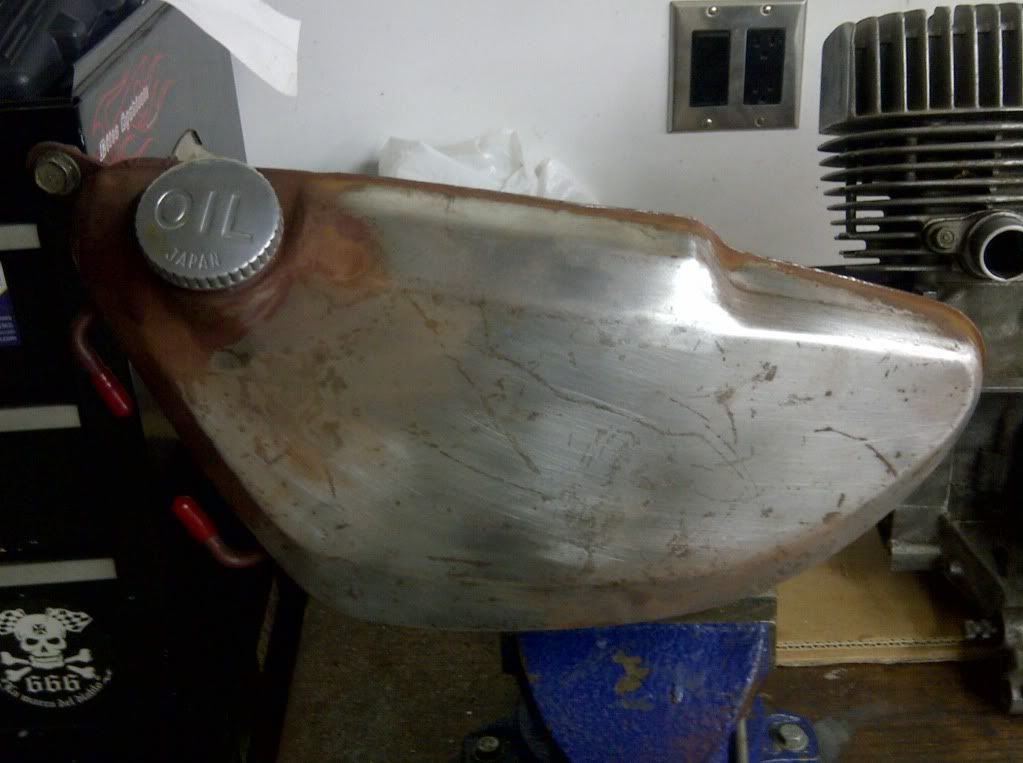
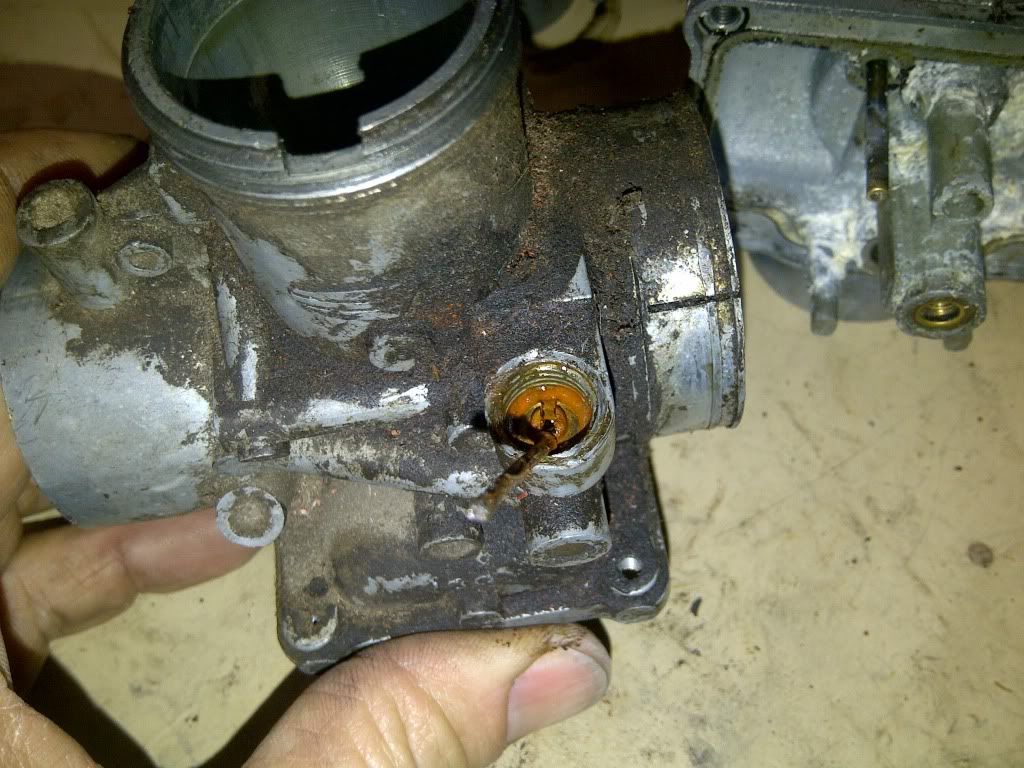
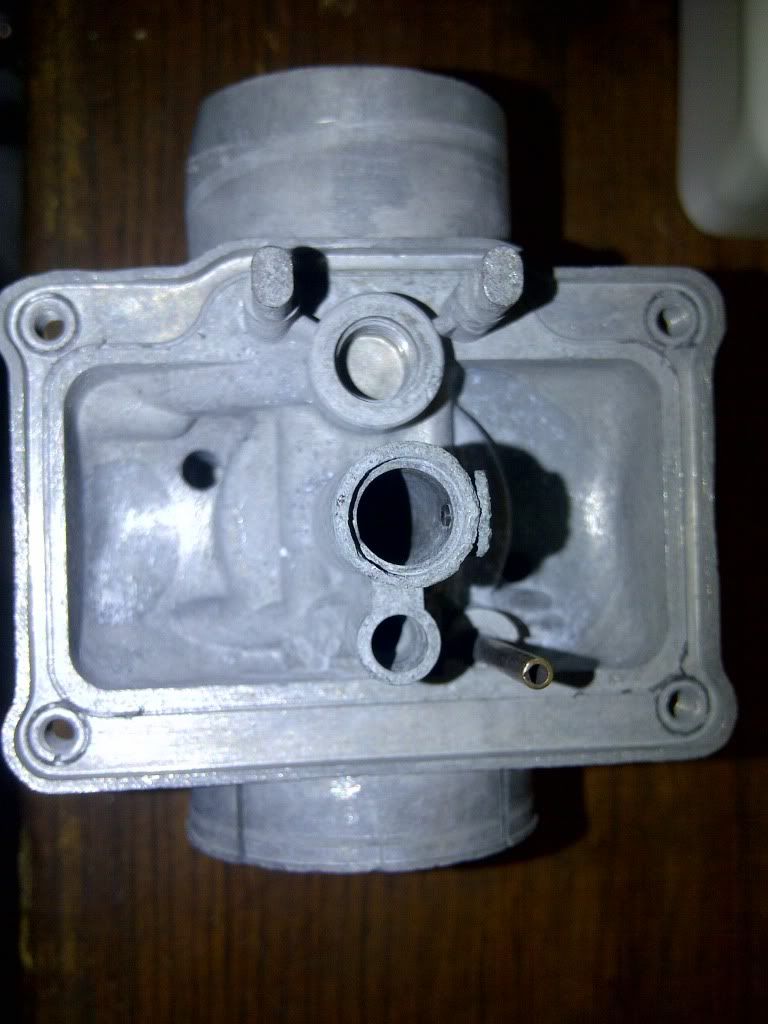
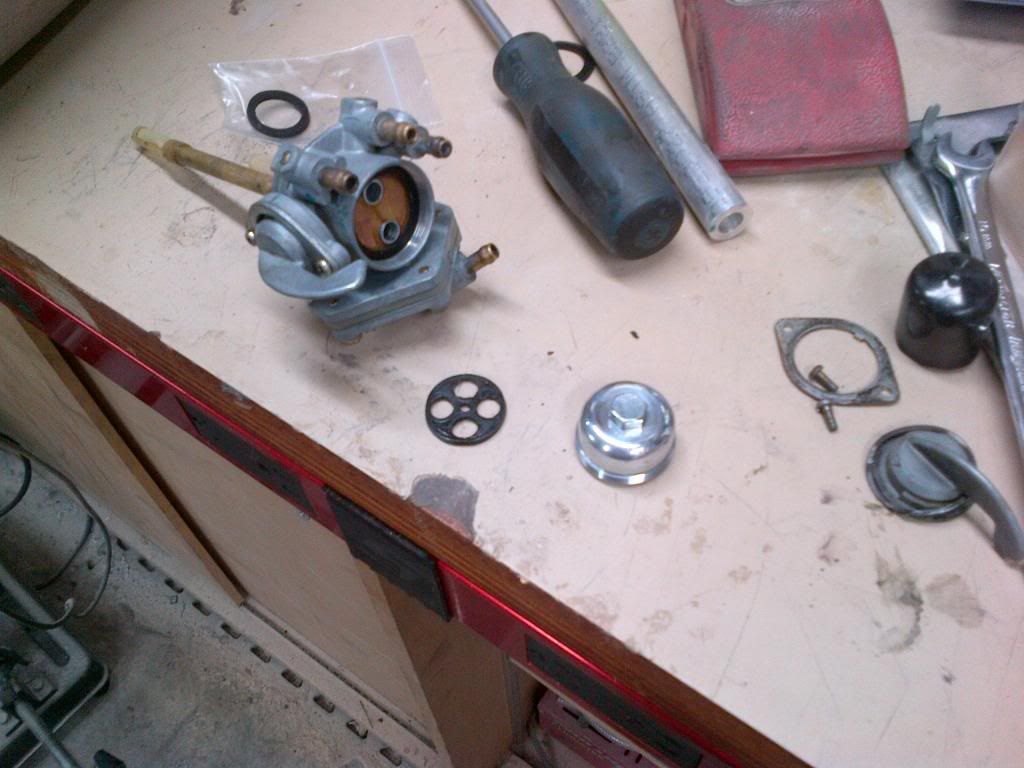
Petcock Rebuild hehe!
Work Done in fall 2012 and all of 2013
This is how it all started for me. Drug this out of a guys barn for the total price of $0. I was doing him a favor by cleaning up his junk. I had no idea what I had just picked up or the obsession that would start. It was was complete but seized, heads were off and the guy I got it off of used Coke to try and free the rings. Well it didn't work as you can see by the following pictures:
The left cylinder still won't come off and it has been soaking in oil for about 8 months. Found myself a new engine though, a 72 h1 with a little bit of work done to it. Wiseco forged pistons, ported somewhat but it was built about 18 years ago, so I need to pull it down a down and refresh it. Much better shape to start with.
The rest of the bike looks like this
Got the ol girl up on the jack and swapped the front end. I think the stem will work just need to find a bearing that will work with it. Could be a challenge.
I mocked up the 88 ninja swinger I just bought and think it might work well. Dam the wheels are nice!
I ended up pushing the stem out of the triple for a little machining to get the new All Balls bearing kit to fit.
And here it is, ready for install
It is about .8" too long so I started machining a spacer for the top below the triple clamp. I'll post a pic once I have the front back on the frame. This spacer will give me some flexability to make a gauge mount under the triple clamp. More on that later.
Finished the spacer for the triples and put the front end back on the bike. The factory turn stop thingy actually worked with these triples, just needed a little massaging. I figured I would put the HoHey Top clamp and dirty bars on to see what they looked like. Not sure which i like better. Thoughts?
Started to work on the swinger. I pulled the cross shaft out and thought I would find bushings. Not so, these pesky little bearings need to be pressed out but the swinger is tapered and I can't get at them. I will try something else tonight, but am open to any suggestions. I am pretty sure once I grind the swinger down they will be too long anyway, I'll probably build some bushings out of brass. Have to pick some up on the way home.
I overlooked a crucial component of the swingarm, I had no side thrust once I mounted it in the H1 frame so I had to build these. Tightened it up nicely.
Next the swingarm bolt, the Ninja bolt was a c-hair too big for the H1 frame(black one, not blonde:D) Instead of drilling the the frame, I made some bushings for the pivot and pressed them in to use the H1 swinger bolt. Nice and Tight now, just how I like'm
Had to build a boring bit to hog the holes deeper in the swinger to be able accept the stock bearings since I cut about a 1/2" off of each side. Here is the Bit
Before
After
Pressed the new bearings in and she is complete!
Now do I go mono shock or duals?
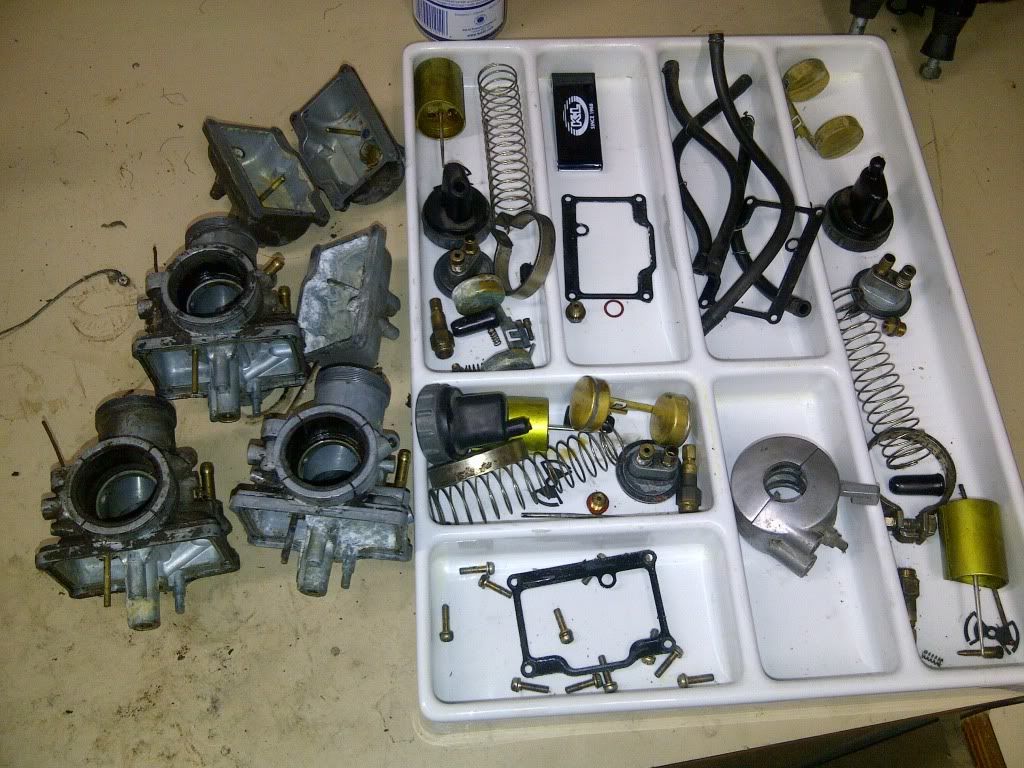
I tackled the carbs while I figure out what I want to do for shocks. These bad boys is dirty, rusty and full of shite!
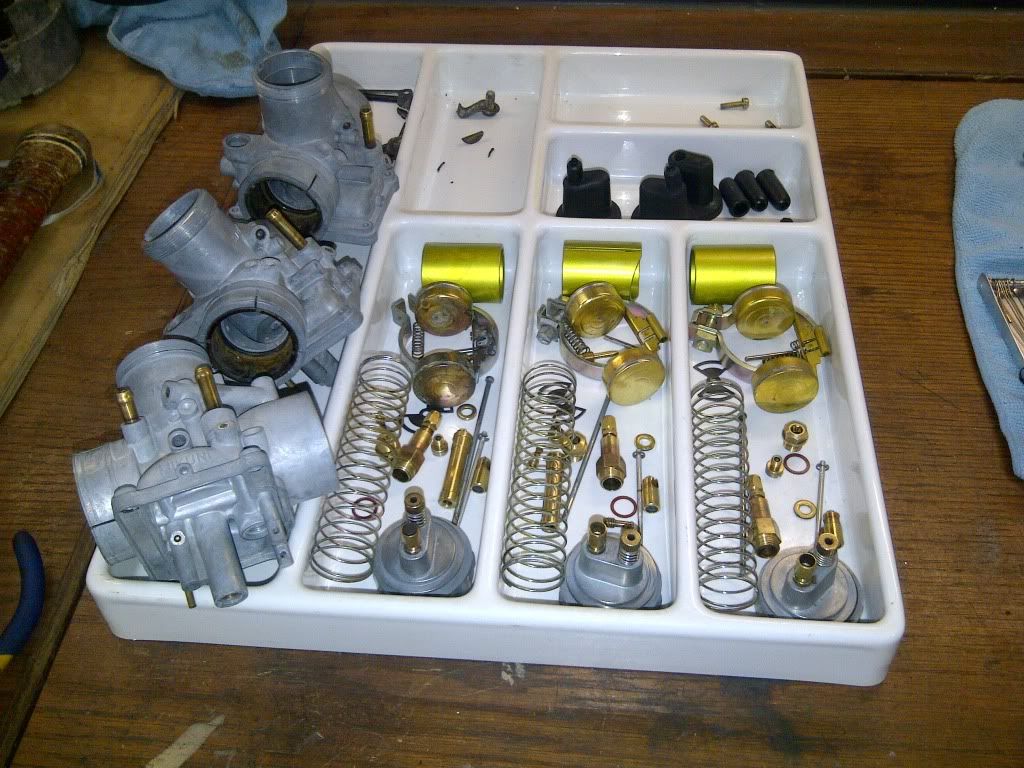
But I gottem all apart and separated into their respective trays for cleaning. I think I am going to have to order a few carb kits

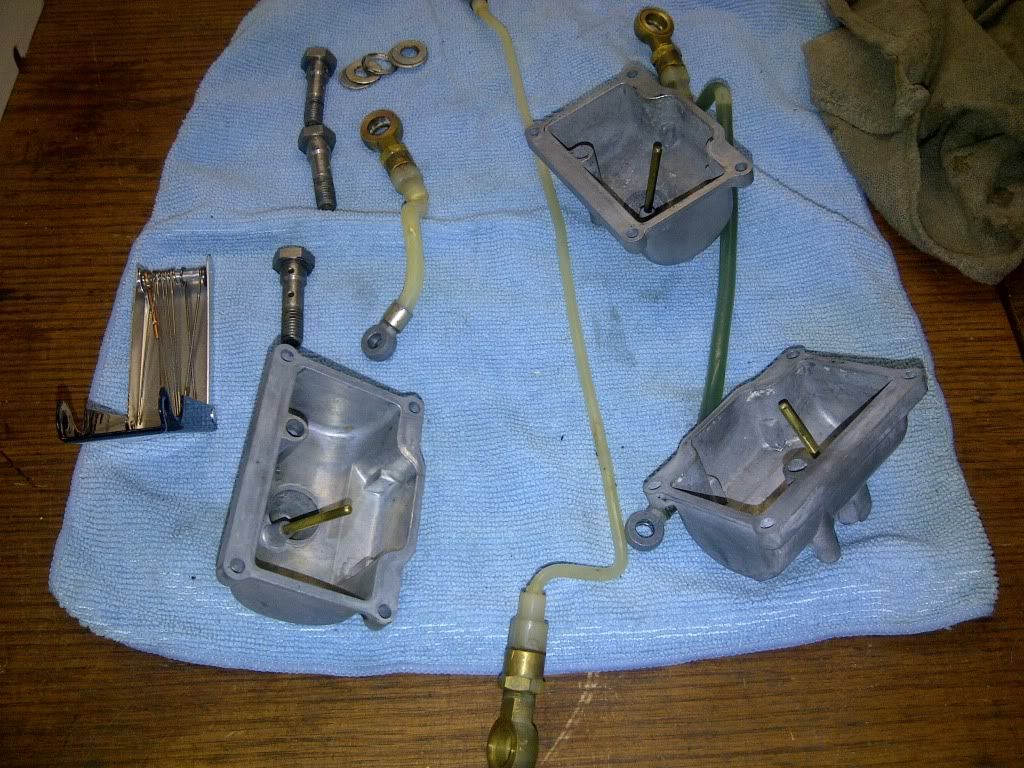
One set of floats has been crushed, I am assuming from water being in the bowl and freezing. Maybe I should just buy some Mikuni flatslides? Time for a dunk in the Gunk or Pinesol (I have heard it works prett y good too)
Carb's all cleaned up. I used Pine-Sol cause I didn't get to the parts supply to get some proper carb dip. Worked well though, the only downside was it smelled like someone shit a christmas tree in my garage for 3 days after!
Waiting on carb kits now. So I took the old lump apart to scavenge the clutch and drive gears out of it. The basket and gears are mint, I think I am the first one to split this thing open. Now the crank is another story. nothing a miracle can't fix. See for yourself.
Carbs are rebuilt and look great, added a new cable, Nice and smoooooth
Started glassing the Tail, I have i coat of woven and a heavy layer under this of the fiber
With this smelly crap drying in the shop I moved to the garage to rebuild the Stator. this thing was rusted solid. I should have taken a before picture but I was to excited to get scrubbin
After a long soak in Evap-O-Rust
Started cleaning up the Engine, managed to get the engine cleaned up and the clutch basket and hub mounted. Put the drive gears on the crank, pulled the new style stator off to install the one off of the old engine. Had to build a puller first of course! Need to go to the cycle shop today to get some oil to soak the clutch fibers in before the install.
I pulled the bike back down to the frame to do some surgery. There was a lot of tabs that weren't needed!
Started mocking up the seat. I am undecided if is should install a hoop on the end of the frame or build a cross bar and and have the tail hang past.
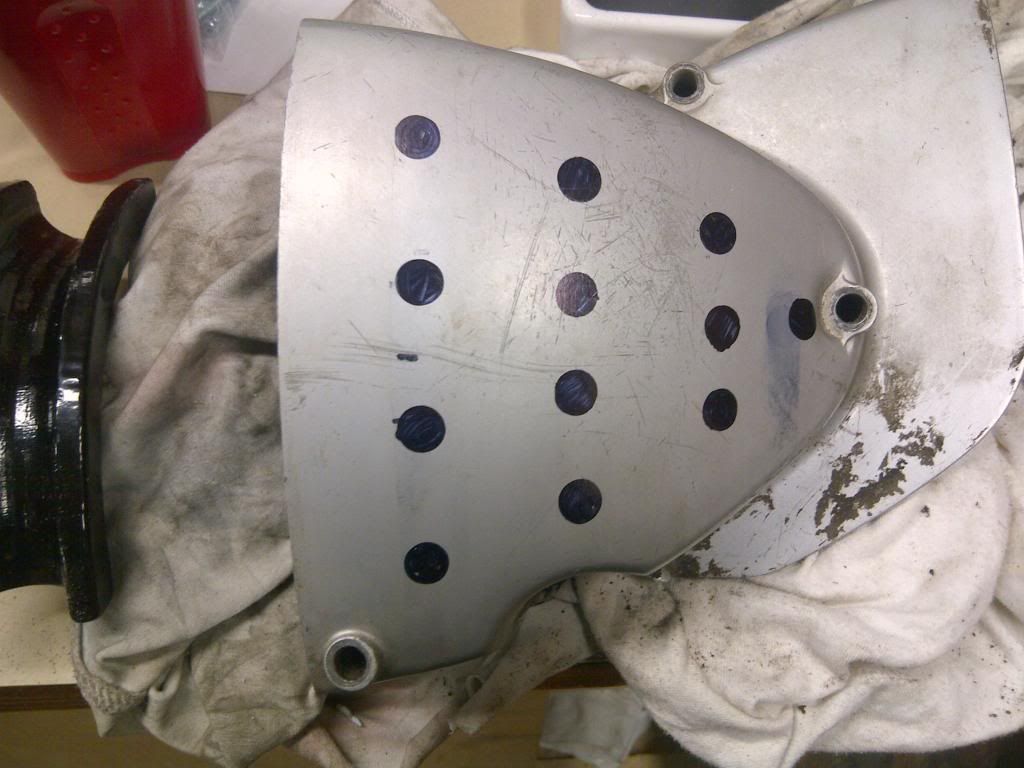
Had a little time last night to DW. Took this
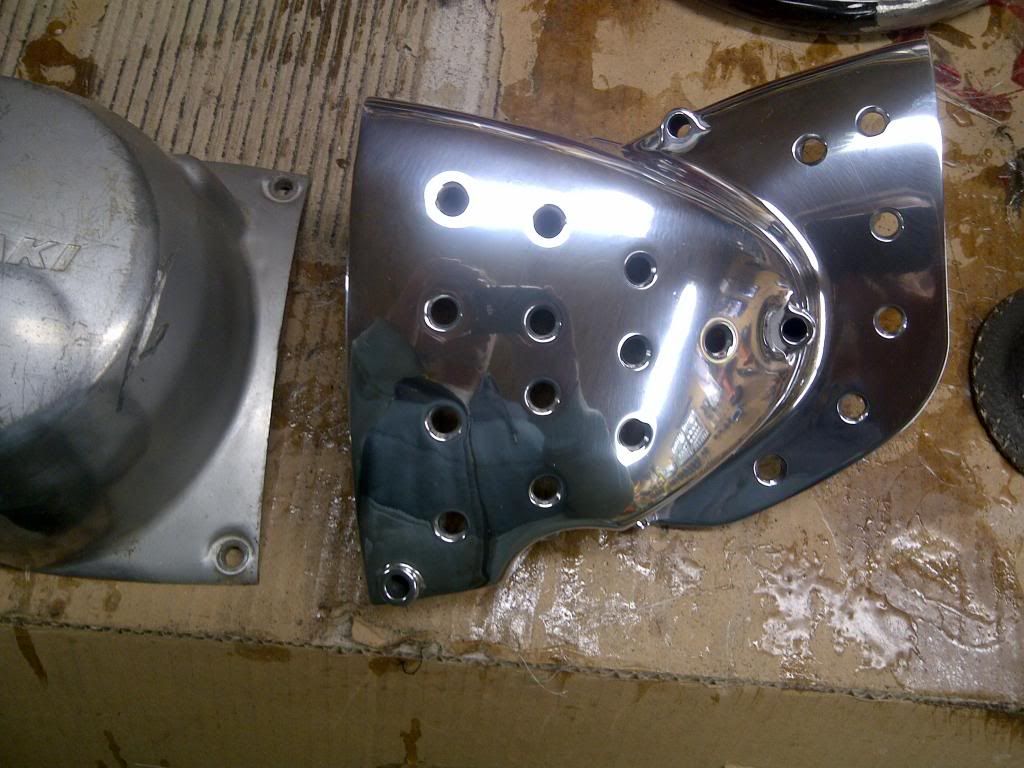
and turned it into this
Now only 3 more covers to go, and this was the easy one
Managed to get the clutch back in and then I pulled the jugs off to paint the cases.
Got the stator hole figured out. I built an aluminum spool to get the hole perpendicular to the case. Worked really well.
I started drilling and everything was going smooth until i drilled into a cavity. At first I thought I was into the combustion chamber, but it was just the hole for one of the jug studs! Whew, that was close almost had a heart attack , thought I fooked the case. I checked the other set of cases I have and it was the same so all is well. I drilled the hole in the spool to match the size of hole needed for the tap, once the hole was drilled in the case I hogged the hole in the spool large enough for the shank of the tap to fit through. This way the threads were sure to be square. Pretty small update but it was time consuming and a PITA. Stator is fully mounted and back together, wiring and all!
1 step forward. 2 steps back. Looks pretty good, polished up another cover.
Put some new base gaskets
And bolted the heads back up.
I ran into a slight problem with the stator, the engine cases are missing one threaded hole for the old style stator. So I have to drill and tap it I guess. I think I figured out a way to get the hole straight and in the right spot, but I won't post any pics until I get it right
Small update literally, Made a tach cable block off for the side cover since I will be running an electronic pick up tach. The speedo and tach should be here this week. Little bugger still took a couple of hours to machine. The small stuff is what kills you. I was tired of sanding and polishing.
Also finally found a headlight lens to fit into the stock H1 light bucket. Easy straight forward swap.
started cleaning up the controls, polished of course and added some black braid
Had to build an adapter for my dial indicator to measure TDC for iggy timing. Manual says 25 deg BTDC or .1356" So this rig worked perfect. Built it out of an old plug and a chunk of alluminum
So timing is set, now time to bolt up the rest of the shiny shit.
Well its been busy lately, the parts keep showing up and I have no time to put them on. Koso gauges from Germany, for some reason you can't buy these in North America, European Market only Koso said, so I found a dude in Germany on E-Bay, cheaper than Koso List! Beautiful Gauges in my opinion:D
Had a big box waiting for me at home from across the big pond yesterday.
I popped the mill in the frame last week to check the offset I needed for the sprocket. Since the engine was in I figured I had to mock the pipes up! I couldn't wait. These aren't what I thought I ordered but they are pretty nice!
A little progress, Built an exhaust hanger and mocked up the right side rear set.
Plumbed in the oil pump, that took a whole night to bleed the lines, some idiot was turning the pump backwards and put one of the check balls on the wrong side of the spring...:doh: But we got her rigged, some of the swank white plug wires plumbed too. I ordered all the parts for the new iggy system but I figured it's almost together and I have all the parts, I'm gonna try the original system first.
It's been a while but a some good progress. The light is mounted and pretty solid. Bracket will need some speed holes though.

I abandoned the old iggy system as soon as I saw the new boxes. These are things of pure beauty. Boxes are mounted, stator and rotor swapped and ready for ignition.

With the new iggy system I needed 3 new coils. had to build a bracket, just happened to have the perfect material. speed hole plate!

The tank needed a little massage for clearance

Left Exhaust hanger complete

Built some shock mounts for the swinger and had Rodger weld em up for me.


Trimmed the 636 triple clamp of the key mount

I figured time is running out and I better finish the body work to get it in for paint. Glassed up the bottom of the tail to house the lights.


Offset sprocket from Fast from the Past, came with speedholes!

Al in all she is standing on her own and getting closer to the finish line. need to mount the gauges and rear sets next.

Well it looks like I may be out of time. End of the week right? I might be able to piece her together and get her running in a mock up stage. Does that count? Anyways progression is as follows:
Body is stripped ready for paint:


Petcock Rebuild hehe!


 I might be changing the clutch cover anyway to a later style, I just need to find a member willing to part with an oil pump cover! I could always loctite it then.