|
|
Post by crazycunuc on Jun 30, 2017 12:48:22 GMT -5
Hey all...so I've decided to do a little experiment and share my findings. I recently had a set of pods for my H2 powdercoated in the wrinkle finish but i had a spare set so thought id try the wrinkle paint on them. In my H2 build thread it was suggested to use the Harley Davidson wrinkle finish. $34 and nearly a month of waiting for the order i got my can of paint. To prep the pods i gave them a good sandblast, painted the inside with Tremclad and gave the pods a 400grit sand to get rid of any surface abrasions. 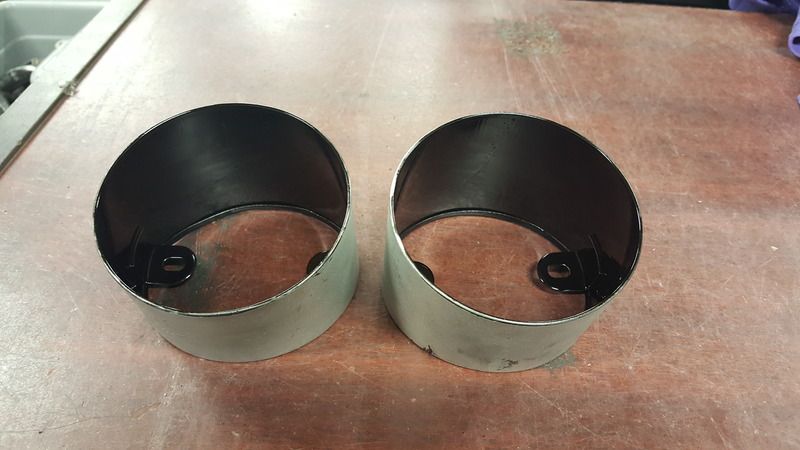 My after my 1st spray the paint started to run quite a bit. I thought I had given an appropriate distance with my spray but it seems to be a lot more runny than standard paints that I'm used to. I quickly cleaned it off in acetone and from about 2" away did light dustings. The instructions say to do 3 coats 7-10min apart then wait 1-2 hours for wrinkling effect. After the 3rd coat is applied 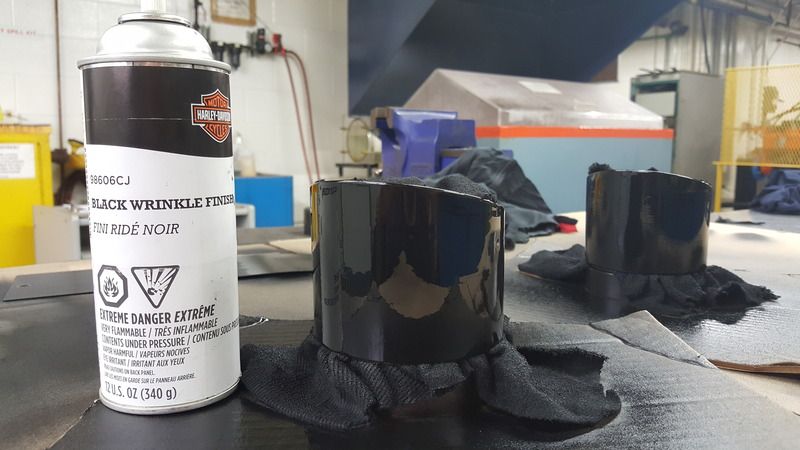 After 1: hour wrinckling is starting 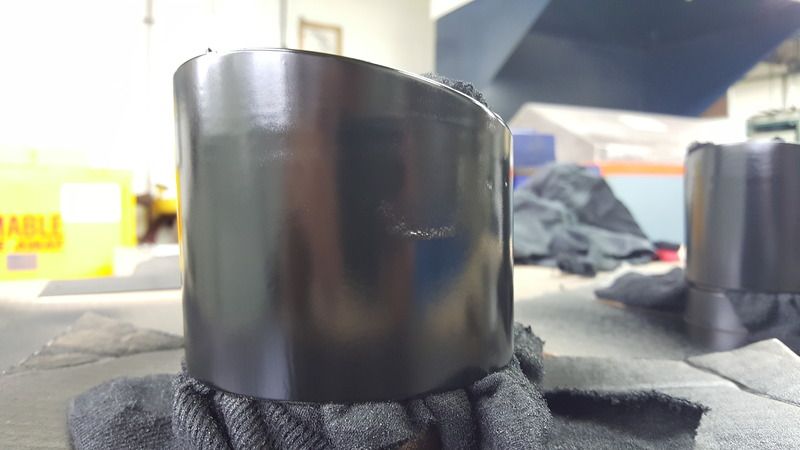 After 2 hours 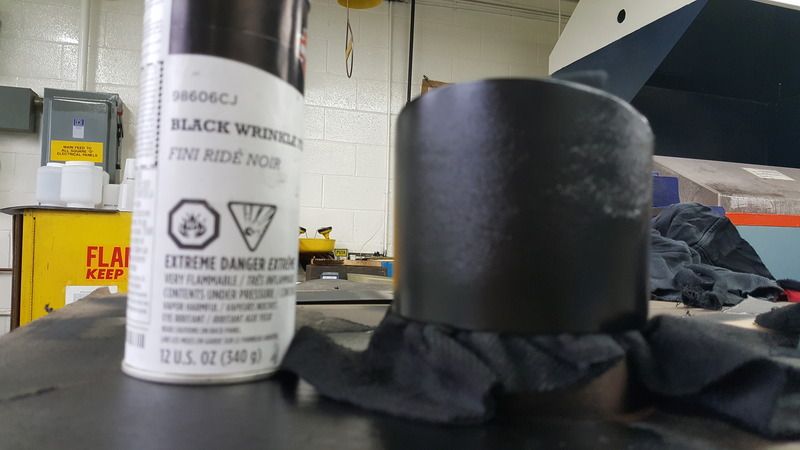 After 4 hours: At this point I'm expecting more wrinkling. My test piece was completely wrinkled at 2 hours already 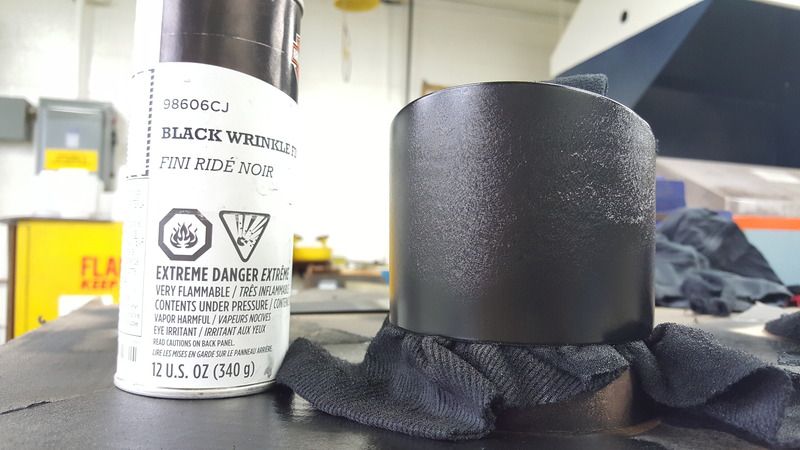 Coming back the next day it's clear. My 3 coats were not thick enough to allow the paint to fully wrinkle. 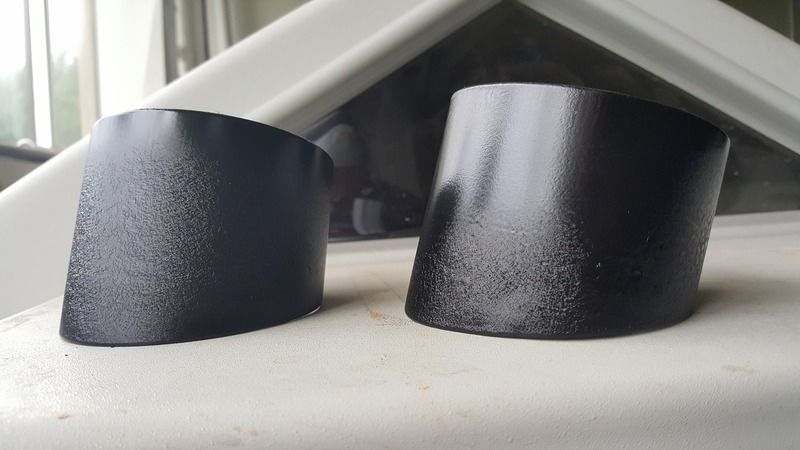 For a 1st attempt being extra cautious I dont think it was too bad. Next up Im going to strip the pods once again and start over with thicker coats to try and get the desired effect. Now correct me if Im wrong but the original Colour was flat black rather them satin black? I might try dusting it with some Flat Black paint once i get the desired effect. |
|
|
|
Post by tankie on Jul 1, 2017 13:09:05 GMT -5
With the paint I found in this country I put a couple of light coats on till just touch dry, then a heavier final coat the effect was there in a couple of mins
|
|
|
|
Post by midnightlamp on Jul 2, 2017 13:13:59 GMT -5
I had no luck with wrinkle paint...At least here the surfaces are nice and simple, but I found the wrinkling varied a lot. Also they STINK if you heat them to cure.
|
|
|
|
Post by crazycunuc on Jul 3, 2017 16:22:11 GMT -5
I had no luck with wrinkle paint...At least here the surfaces are nice and simple, but I found the wrinkling varied a lot. Also they STINK if you heat them to cure. I couldn't imagine trying a larger part with various contours. I had to re-paint one of the pods several times just to get a consistent surface finish. Hopefully I'll get to post pictures tonight. |
|
|
|
Post by crazycunuc on Jul 3, 2017 18:03:59 GMT -5
ROUND 2 I learned from earlier that my initial paint was too thin..however the paint is too thin to apply thicker coats. So I upped it to 5 coats rather than 3. On my 2nd attempt I went a little over board. 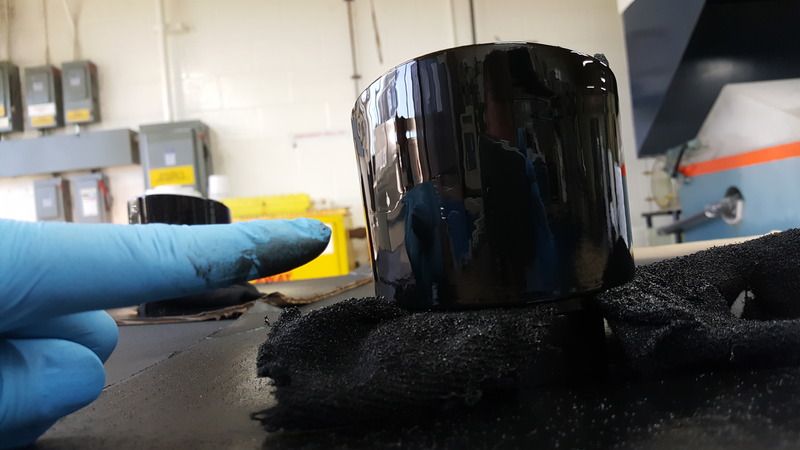 3rd times the charm. I tried my best to keep my sprays consistent. -5 Moderate Coats -approx 15" away -3 strokes to cover surface -split circumference into 6 sections for even coating / overlap And after just 1 hour: MUCH better results with 5 coats than 3 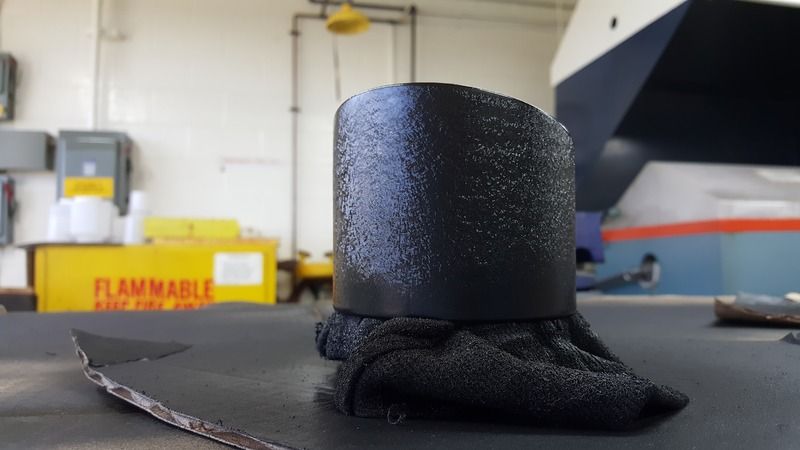 After both parts have dried it's easy to tell that I was lighter on the paint with 1 of the parts (part 2) Part 1: 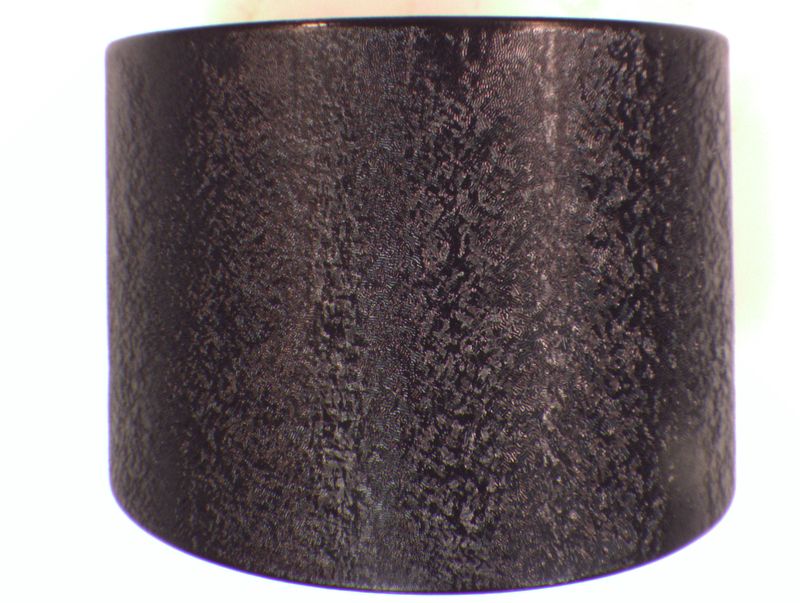 Part 2: 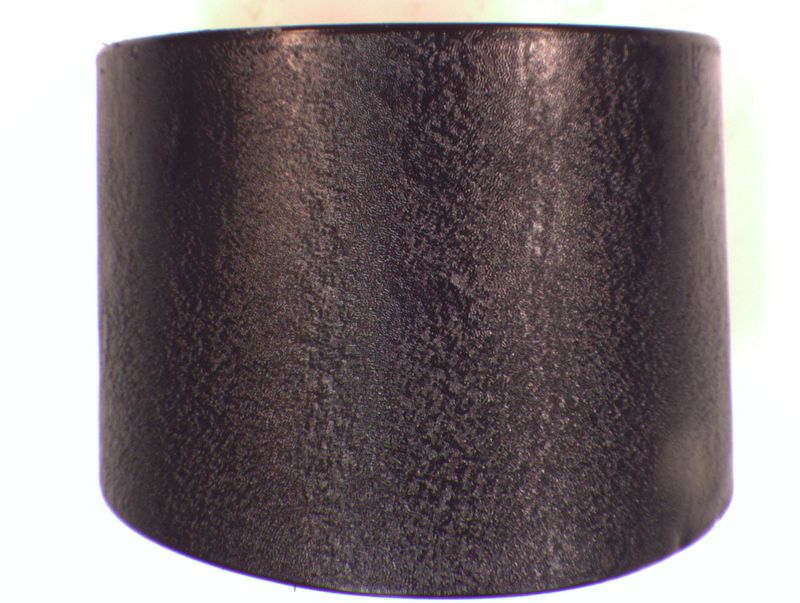 AB COMPARISON: Stereo Microscope 20X Magnification 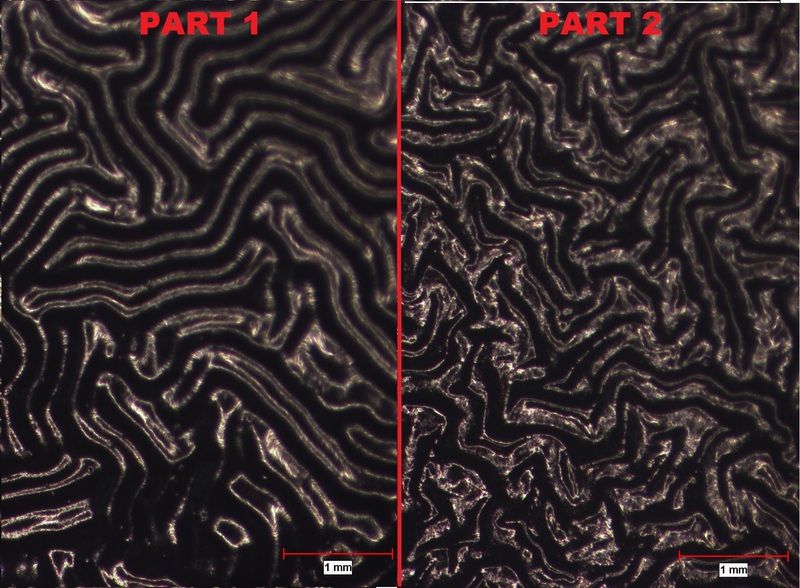 I was not happy with Part 2 so back to the sand blast and repaint for the 4th time. Annd after SLIGHTLY heavier coats I got this: not EXACTLY the same as part 1 but pretty darn close 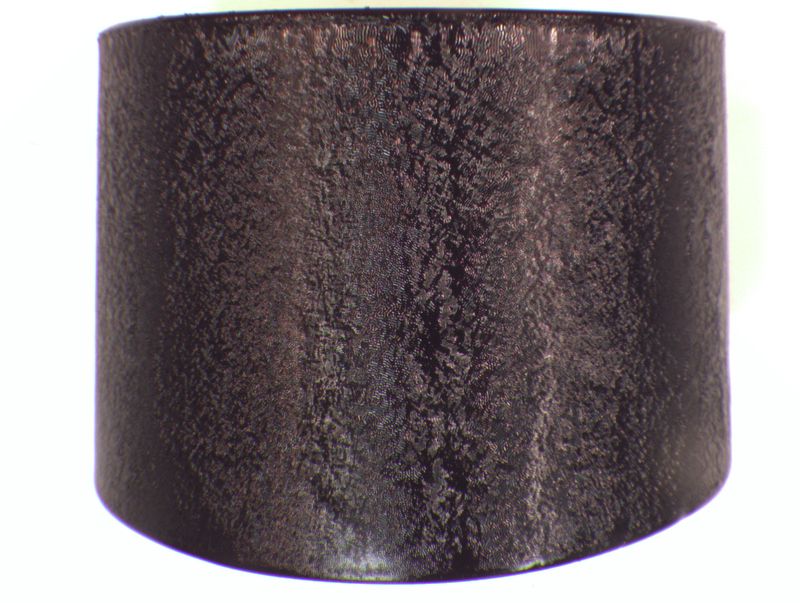 AB COMPARISON: Stereo Microscope, 20X Magnification 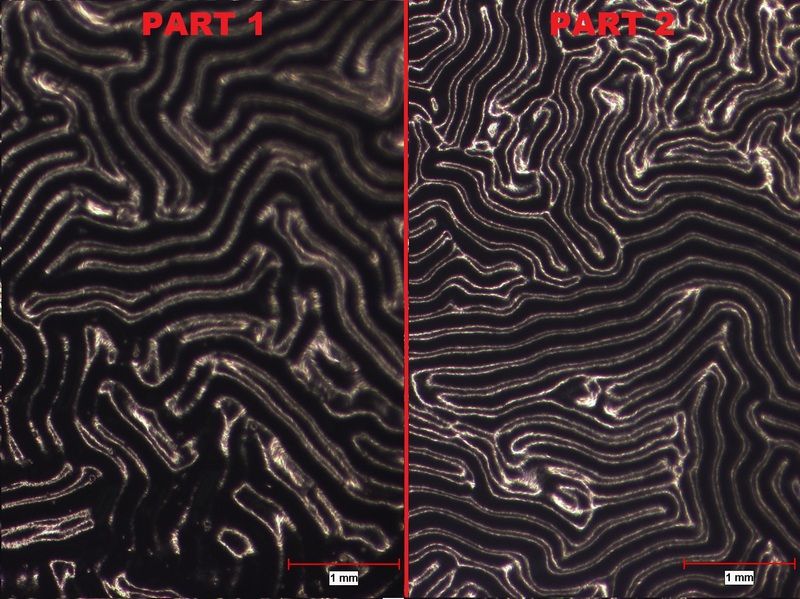 Overall I'm quite happy with the results. All that's left is a dusting of flat black to replicate the original OEM part. In conclusion this is not a job to be rushed. To get an even consistancy in the paint and equal surface finish requires some real time, patience and luck. If it weren't for having a few tools and chemicals at my disposal I probably would have gone mad. There were a few moments where I thought the paint was going wrong or not even. DO NOT try to cover up with more paint. I found that after 1-2 hours the surface evened out if applied correctly. Again..this was just a little experiment I did on my spare pods and I'm sure results will vary with different paint brands. These are just my observations / 2 cents from my own experiences. Hope this helps...please give your thpughts / input |
|
|
|
Post by tankie on Jul 4, 2017 7:47:17 GMT -5
Nice job
|
|
|
|
Post by autofobe on Jul 4, 2017 18:57:12 GMT -5
looks pretty good.i heard it works better with heat.i seen a guy with a duck ss that done his lower fork legs.They looked great.When I asked him how he said he had done them on the BBQ spit as it turned then lit the bbq on low & let it cook for a couple of hours.
Brad
also the case covers on the tz are done that way.Just pop them in the oven for a couple of hours when the wife is not home.
|
|
|
|
Post by crazycunuc on Jul 5, 2017 6:48:09 GMT -5
he had done them on the BBQ spit as it turned then lit the bbq on low & let it cook for a couple of hours.
That's an interesting way to do it 
I wonder if the heat acts as a catalyst to increase the wrinkle effect with lighter coats..
|
|
|
|
Post by zedixe13 on Jul 16, 2017 0:35:07 GMT -5
I used Tremclad wrinkle paint with success , just put them in the oven for a few minutes that's it . The wrinkles effect is done when the top layer dry faster than the undercoating like an orange peel on a car paint . Oil based paint like Tremclad dry by reaction not evaporation like lacquer . I'm sure HD just repackage some paint from a manufacturer .
|
|
|
|
Post by lc on Nov 11, 2017 21:02:25 GMT -5
A heat lamp works well. It accelerates the process and gives a more uniform finish.
Years ago I used allot of wrinkle paint.I used to get the part smoking from the heat!
Always had an issue with clogged nozzles causing loss of half the cans though..
J
|
|
|
|
Post by oddnedod on Dec 21, 2017 19:33:05 GMT -5
Give VHT wrinkle plus a go, mine came out really good, just follow the directions on the can, I think the 'secret' is
in the three specific directional spraying techniques for each coat, 1st is horizontal,2nd is vertical up and down,
3rd is diagonal, and spray each coat just as it starts to 'flash off'.
|
|
|
|
Post by crazycunuc on Dec 21, 2017 22:14:51 GMT -5
Thanks for the input. Curious why the specific 3 spray patterns.
Pretty sure Ratt2 used the same stuff on his pods if i recall correctly. They look great too
|
|
|
|
Post by oddnedod on Dec 22, 2017 17:08:01 GMT -5
I tried some wrinkle finish paint by carplan, I also tried the Harley Davidson black wrinkle finish to no avail, a while back, I think it was Barry Burton on the Kawasaki triples site on facebook, that put me onto the VHT wrinkle plus, he had used another manufacturers paint but said it was no longer available. But he also said pay particular attention on how to apply the VHT wrinkle plus paint, this is my way, firstly make sure you remove all the old paint scrupulously, then use a tack rag, to clean, don't touch the 'pods' with your fingers or hands, move it with the tack rag to where you are going to spray them, then just follow the instructions on the can...Hey presto...job done. |
|
|
|
Post by Tripnut on Jan 4, 2018 8:06:48 GMT -5
I used the HD wrinkle paint on my XR1200X on the top triple tree after a spill and found that two very light coats gave a factory finish, I didn't heat either the part or the paint and only painted the part that was worn on the road. You cant see the join apart from where I didn't rub it down properly, I had so much work to do after the spill that I thought that as long as it's black I could sort it out later! Was surprised that it came out this well considering how quickly I did it.
The original HD wrinkle finish is variable but that's just down to the usual HD bad quality finish and general lack of care during manufacturing.
Did this in a cold garage in the winter.
|
|


