|
|
Post by drewski on Dec 6, 2015 23:35:55 GMT -5
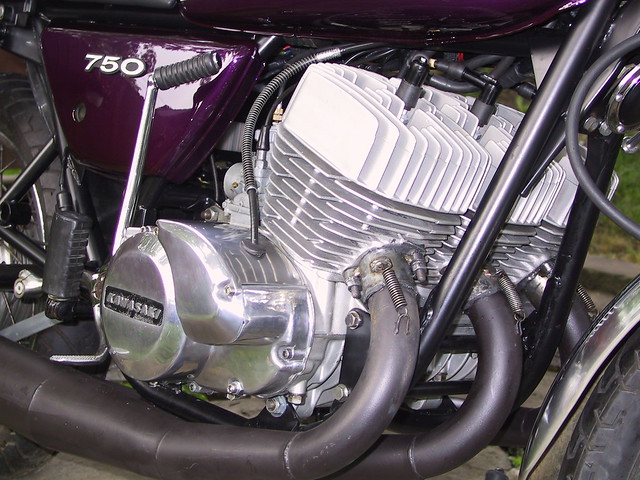
 I know you said you didn't want to go off the heads...but this fella did, looks pretty cool   Yup, he created quite a stir for a while, then disappeared.  I don't believe there was ever any independent verification that it actually worked. I like the concept though. Other than the over-the-top exhaust. Not a huge fan of that. |
|
|
|
Post by triplepoweredgpz on Dec 6, 2015 23:57:20 GMT -5
I'd kinda wonder about the strength of the engine...but it look nice, wonder if we can track this guy down and find out if it worked...lol
|
|
|
|
Post by JA-Moo on Dec 7, 2015 2:01:32 GMT -5
He was a joke, was trying to make advertising money scamming around. It barely ran.
|
|
browney
2nd Gear
 Goin' Crazy Wanna Come............
Posts: 361 
|
Post by browney on Dec 7, 2015 3:58:34 GMT -5
I still like this set-up. But with the down tubes on the outside of the lower engine mounts and some extra horizontal braces at the height where the head gaskets are and under the engine. You would still need to reinforce the tubes where they bend at the top and bottom. In other words add the horizontal braces where they have them on the H2. That would make it close to a H2 setup. Making things look Cool doesn't always make things practical as you can see from the previous post of the ZX7/H2 hybrid. Anyway you look at it I would hate to go through all that work and have the mount holes on the ZX7 frame break from the torque of the H2 engine. Interesting project looking forward to seeing how you progress. browney out  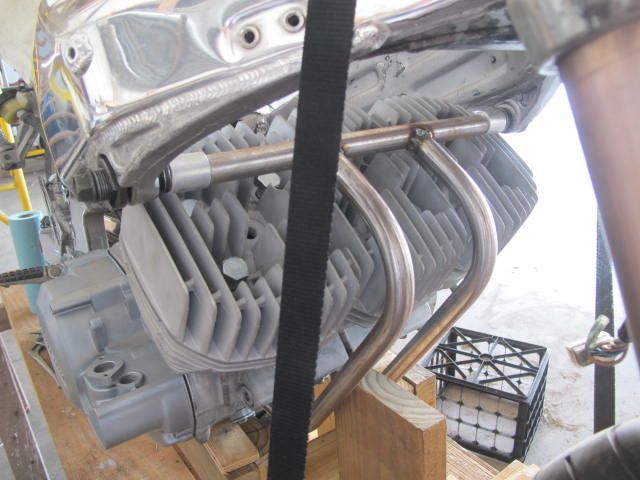 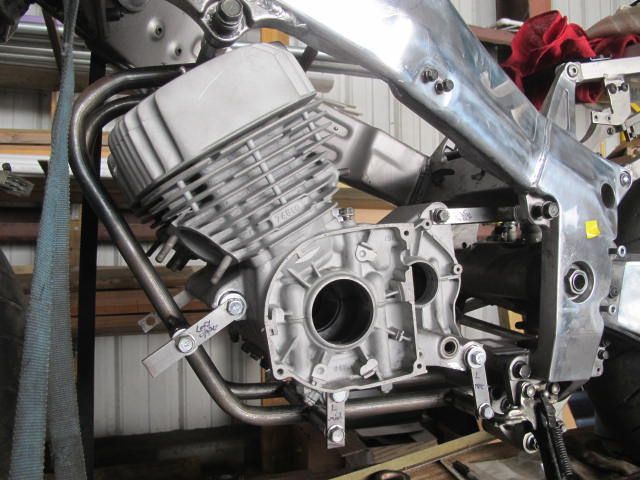 |
|
Deleted
Deleted Member
Posts: 0
|
Post by Deleted on Dec 7, 2015 5:00:47 GMT -5
I think all you need to do is make sure the welded engine mount tabs on the frame are big enough and triangulated somehow to prevent movement and promote structure. The crankcase would carry some fore/aft load easily(engine torque). Top lugs of your frame/subframe look strong enough but not sure if you could need it more rigid for 'handling flexing frame' looks kinda semi-monocoque which can be quite strong.
|
|
|
|
Post by captainpooby on Jan 17, 2016 15:42:24 GMT -5
Built the brake lines today. Last week I finished fitting the front wheel and measuring the spacers, they are at the machinist and then off for anodizing as well as spacers for the calipers, should be ready tomorrow but for now here's the brake line fab. These are mating to a Brembo master cylinder from a Ducati 848, that I got off ebay. I also have a Brembo clutch master from a Ducati 1100S Hypermotard. The clutch slave is a custom one made by a guy Ned on the Canadian triples board. Checking the banjos: 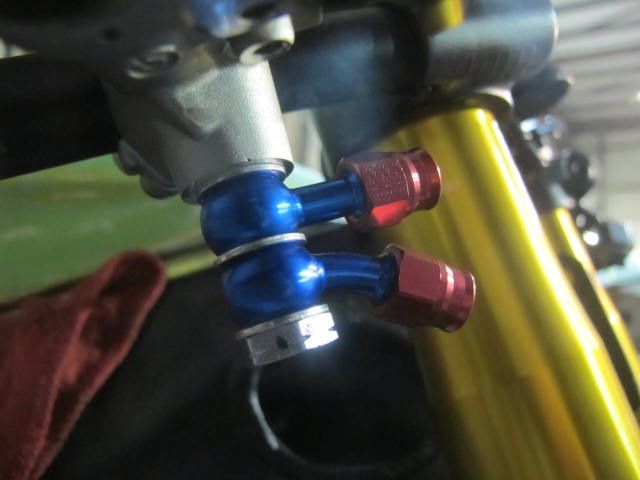 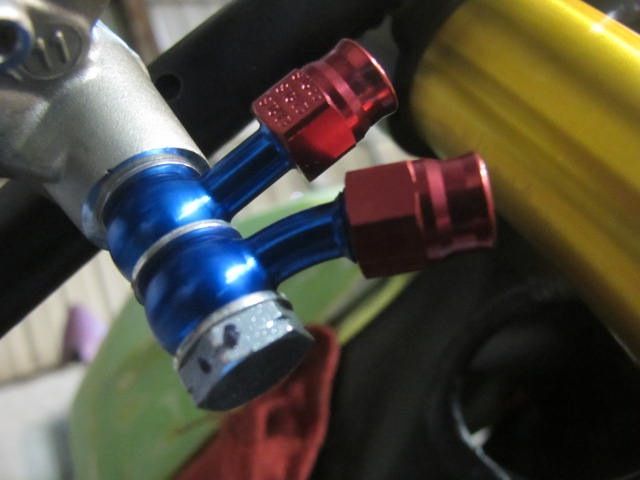 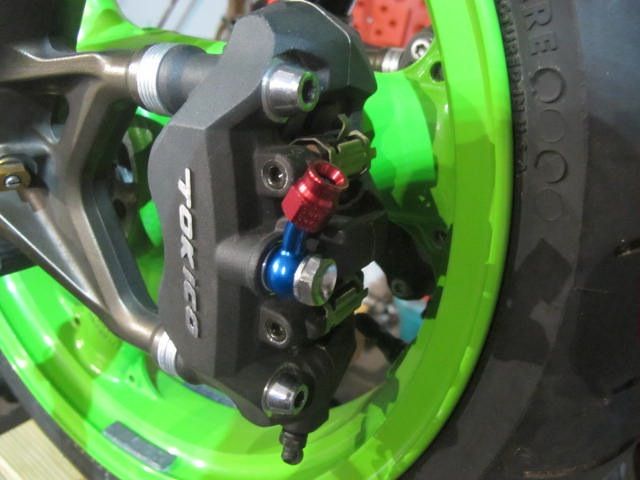 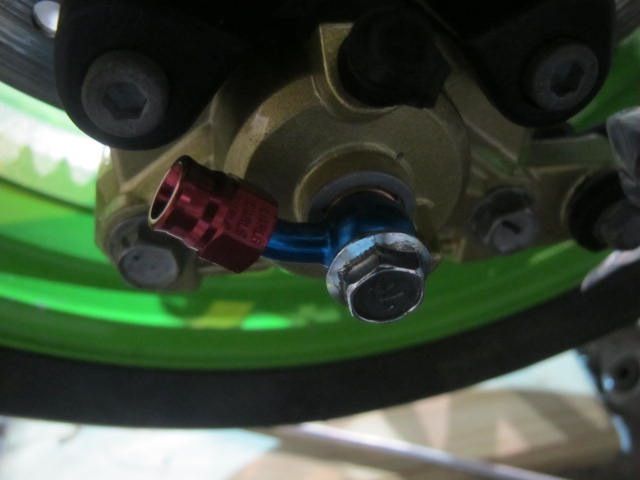 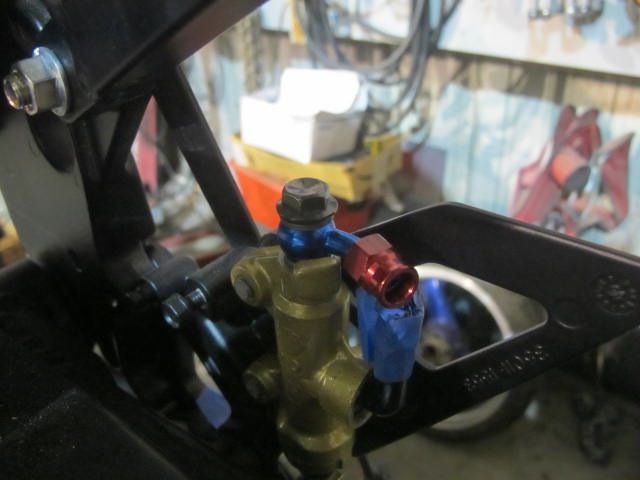 OK, cool, I ordered the right ones.  On to fitting and assembling the lines! Rear master: 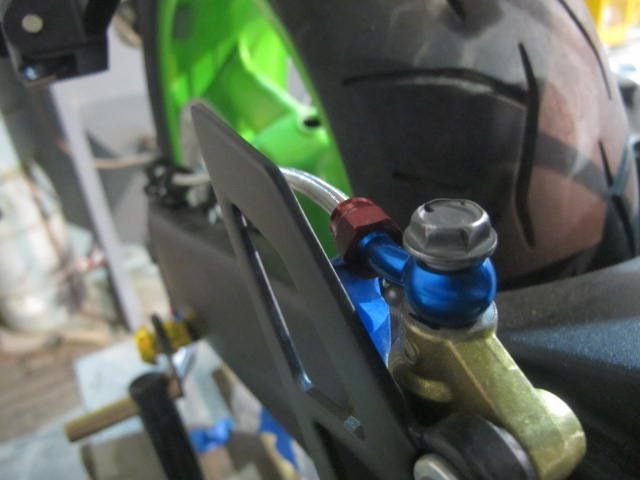 Rear caliper: 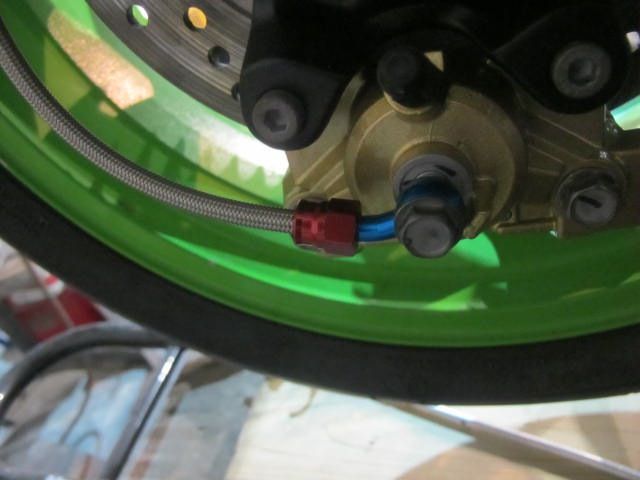 Finished line: 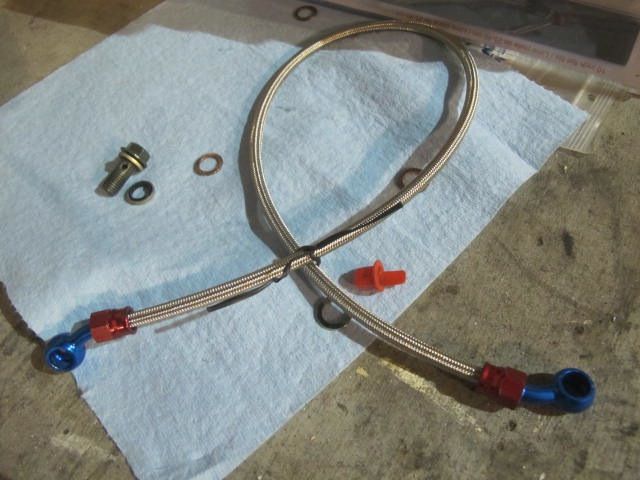 Front upper left line:  Front lower left: 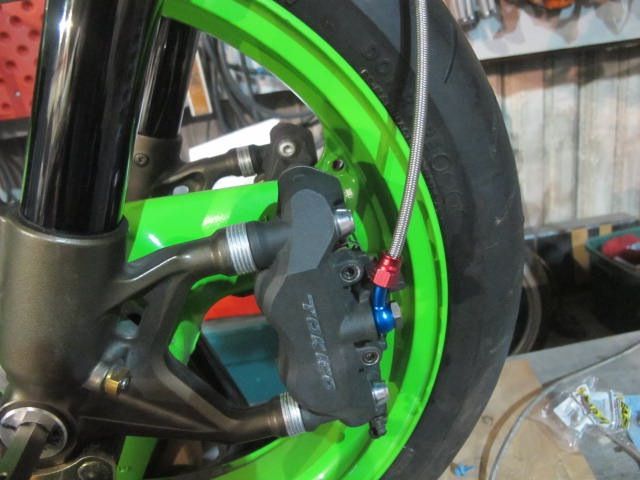 Front upper right: 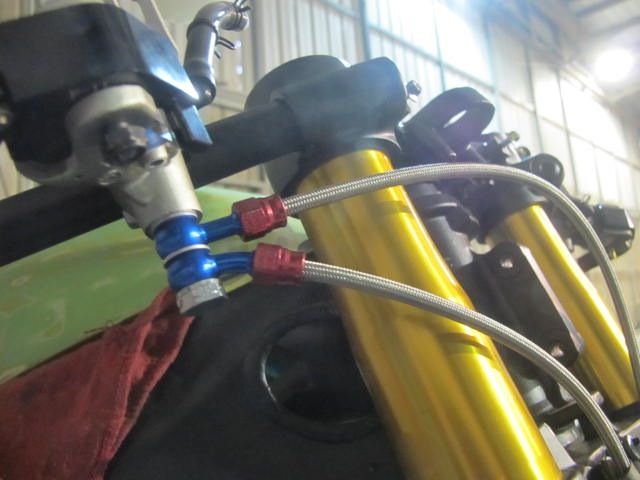 Lower right: 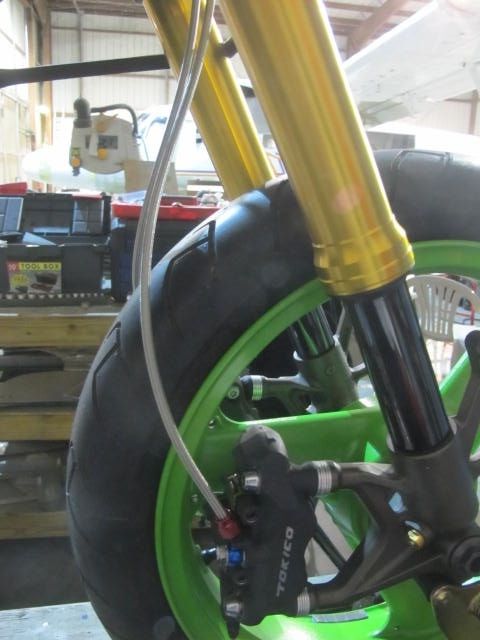 Done. These line clamps will be replaced with some new ones, they're just there for fitment. The caliper banjos will be replaced with red anodized aluminum ones as well. I specifically made these with red and blue fittings for an old school "works" type of look. 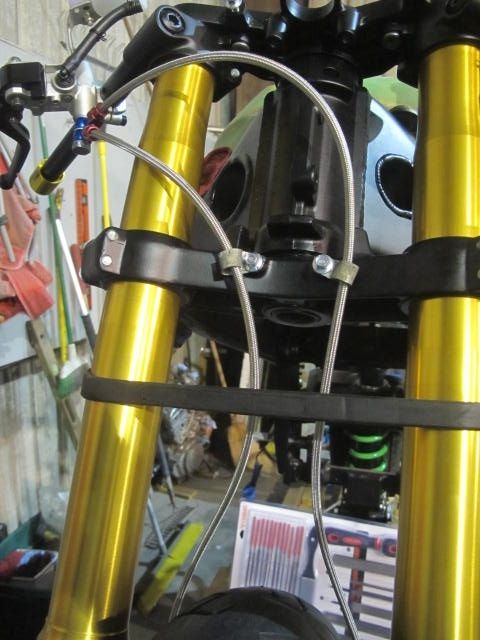 |
|
Deleted
Deleted Member
Posts: 0
|
Post by Deleted on Jan 17, 2016 19:25:47 GMT -5
Ports look a little sharp, maybe need some chamfer with a file so the rings don't fetch up. Looks like a very nice project to me. Keep the pics coming.  |
|
|
|
Post by captainpooby on Jan 18, 2016 9:23:14 GMT -5
Ports look a little sharp, maybe need some chamfer with a file so the rings don't fetch up. Looks like a very nice project to me. Keep the pics coming. The chamfer is there, you just can barely see it on the exhaust port in the pic. |
|
|
|
Post by captainpooby on Jan 26, 2016 9:23:13 GMT -5
New pics 1/25/16 Did some work with some flat slides carbs I picked up on ebay for 300 bucks. I bead blasted the outsides, disassembled them and cleaned them in an ultrasonic cleaner then slapped them back together. I'm sending them out to be coated with a heat barrier coating, as much for looks as for function. 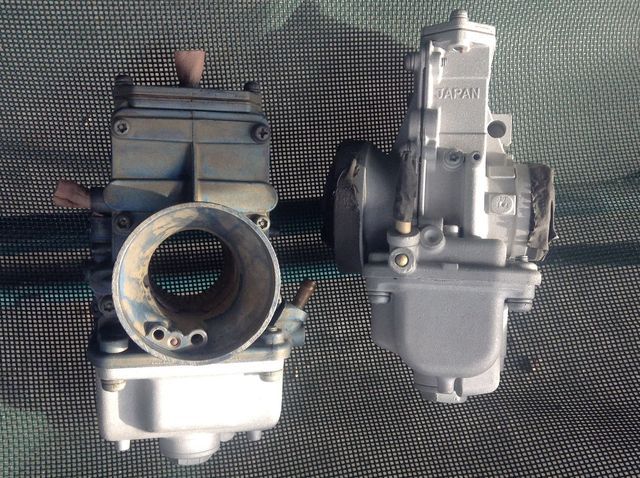 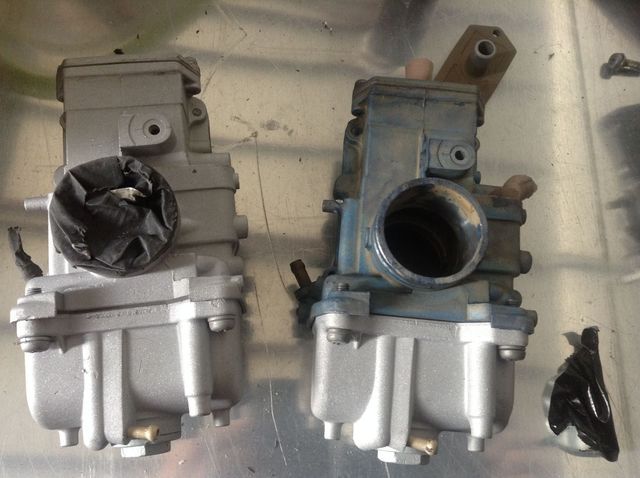 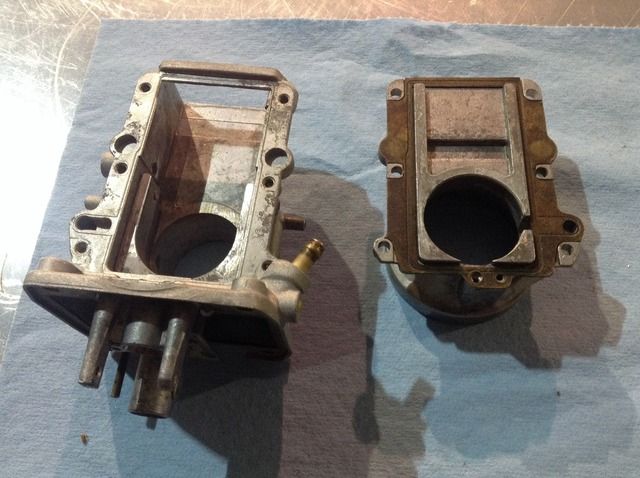  I'm sending them out to get them thermal barrier coated like this. I was going to powder coat them but for a few bucks extra, I can have a functional coating. The "race" or "works" look is what I was seeking cosmetically anyway.  " 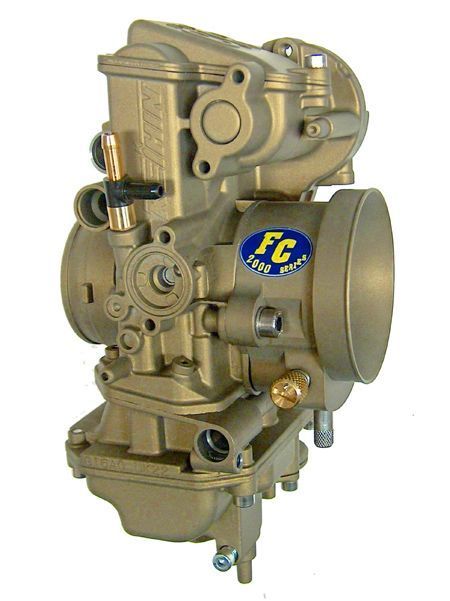 Then I had to make a part. I had to turn this: 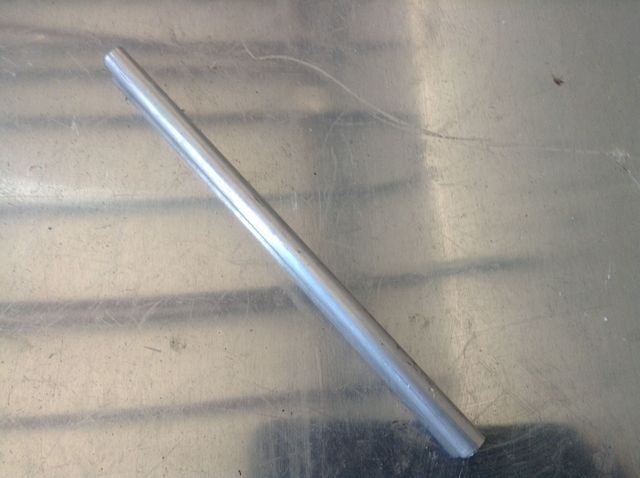 Into this: 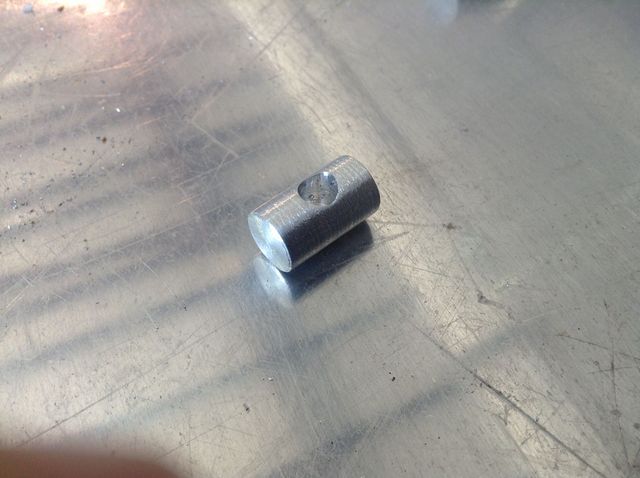 For this, the part I made has the check mark on it. 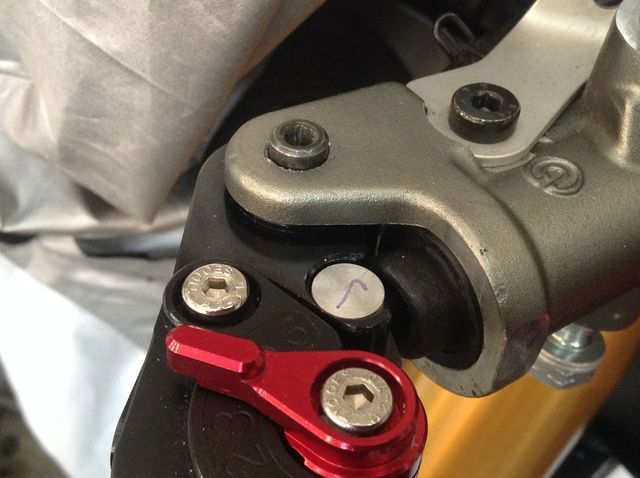 I measured it and drilled the hole, then chucked it in a drill press and cut and finished it with a file and some 400 grit paper. I'm kinda proud of it, it almost looks store bought. Thing is, I bought the master and the levers separate and neither one came with it and I couldn't find it for sale anywhere, not ebay or even OEM so I made it.javascript:emoticon('8)') 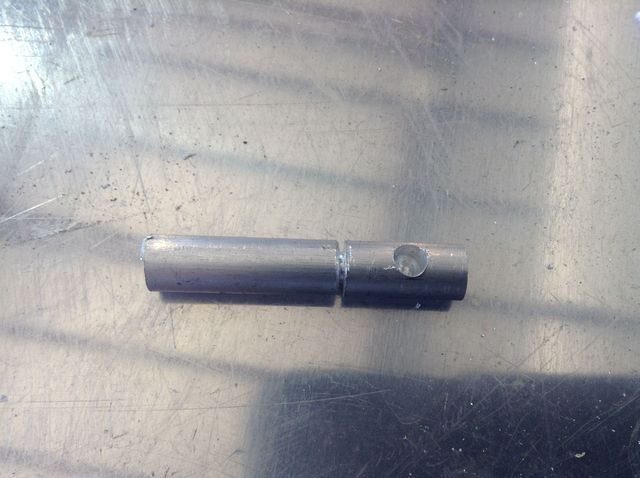 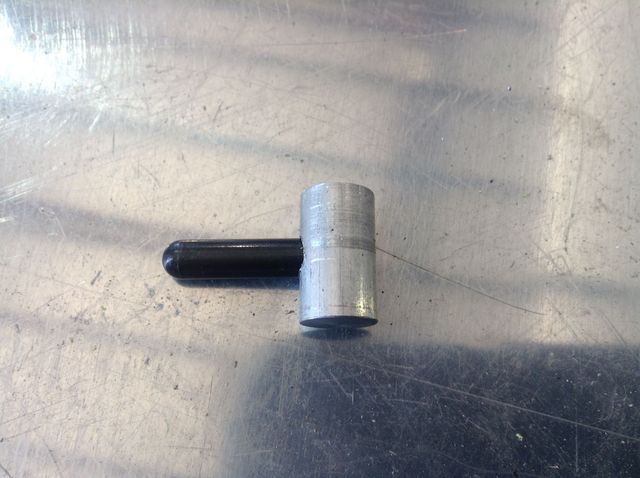 8) |
|
|
|
Post by zambia on Jan 26, 2016 9:29:40 GMT -5
Yeah, the part you made is cool! That's why we call you the Captain!
|
|
roadrash
2nd Gear
10 McNab St.E. Port Dover
Posts: 273
|
Post by roadrash on Aug 21, 2016 11:08:14 GMT -5
;)Billy, what's happening with your bike?Is it too hot down there to work?
I finally sorted out my 400.I replaced the headlight with an led which worked great and then the battery died.
Replaced that and no problems anymore.
It's almost as fun as building a special.
|
|


 I don't believe there was ever any independent verification that it actually worked. I like the concept though. Other than the over-the-top exhaust. Not a huge fan of that.